


 Reply With Quote
Just re-assemble and use water for the coolant and use Hylomar on the gasket for extra reassurance. If it leaks again then look to the head or block.


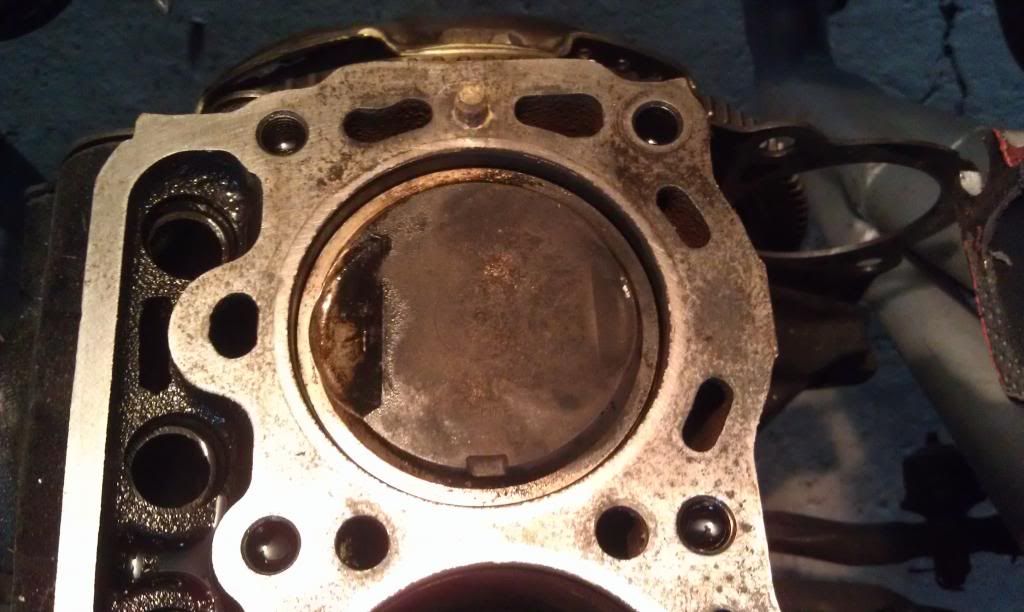
Had an issue with an external coolant leak between the cylinder head and block of a 3TC. A reconditioned head was just installed and only had about an hour running time (30 minutes driving). Was running fine. I used a Permaseal head gasket and reused the head bolts. I did try and re-torque the head bolts and got about 3-5 ft-lb on most of them, but it still leaked, so I’ve taken the head off to try again. Here's the leak:
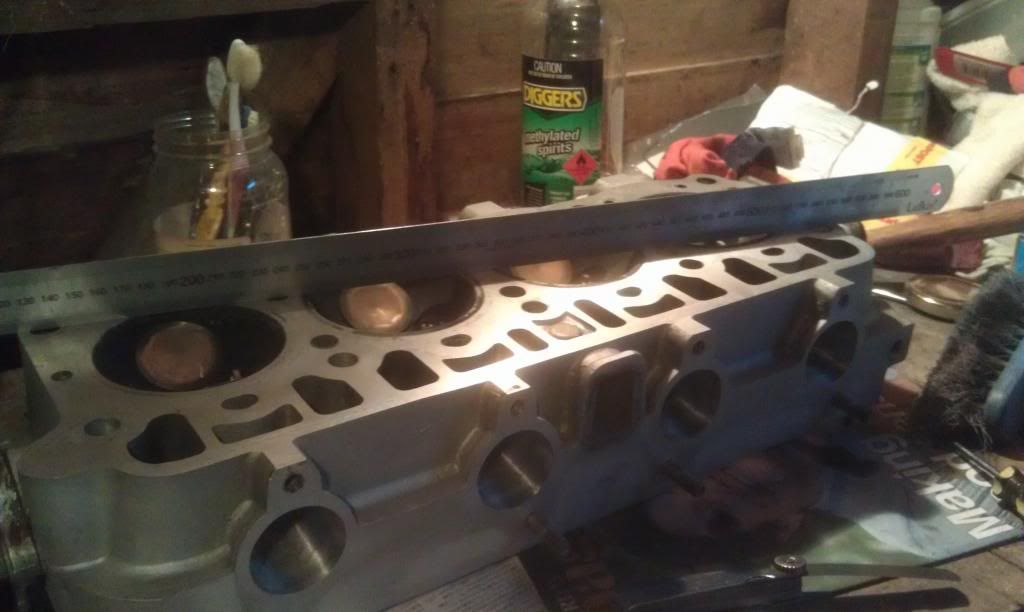
Question is should I get the cylinder head surface machined or skip and save $70? I’ve checked with a straight ruler and feeler gauge across the diagonals and corner to corner and it seems OK. The cylinder head warpage limit in the 3TC engine manual is 0.05mm, and I can’t get under the ruler with 0.04mm feeler gauge. I’ve removed the head bolts a little at a time in the tighten sequence. I’m thinking of just cleaning up the surfaces and installing a new head gasket. I’ve got some new ARP head studs as well.
What are people’s thoughts on using coolant with a new head gasket? I spoke to an engine builder and he said to use water when running the engine for the first time. Run it for a while then put coolant in. He said the coolant can interact with the gasket material before it sets. Sometimes you can get away with it, other times not. Photo checking for warpage:
ACL recommends to run with water first. Run the engine to operating temperature, then drain the water and add the coolant. Because the ethylene glycol in the coolant can work its way through crevices more readily than water. Here’s some info on it:
http://www.acl.co.nz/Tech/Coolants,%...20Assembly.pdf
http://www.penriteoil.com.au/tech_pd...ON_GASKETS.pdf
Coolants, Ethylene Glycol and Engine Assembly.pdf
Last edited by brucey; 18-03-2018 at 11:15 PM. Reason: photobucket links

Just re-assemble and use water for the coolant and use Hylomar on the gasket for extra reassurance. If it leaks again then look to the head or block.
From the five years, 1968-73, if you were an F1 driver at that time, there was a very likely chance that you would have died.
- Jackie Stewart
(now that's my type of racing
Assuming you've got the original head bolts - should be Ok reusing these. If they happened to be TTY bolts you can get false torque readings - they are single use bolts. Bit puzzled by your torque figure above ("3-5 ft-lb"). You should be at around 60 ft lbs (~ 80Nm) on this head.
Did you back off and retorque the bolts in sequence after the first time the motor got hot?
(Do it even if they say only do it once, esp with 2nd hand bolts)
How well did you clean the block? Check the block with a straight edge too, if it's sad you'll have to get it decked, or like silly rabbit said, a light drizzle of silicone around the problem water jacket area would help the cause. If the pistons have good compression and it's just seeping water I can't see the harm in feeding it a bottle of chemiweld, I'd bet it'd last for years if there isn't any cylinder compression getting in the water passage.
I'll just put a new head gasket on and run it with straight water. See how it goes. I'll have a look into the Hylomar.Originally Posted by Silly Rabbit

I've got the original head bolts, but they have been used at least three times already. I didn't like the feel of them torquing them up; a few of them would turn real easy up around 60 ft-lbs, similar feeling to when a bolt is about to snap, though not sure could be nothing. I did lubricate the threads and under the heads of the bolts with grease. I torqued the bolts to 65 ft-lbs (87 Nm) in three stages, according to the spec sheet that came with the head gasket. When I re-torque them to 65 ft-lbs to fix the leak they were 3-5 ft-lb looser. I've got some new ARP 3TC head studs now.
I didn't back off the bolts when doing the re-torque. Just tighten them up in the sequence to the required torque. How much do they need to be backed off?
I removed the old gasket and sanded the block with a small sanding block. The engine block surface isn't perfect but I don't think it's real bad. It could do with a better sand. I've got a larger hand sander with 120 grit sand paper to do the job. Taking the engine out to machine the block would be a hassle. I'll put the new head gasket with new bolts and run it with water and see how it goes.
Last edited by brucey; 07-10-2013 at 05:02 PM.
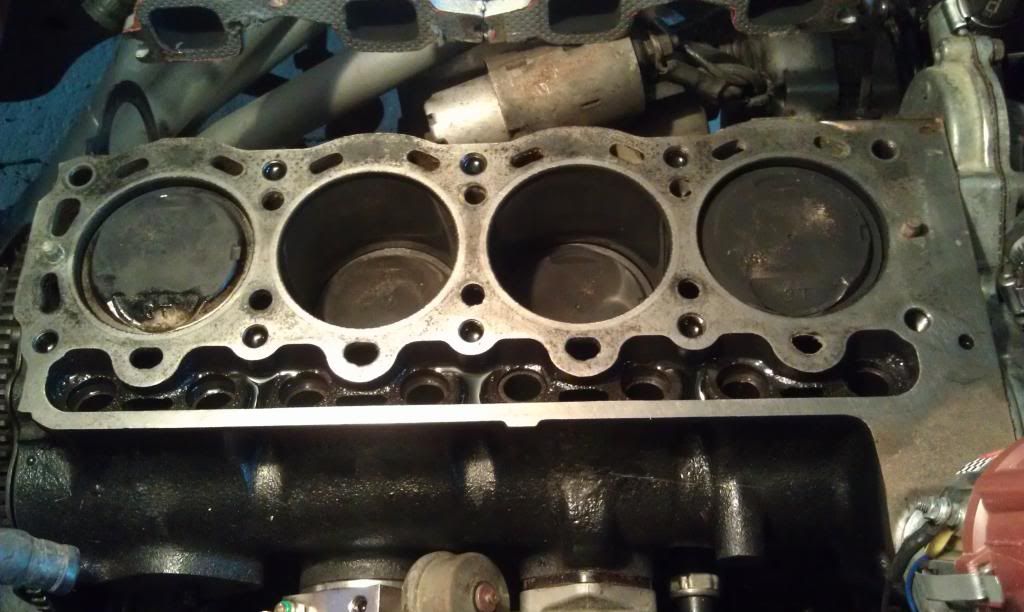
Some photos of the block. Haven't sanded it yet.
The head gasket came off intact, and wasn't stubbornly stuck to the surface. Gasket material didn't tear off when it was removed. I guess it wasn't on there for long to adhere to the surfaces.
Been a while. Had to get the block machined:
Could see daylight underneath a straight edge:
Upon disassembling the engine I noticed a broken piston ring, and also a groove wore on the crank since someone put the thrust bearing on the wrong way. Had to keep adjusting the clutch. So I ended up doing a full rebuild, bored out for 1.5 mm over-sized pistons. Cometic head gasket and ARP head bolts.

 Posting Permissions


Bookmarks