Page 2 of 3 FirstFirst 123 LastLast
Results 16 to 30 of 42

Thread: RA28 Ammeter wiring help

  1. #16
    Is a Chief Engine Builder wilbo666's Avatar
    Join Date
    Sep 2005
    Location
    QLD
    Posts
    3,468

    Default Re: RA28 Ammeter wiring help

    Quote Originally Posted by GT1978 View Post
    Don't forget about the resistance across the guage itself. That will be added in series to your 4900mm of wire. If your wire is good quality with low voltage drop over the length the guage may have more bearing on the ratio than the wire.

    Glen
    Exactly what I was going to say! Check this.

    Cheers
    Wilbo
    Wilbo's Wiki (Includes 2JZ-GTE Wiring, etc! )

    Wilbo's JZA80
    Wilbo's JZZ12

  2. #17
    ½ Bogan, ½ Dork Backyard Mechanic andrewzuku's Avatar
    Join Date
    Jul 2011
    Location
    Saskatchewan, Canada
    Posts
    214

    Default Re: RA28 Ammeter wiring help

    The gauge shows 0.3 Ohms across it's terminals, which is the same as when I just touch the prongs of the multimeter together.

    Once the 16 AWG wire arrives from ebay I'll run the wires all the way through the dash etc, then measure the resistance where they'd join to the fusible link. That should let me know how long to make the fusible link

    Hopefully this does the trick, then I'll rename the thread with the words "SOLVED" in the title.

  3. #18
    ½ Bogan, ½ Dork Backyard Mechanic andrewzuku's Avatar
    Join Date
    Jul 2011
    Location
    Saskatchewan, Canada
    Posts
    214

    Default Re: RA28 Ammeter wiring help

    SUCCESS!!

    I used 16AWG wire as both the fusible link, and wires that go all the way to the ammeter and back.

    it's about a 5000mm round-trip in parrallel with a 200mm fusible link (100mm would have been 2%, but there's obvously extra resistance in the ammeter).

    I just need to add two 5 Amp fuses in the lines to protect the Ammeter in the event that the fusible link blows (we don't want all that current going through ammeter, since it's actually only a 1 Amp unit).

  4. #19
    Forum Member 1st year Apprentice
    Join Date
    May 2014
    Location
    Sweden
    Posts
    33

    Default Re: RA28 Ammeter wiring help

    Sorry for the necroposting but I just wanted to say thank you to andrewzuku for this thread!

    I tried to get my ammeter to react years ago but gave up because I didn't understand the whole "fusible link"-thing. I have just done a major cleanup of my electrical system due to weird charging so I thought I'd give andrewzuku method a try and the ammeter reacts now!

    However, I was expecting the ammeter to indicate both positive and negative charge. Let me explain, I thought that if no electrical user was switched on with engine running the ammeter would indicate a positive value indicating that the charging is greater than the electrical usage. When users are switched on the needle should get closer and closer to midpoint until it goes over to the negative indicating that the charging is not sufficient for the amount of electrical users that are switched on.

    In my car the needle is only on the positive range and never goes under midpoint. When a user is switched on the needle steps up on the positive side and with all users off including engine it sits on neutral value.

    How does you other guys ammeters work?

    Regards
    Fred

    (I apologize for my English...I'm from Sweden! )

  5. #20
    ½ Bogan, ½ Dork Backyard Mechanic andrewzuku's Avatar
    Join Date
    Jul 2011
    Location
    Saskatchewan, Canada
    Posts
    214

    Default Re: RA28 Ammeter wiring help

    Hey, no problem

    As far as I can tell, the Amp gauge shows the direction of current to the battery (is it being charged, or discharged).

    In my car:

    Car off: Needle at zero
    Car off with high-beams on: needle shows negative
    Car on: needle shows positive
    Car on with high beams on: needle shows slightly less, but still positive

    My needle doesn't move as far as I'd like it to, so I was thinking of lengthening the fusible link soon (or maybe using different gauge wires).
    Last edited by andrewzuku; 10-06-2014 at 07:07 AM. Reason: charged/discharged

  6. #21
    Forum Member 1st year Apprentice
    Join Date
    May 2014
    Location
    Sweden
    Posts
    33

    Default Re: RA28 Ammeter wiring help

    Hmm...then yours is working the way I was thinking mine would. I wonder why mine doesn't react to the charging...

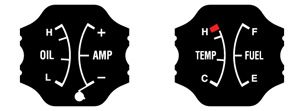
    Attached picture shows how far my needle goes with the car off and the high beams on and that it goes to the positive. I guess that can easily be remedied by switching the wires to the ammeter.


    PLEASE excuse the cheesy white dials with the sharpie markings on it. A lot of stupid things where done in the -90's... I do have a spare set of untouched dials that I can use. I quite like the white though but I really need to have them redone by professionals.
    Toyota Celica ST2000
    1976
    VIN: RA23000411
    18R-C, rebuilt, stock apart from a Weber 36/36 DCD

  7. #22
    ½ Bogan, ½ Dork Backyard Mechanic andrewzuku's Avatar
    Join Date
    Jul 2011
    Location
    Saskatchewan, Canada
    Posts
    214

    Default Re: RA28 Ammeter wiring help

    Before I found an original set, I was going to make my own. I used the Temp/Fuel gauge as a guide and created sticker faces to use:


    RA28 GT Gauges.pdf

    Take this file to a signwriter (or maybe use VistaPrint.com ?), or if they need another file type I can provide whatever they need.

    They can even be inverted to white background / black text if you like.
    Last edited by andrewzuku; 10-06-2014 at 08:20 AM.

  8. #23
    Forum Member 1st year Apprentice
    Join Date
    May 2014
    Location
    Sweden
    Posts
    33

    Default Re: RA28 Ammeter wiring help

    I actually found that file a few days ago and did some Photoshopping on it, I hope you don't mind. Nice job on scanning the gauges! Did you do the speedo and tachy too?


    So does your ammeter needle go further or shorter than mine when high beams are on with engine off?
    Toyota Celica ST2000
    1976
    VIN: RA23000411
    18R-C, rebuilt, stock apart from a Weber 36/36 DCD

  9. #24
    ½ Bogan, ½ Dork Backyard Mechanic andrewzuku's Avatar
    Join Date
    Jul 2011
    Location
    Saskatchewan, Canada
    Posts
    214

    Default Re: RA28 Ammeter wiring help

    I don't mind at all. That's why I share everything

    Until now I haven't had a need to do the speedo, tacho, or clock. I guess I should, eh? I had no idea they'd be useful for re-skinning the gauge faces!

    My needle only goes about 1/4 as far as yours. In my opinion, yours swing the perfect amount.

  10. #25
    Forum Member 1st year Apprentice
    Join Date
    May 2014
    Location
    Sweden
    Posts
    33

    Default Re: RA28 Ammeter wiring help

    I was thinking the same...you don't want the needle to hit the roof. I didn't test it but I guess high beams and a foot on the brake pedal will push the needle close to the top mark.

    Do you have any idea what can be the reason for my gauge only reacting to load and not to charge?
    Toyota Celica ST2000
    1976
    VIN: RA23000411
    18R-C, rebuilt, stock apart from a Weber 36/36 DCD

  11. #26
    ½ Bogan, ½ Dork Backyard Mechanic andrewzuku's Avatar
    Join Date
    Jul 2011
    Location
    Saskatchewan, Canada
    Posts
    214

    Default Re: RA28 Ammeter wiring help

    Stupid question first... Is the battery definately charging (i.e. is the alternator working when the car is running)?

    Other than that, i don't know. have you reversed the wires to make sure it can swing the other way?
    Last edited by andrewzuku; 10-06-2014 at 09:31 AM. Reason: alternator

  12. #27
    Forum Member 1st year Apprentice
    Join Date
    May 2014
    Location
    Sweden
    Posts
    33

    Default Re: RA28 Ammeter wiring help

    Yes, the alternator is charging even if it is a bit weird, se my other thread. I think I have some work to do...

    I haven't reversed the wires yet. I will do that next, they should be the other way around anyway since the needle moves to the positive during load.
    Toyota Celica ST2000
    1976
    VIN: RA23000411
    18R-C, rebuilt, stock apart from a Weber 36/36 DCD

  13. #28
    Forum Member 1st year Apprentice
    Join Date
    May 2014
    Location
    Sweden
    Posts
    33

    Default Re: RA28 Ammeter wiring help

    OK, so switching the wires corrected the way the needle moves but it did nothing for the ammeter to register charge. I'm in the process of creating a schematics over how my car is wired. I have done a lot of modifications (yes, I do regret it now but I was young and ambitious when I did it! ) so I'm trying to do the schematics as close to reality as I can get, even the placement of things. I'll post a picture of the schematics when I have something to show!

    Edit:

    Sitting with the schematics in Photoshop one thing came to mind: One "upgrade" I just did to the car was that I installed a main connection block for the positive side. I ran the positive main lead from the battery (via a main fuse and a main breaker switch) to the block that I placed under the center console. From this block I routed the wire to the starter, to the block I ran the main wire from the alternator and the main positive lead for the rest of the car (indicated white in the schematics) is fead from it via the fusible link. I think this is where something is wrong...

    Here is my first draft of the schematics:

    Attached Images Attached Images
    Last edited by Paxman; 11-06-2014 at 09:15 AM.
    Toyota Celica ST2000
    1976
    VIN: RA23000411
    18R-C, rebuilt, stock apart from a Weber 36/36 DCD

  14. #29
    Forum Member 1st year Apprentice
    Join Date
    May 2014
    Location
    Sweden
    Posts
    33

    Default Re: RA28 Ammeter wiring help

    After a "good" nights sleep (it's too hot here in Sweden now!) I looked on the schematics with new eyes and think I might have found where I made a mistake. If you look where the white wire coming from the alternator's and regulator's "B"-terminals goes you will notice that it is connected directly to the positive connection block. In the original schematics it is connected to the fusible link on the negative side of the ammeter!

    The way I connected the white cable it seems to be bypassing the ammeter...or am I thinking totally wrong here?

    If my thinking is correct there is one concern...how can the fusible link (the 16 AWG wire) cope with all the current without burning?

    EDIT:

    I noticed that on the schematics in my post above I have switched the ammeter poles. The positive pole should be towards the connection block and the negative should be towards the users. Sorry about that! Will be fixed on the next schematic I'll post.
    Last edited by Paxman; 11-06-2014 at 06:39 PM.
    Toyota Celica ST2000
    1976
    VIN: RA23000411
    18R-C, rebuilt, stock apart from a Weber 36/36 DCD

  15. #30
    Forum Member 1st year Apprentice
    Join Date
    May 2014
    Location
    Sweden
    Posts
    33

    Default Re: RA28 Ammeter wiring help

    So, with my new insights of where the white cable should connect I tested again. Now the ammeter works the way it should! Engine off and some load= negative value and with engine on the needle moves to positive!! Great success!!

    However...the charging is even worse now. The voltage varies violently, even to the point that you can see all the lights dimming intermittently but this really should be adressed in my other thread.

    As for this thread, I'm really happy with the results and like to thank andrewzuku once more for the help!
    Toyota Celica ST2000
    1976
    VIN: RA23000411
    18R-C, rebuilt, stock apart from a Weber 36/36 DCD

Similar Threads

  1. wiring diagram ra28
    By Omegaman in forum Tech and Conversions
    Replies: 11
    Last Post: 09-03-2006, 10:51 PM
  2. Installing an Ammeter
    By Talasas in forum Tech and Conversions
    Replies: 8
    Last Post: 28-01-2006, 12:50 AM

Bookmarks

Posting Permissions

  • You may not post new threads
  • You may not post replies
  • You may not post attachments
  • You may not edit your posts
  •