Gday all,
It seems I have piecemeal explained this several times, and should put this info in one place.
Please excuse this thread for a bit, as I will add photos later.
Ok, so you want to drop 20kgs off your vehicle weight, and get some better ratios, but aren't sure how to put a W5x (ie W55 through W58) onto the back of your 18R. Well here's an explaination of what will and won't work for a number of applications. There will be some times when there is another obstacle to overcome (ie you are doing this in a mini minor), but for the majority of people doing this conversion, I should be able to cover all bases for you.
First step - get a box. I can't give full details for all donor vehicles and their pros and cons, though that info is around so do some searches before asking. The easiest boxes for this conversion are the ones found behind 21R and 22R motors. So any of the RA6x series Celicas, or the RT142 Corona are the popular items.
Next step depends if you are upgrading from auto to manual, or from cast iron manual to manual. If you are going from auto, you will need to turf your old slush box, including the flex plate and flex plate bolts. The engine backing plate will be fine for re-use, just your inspection covers will be kind of redundant. You will need to get a flywheel and some flywheel bolts. These can be picked up second hand for next to nix, or you can purchase aftermarket items. The bolt thread is M10x1.25. You will need to get a clutch kit. There are 2 types, with the only difference being the throwout bearing. Get the later version (just ask for one to suit an RT142 and you can't go wrong). You will also need relevant manual pedal box, clutch master cylinder, fixed line and flexible line. These will need to be sourced from a wrecker etc (master cyl can be had new). A new slave cylinder is also in order. Get the one to suit the RT142, again there is a difference with the early Wx0 versions (which were adjustable, but not suitable). You will also need to install a spigot bearing into the back of the crank. Last but not least, you will need to short out the neutral start circuit. I will provide more info on this later when I have diagrams available.
If you are upgrading from an early W50 or W40 (identified by adjustable clutch slave cylinder and cast iron throwout arm), you will need at a minimum a new clutch slave cylinder and throwout bearing. But while you are going to all this trouble, it would be wise to give your flywheel and clutch a birthday anyway.
If you are upgrading from a later W50 or W40, then you are in lots of luck, and don't need to change a thing. Again though, isn't it easier to change out the clutch and flywheel while the system is apart??
Other things which will be the same are your gearbox xmember, speedo cable, gearbox mount and tailshaft. Depending which gearbox you bought, and what you originally had, you may need to cut a new hole in your transmission tunnel to suit the shifter position. There are 4 shifter positions (that I know of) available for the W5x.
Ok, now the hard parts.
Hard bit 1: gearbox xmember mounting to body.
The gearbox xmember bolts to the body using 2 bolts. When you put a W5x in, the xmember will move rearwards such that the front holes of the xmember will line up with the rear holes in the body. If you are lucky (ie have an RA40), then there will be a third set of holes in the body for your pleasure. If you are unlucky (ie have an RA23), then you will only have 2 holes in the body. There are a few ways of solving this, I will post up possible solutions at a later time, however there are also methods already available on the intawebs if you search.
This is what I did for my temporary one. Need to do a tidier version, however it works.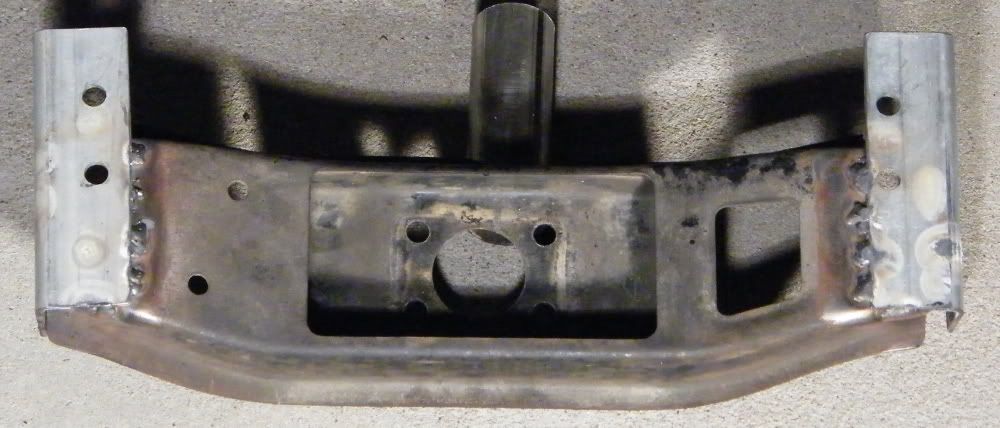
Hard bit 2: block dowels.
The 18Rs had 2 dowels which go around the lower block to bellhousing bolts (they are hollow dowels). The later blocks did not have these, as such the bellhousing of the W5x does not have provision for them. This can be rectified by using a die grinder (or milling equipment or big fuck off drill bit if you have them available) and partially reaming the holes in the bellhousing out to allow fitment of the dowels. I will have a look when I get home, but I would hazard a guess you can also cut the dowels flush with the back of the block.
Once you have all that sorted... it's done!! Really is a simple conversion, only a few minor points to watch out for. As mentioned, I will add to this with photos and diagrams at a later stage, just wanted to get the main info out first.


 Reply With Quote
Originally Posted by o_man_ra23
 Gday all,

Bookmarks