bravo mate.. Awesome bits of information and pictures there!


Just thought i would make a thread while i was going as it took me ages to find the info i needed.
to start with i bought a running 2jzge (was in a mates jza80 and he went turbo motor)
then pulled head off, oil pump, water pump and sump (was rear sump and whatever i put it in will be front sump)
quick check of bearings while it was apart and were in good condition so looked no further
now to the differences, you will need a 1jz/2jz turbo oil pump for the crank sensor, you will also need the lower crank gear as it has the teeth for the crank trigger, and of course you need the sensor.
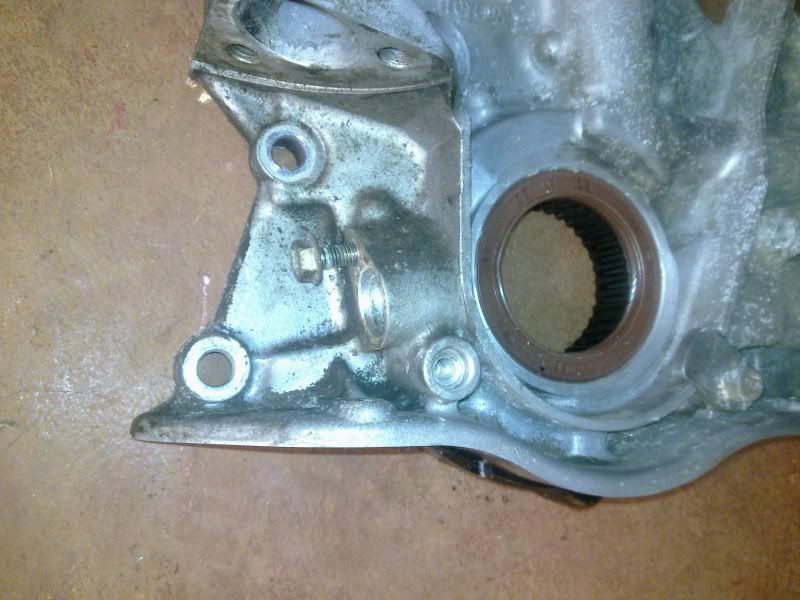
2jzge oil pump no hole for sensor
1jzgte/2jzgte oil pump has sensor hole

crank gears 1jzgte/2jzgte left with trigger wheel 2jzge right without trigger wheel
2jzge water pump backing has water outlet for head pointing outwards
1jzgte/2jzgte water pump backing has water outlet for head pointing up which you will need, you also need to make the sleeve that joins the water pump and the top hose outlet longer as the block is taller (will add pics when i make mine).
2jzge head gasket is only .3mm thick i will be using 1jzgte head gasket which is 1.3mm thick which will drop compression enough for what i need. if you want to drop compression more you can purchase a 2.0mm gasket.
thats all ive done for now will put pics up of oil modifications to the head when they get done
list of parts needed
2jzge bottom end $500
1jzgte/2jzgte oil pump
(can be bought new for under $250)
1jzgte/2jzgte lower crank gear
1jzgte/2jzgte crank sensor
1jzgte/2jzgte water pump backing
new water pump $100
1jzgte head
1jzgte headgasket $100 genuine gasket
longer water bypass to head
2jz timing belt $50 gates belt
2jz timing belt bearing (not needed but best to do) $50
2xcam and 2xcrank seals $100
oil gallery in head modified
(can do without but not recommended)
Last edited by sleepercorty; 01-01-2011 at 06:51 PM.
bravo mate.. Awesome bits of information and pictures there!


yes great info ,, maybe the 1jz long motors i have in storage can come in handy for stroker kits ..
more info on head / galleries lining up and mods would make a huge help to anyone thinking of doing this ..
shame ts not the same case for vvti 1jz i beleive as they had different oil/water jackets
Will watch with interest mate, thanks.
How come you need to make your own coolant bypass tube between the water pump and outlet on the head? Any reason why you wouldn't just buy the 2JZGTE part from toyota?
Cheers
Phil
AE71 Corolla 2 door window van - retired / JZA70 Supra - VVTi converted - sold


Which can be found here.
http://www.toyodiy.com/parts/p_J_199...LFQZ_1603.html
PN: 16268-46020
MX83 Grande 1jz GT35R buildup here.
http://www.toymods.net/forums/showth...ghlight=grande
Some say that his heart has 6 cylinders. All we know, is he's called,


getting to the oil gallery part, here is a pic of the 1jz block first and the 2jz block in the second picture. you will notice that the 1jz block the casting goes further outwards
1jz block
2jz block
heres a picture of the 1jz head gasket on the 2jz block, notice that the gasket sticks out past the edge of the block
and a picture of the 2jz head gasket on the 1jz block , you will see that the gasket doesnt go to the edge of the block.
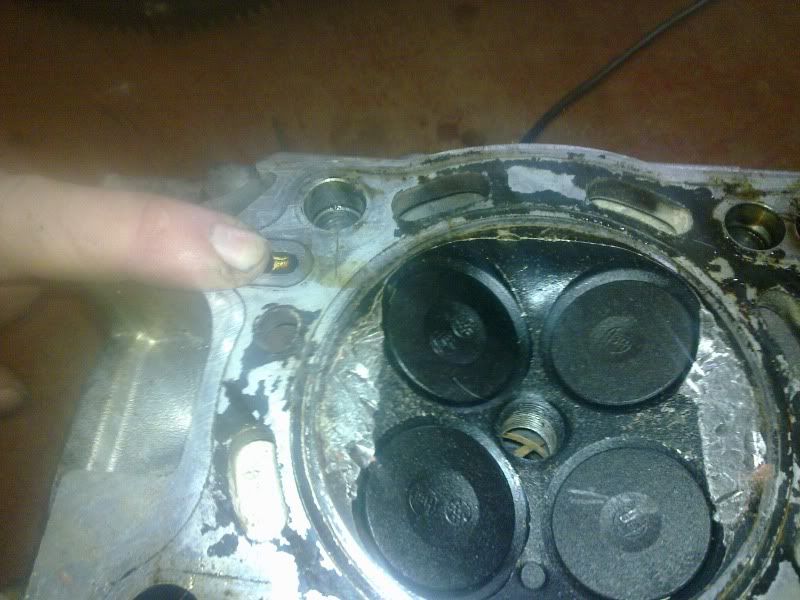
1jz head oil up from block then across about 5mm and up again
i forgot to take a picture of 2jz head before i threw it out but oil comes straight up out of block and into head doesnt go across like 1jz. which is why the block on the 2jz doesnt go out as far as the 1jz, where my finger is in the picture is where we will be welding up and after it is welded we will drill through on a 45 degree angle. you can do the head swap without doing this but the gasket only has about 1mm surface to seal on so is a chance of leaking. so basically all we are doing is making more surface area for the gasket to seal on easy as that. (im not using this head as it is damaged in number 6 cylinder just used it for the pics)


difference in thickness in head gaskets 2jzge is .3mm thick 1jzgte is 1.3mm thick, im not sure how much compression it will give me but plenty low enough for boost.
some people use the 1jzgte gasket and some use a 2jzgte gasket, the way i look at it is that the water galleries in the block are same between 1jz and 2jz but the gaskets and way the water flows around the head is different so you are going to want to use the gasket for the head therefore 1jz head use 1jz gasket.


also fitted water pipe from 1jz bolts straight on just need to remove a bung from the block, the rubber hose fits (just) is a bit tight where the oil filter housing is. you can use the 1jz filter housing and will bolt straight on, i used the 2jzge one as it looks neater doesnt have the water cooling running through it.
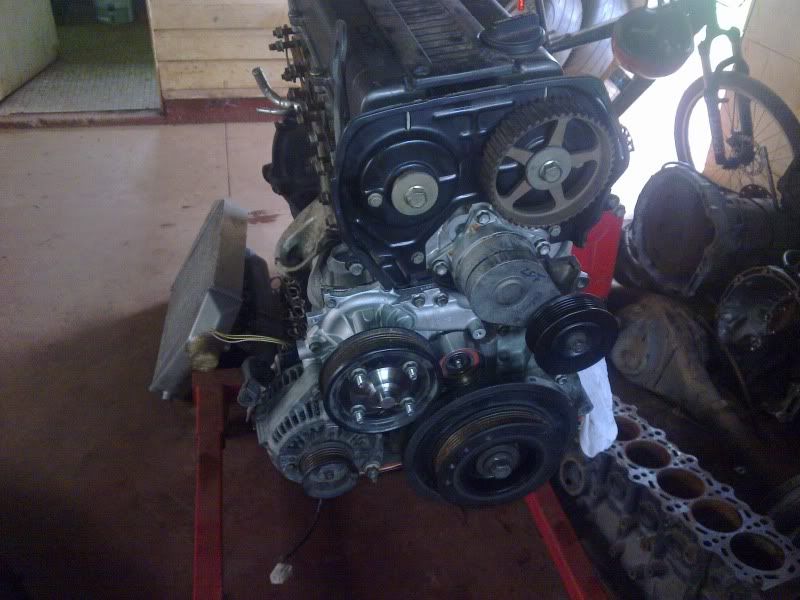
as there will be no powersteering or aircon my belt will just run around these 4 pulleys, was as simple as fitting a ribbed pulley to the tensioner. you can use the 1jz or 2jz tensioner they are just on a slightly different angle .

Very informative mate, thanks! Good to see the comparison pics side by side.
If you have problems with belt coverage/slip with just the 4 pulleys and limited contact on the crank one, you can use the power steering pump as an idler pulley (no hoses etc), I had mine machined to take two sealed bearings to support the shaft.
Cheers
Phil
AE71 Corolla 2 door window van - retired / JZA70 Supra - VVTi converted - sold


^^^or run the pressure line directly to the return line and fill it with oil
2009 aurion
Purple 2000 Hilux - 1UZ
assembly is just the opposite of disassembly - just you swear in different spots!
Great post, certainly answered a few questions i had about the 1J/2J hybrid.
Cheers!!
very informative thread, wish this was here when i put mine together lol
hopefully firing mine up any week now haha


I used a gte block so a lot of parts werent required to be swapped over like yours, e.g oil pump, crank sprocket etc
i didnt redrill oil hole, i thought i would give it a shot, people have tried both ways and apparently have failed both ways lol plus the head and block were both freshly machined ready to go so didnt want to have to go down the path of welding and machining at that stage.
I dont think there is a fully proven way to build one of these motors yet, too much hear say and speculation so my opinion is only to try and find out for yourself.
Bookmarks