Page 1 of 2 12 LastLast
Results 1 to 15 of 16

Thread: Aristo JZS147 Stereo Install (Part 2 in a Series)(Lots of pix!!)

  1. #1
    Junior Member Automotive Encyclopaedia infotechplus's Avatar
    Join Date
    Apr 2006
    Location
    NSW
    Posts
    816

    Default Aristo JZS147 Stereo Install (Part 2 in a Series)(Lots of pix!!)

    Here we are for Part 2 in this series, and we are going to replace our stock double DIN head unit with a pair of aftermarket units, namely, the JVC KD DV4306 DVD/MP3/DivX/WMA/AM/FM unit and a Jaycar Response 7" LCD TFT motorised screen.

    Part 1 covered the boot amp install, and you can read it here if you missed it first time round.

    The Equipment

    I chose the JVC unit after first seeing it on the shelf at SuperCheap Auto, RRP$399, mainly for its features and price. I was especially after a unit that could play MP3s off DVD-R and DivX movies. This is an attractive unit, with the only downside being it's single RCA out. This can be overcome with the right amp but more on that later.

    A quick check around the web before Christmas showed I could get the 4306 for under $300, and I finally grabbed one from RYDA at Haberfield for $279.00.


    The 4306 is as versatile as it's bigger brother, the 5306, it just misses the iPOD front connection. It's also DTS capable, you can name all the radio stations (2 FM/ 1 AM band), had TAG display and even reads data off audio disks. Here's what you get in the box:


    The remote also lets you control a second screen, on the rear there is a digital OUT and a stacker connection. The documentation is very good, clearly presented with a booklet and a fold-out sheet showing all the connections.


    This is the fascia, which pops off (as most do these days):


    For the screen I looked at a variety of manufacturers and models, both motorised and fixed mount, including headrest mount. I decided to go with a motorised screen for convenience, and security. At least a foldaway unit is not as visible to the hairy-knuckle draggers.

    It seems that you can spend a lot of money in this area with some screens up around the $1500 + mark. After looking at these and reading a little bit about the Jaycar unit on the Mobile Electronics Forum, I went to investigate the Response 7" LCD TFT at my local store. For $299 I didn't expect much but I was very pleasantly suprised to find it compared to the more expensive units in features and quality (and it has a TV tuner too). I know it wasn't a direct "A - B" comparison but my eyes convinced me to get one.


    This unit has outputs for a reversing camera and includes three (3) video outputs including one for TV. It can also handle another screen (both audio and video). Here's what you get in the box:

    A bag of screws, harness, TV aerial. Not much finesse with that aerial - it's basically a pair of telescopic rabbit ears mounted with double-sided tape and a connecting lead/mini-stereo plug. I suspect you mount it inside the front windscreen!


    Manual and remote (with battery). I've made a PDF of the manual you can download here if you want to see what's involved. It's not too badly written with only a little Chinglish in evidence. One confusing thing was the description of the blue wire - in the manual it is the "reverse running lamp circuit" which I eventually decided was the reversing light connection for the optional camera, and I didn't need it at this stage!


    My only gripe with the remote is it's design. My eye seems to be drawn to the curve of the remote, which I expect to be the bottom, but is, in fact, the top. Annoying and I haven't got used to it yet!


    This is the rear of the unit, showing harness and labelled connections (including the aerial connection, which is a female mini-stereo jack):


    So there we have the two components for our install. Next, I'll cover the basic tools required and get started on the removal of the stock head unit.

    Cheers,
    Peter
    Last edited by infotechplus; 18-02-2008 at 02:03 PM. Reason: Added link to Part 1
    OMG - Winner of the Official "Forum Comment of the Week"!

  2. #2
    Junior Member Automotive Encyclopaedia infotechplus's Avatar
    Join Date
    Apr 2006
    Location
    NSW
    Posts
    816

    Default Re: Aristo JZS147 Stereo Install (Part 2 in a Series)

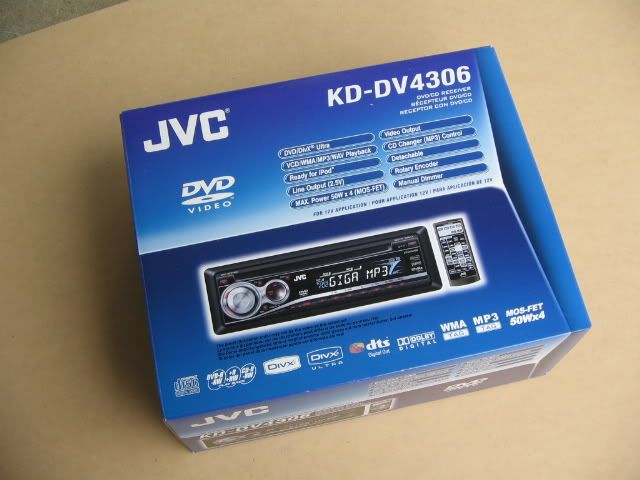
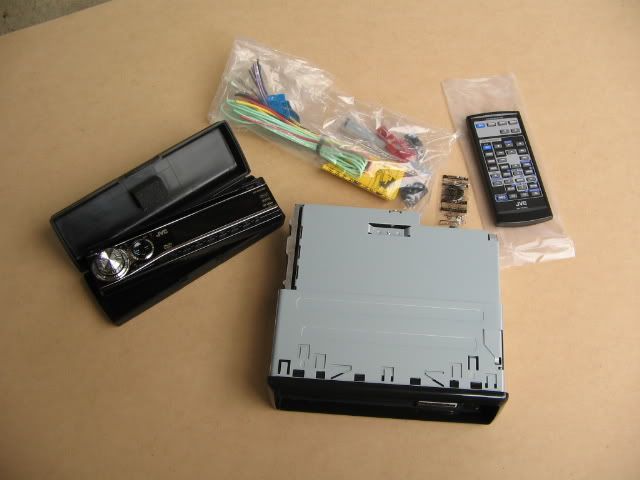
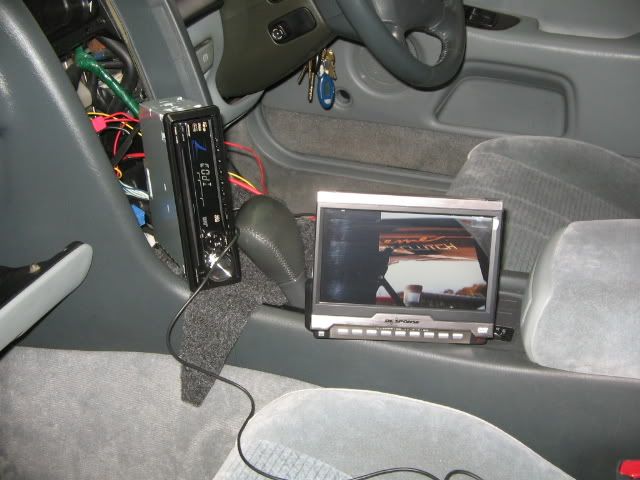
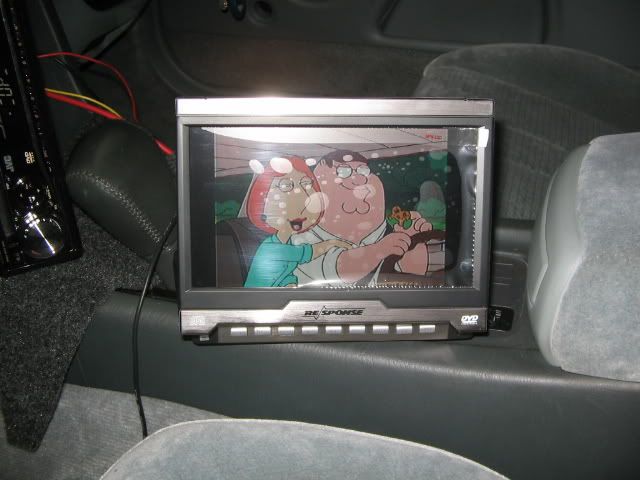
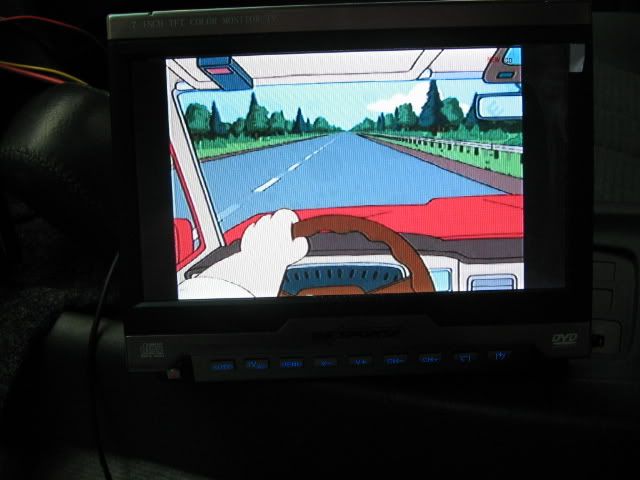
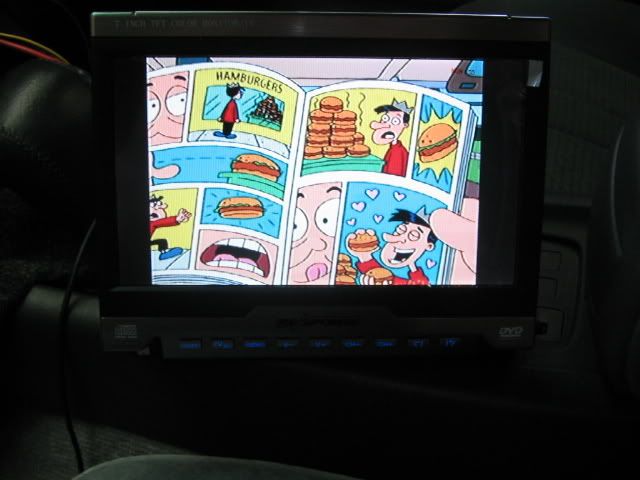
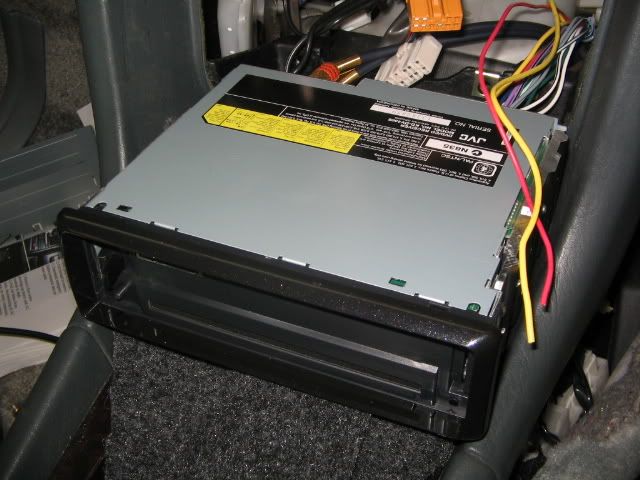
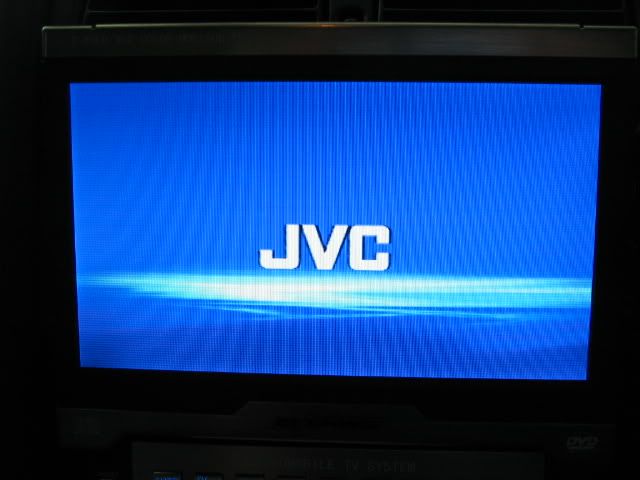
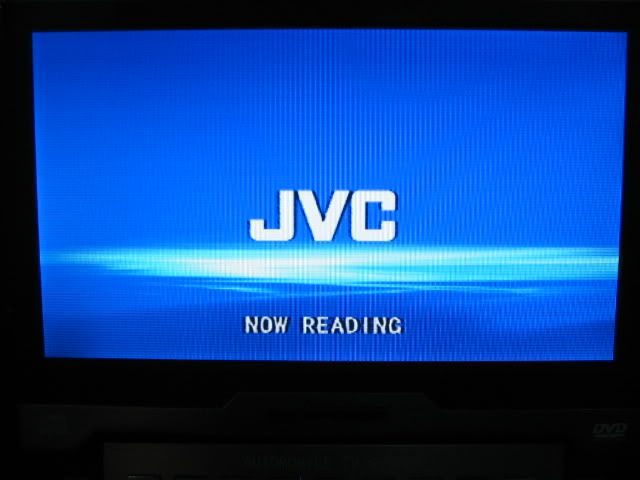
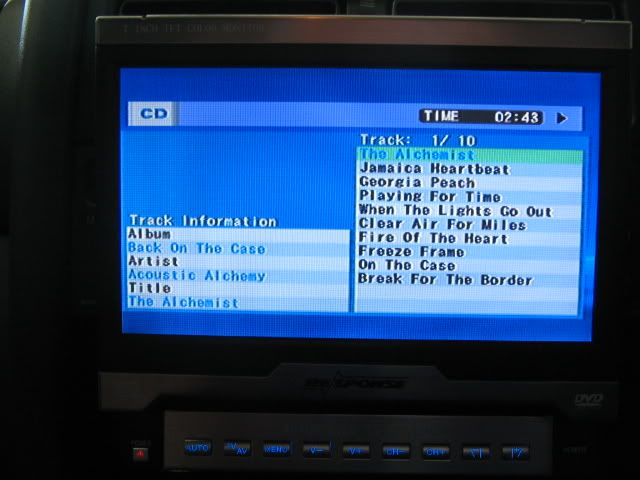
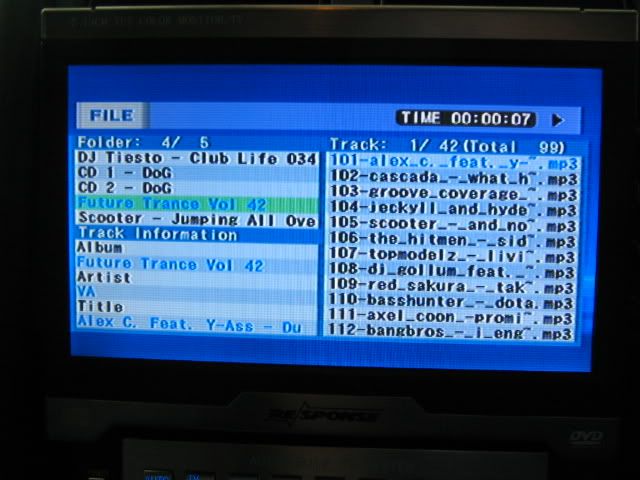
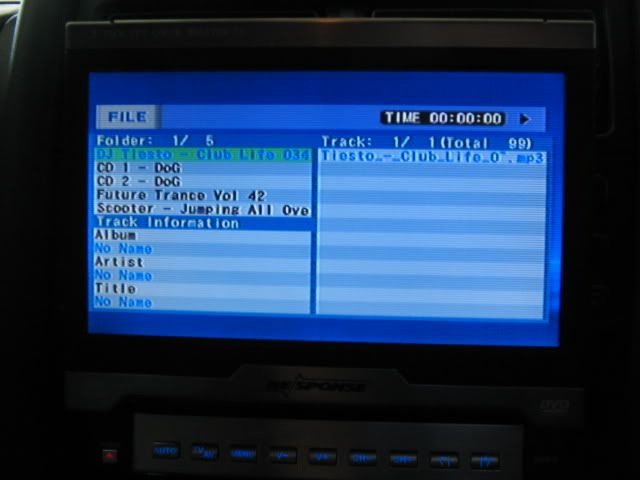
    Bear with me - I'll jump ahead a little bit here. After I removed the Aristo's stock head unit I temporarily connected up the JVC and Response screen to make sure everything worked. I tested most formats of disk - DVD-R MP3, DivX movie (Family Guy ), original audio CD, original DVD, and a collection of TV shows all burnt to a DVD-R. It was all good with the JVC reading everything first go and displaying data on it's scrolling screen. The added bonus was seeing all the data on the 7" screen, very readable.


    The bubbles on the screen are from the plastic protective film, which I left in place until I was finished the installation. Images are from Family Guy DivX DVD-R.


    These photos don't show the true quality of the screen but you get the idea (picture )


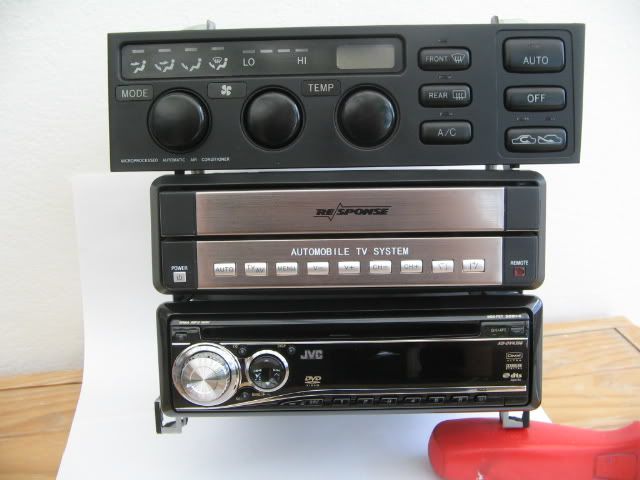
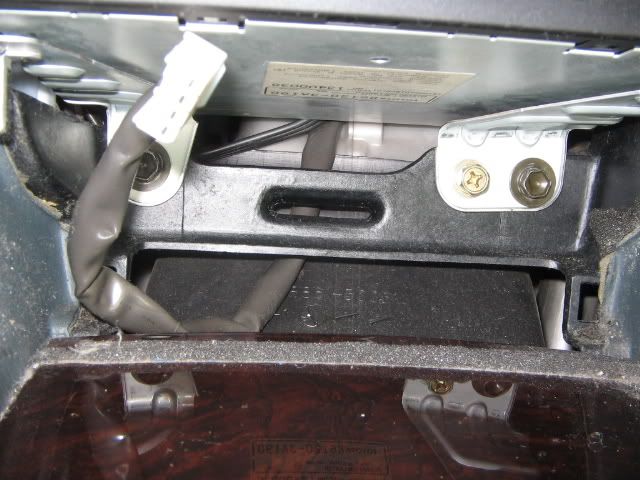
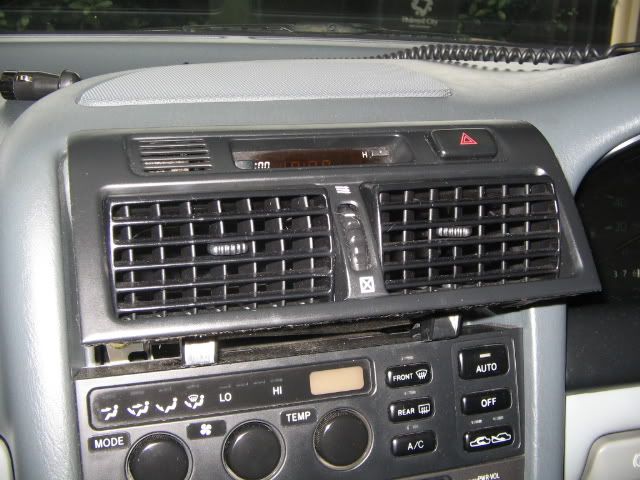
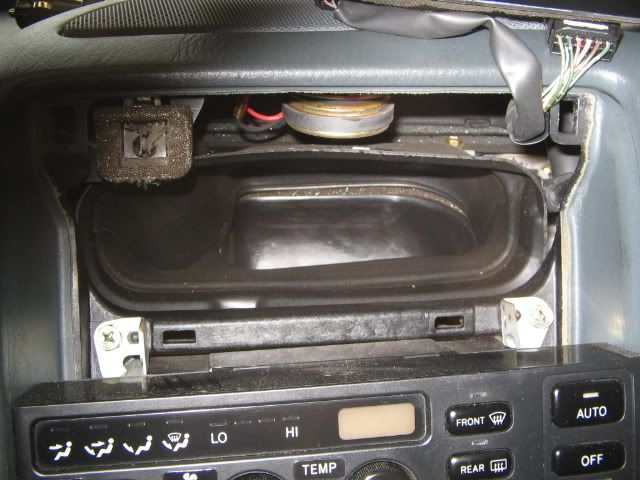
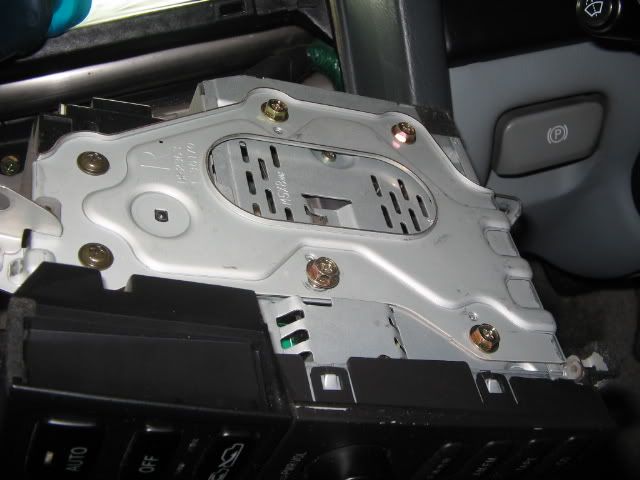
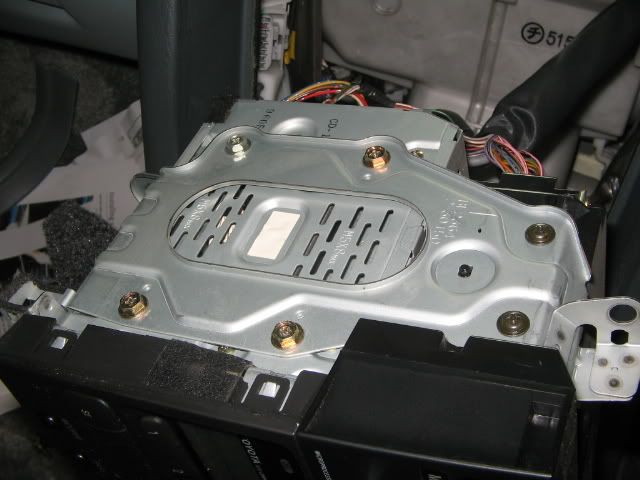
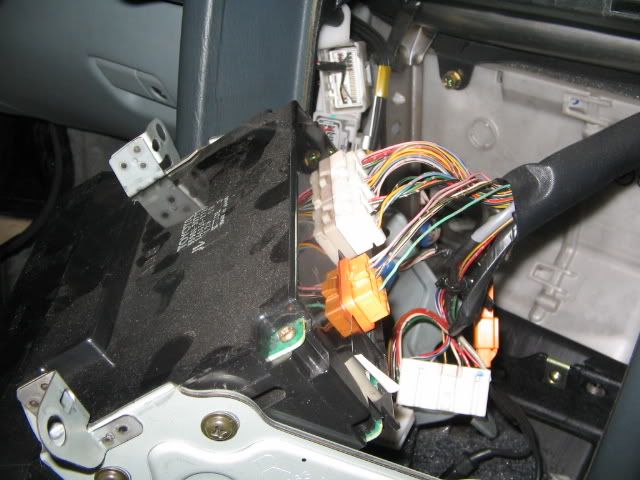
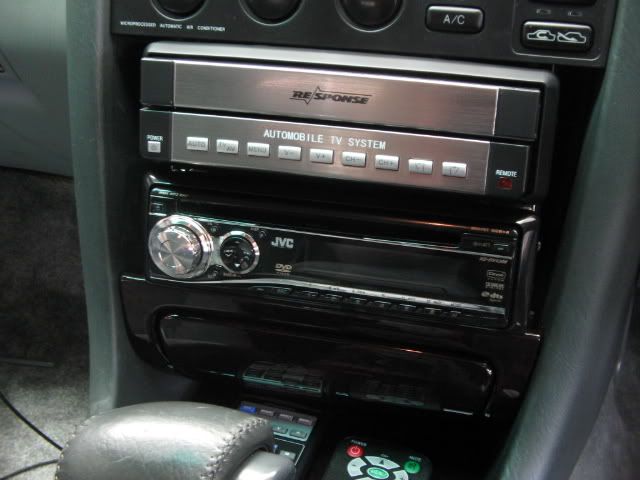
    Here's everything mounted in the stock cradle:


    More ...
    Last edited by infotechplus; 28-01-2008 at 08:15 AM. Reason: Typo
    OMG - Winner of the Official "Forum Comment of the Week"!

  3. #3
    Junior Member Automotive Encyclopaedia infotechplus's Avatar
    Join Date
    Apr 2006
    Location
    NSW
    Posts
    816

    Default Re: Aristo JZS147 Stereo Install (Part 2 in a Series)

    **** DISCONNECT YOUR BATTERY ****

    The first part of the job is to remove the ashtray. This is fairly simple, just pull it out and disconnect the plug from the back. Put it aside.

    Next there are three 10mm bolts to remove, one is a Phillips head but all three can be removed with the 10mm socket. That's the ashtray electrics to the left.


    The next step is to get the centre air vents out.


    You can do this by turning the vents inward at the bottom and then pulling the complete unit out by holding the bottom edge. If it's stubborn, careful use of screwdriver on the edges will allow you to pull the unit out. I didn't disconnect the vents, just put them up on the dash (securely).


    There are two more 10mm Phillips head bolts but, again, the 10mm socket is fine. Remove these two, and the complete AC/Stereo controls and metal housing should all come out. Note: That's the centre speaker up top - you might want to write down the wiring colours if you ever want to trace the wires back to the boot.]

    Before pulling the unit right out, put a towel on the centre console as you don't want to scratch the woodgrain surround. This is the right hand side of the frame:


    You can remove all four of the 10mm bolts holding the double DIN unit in. The same goes for the left side. Don't remove the two uppermost screws as they are for the AC.


    Hold the unit securely as it's quite heavy. Now you need to unplug the wiring, and the two (2) aerial socket plugs. It's all colour coded so don't worry about the order in which you disconnect. You won't be needing any of them anyway!


    Read on...
    Last edited by infotechplus; 18-02-2008 at 01:31 PM. Reason: Finally ...
    OMG - Winner of the Official "Forum Comment of the Week"!

  4. #4
    Junior Member Automotive Encyclopaedia infotechplus's Avatar
    Join Date
    Apr 2006
    Location
    NSW
    Posts
    816

    Default Re: Aristo JZS147 Stereo Install (Part 2 in a Series)

    This is the rear view of the double DIN factory unit. I believe it is digital. The two sockets top left are for the aerial plugs.


    This is the unit completely removed from it's cradle. You can put it away somewhere safe, I warapped mine in a plastic bag to prevent insects from nesting in it and keep it free from dust buildup.


    The AC controls are connected at the top. These all need to come out too:


    You should now be here -


    The next part of the job is the most tedious. You will need to reconnect the battery to do this.

    You need power - both constant 12V and ignition 12V. Using a test light and turning the ignition ON/OFF I found two suitable wires to provide the power connections. I patched into these two wires using the little red clamp connectors, and the correct YELLOW and RED wires from the new head unit's connector.

    ****Make sure you disconnect the battery before making the wiring "live" again****


    Having found the power sources, I then put a ring terminal on the black EARTH wire and connected it down by the left foot. Under the carpet there is a bolt suitable for this job with a good Earth. That's my RCA cable running to the rear (before I put it under the carpet.)


    At this time I also ran about 6m of blue wire from the REMOTE ON of the new head unit's plug. The remote wire, the RCA cable(s) and the speaker level wires all have to run to the boot so I made all the connections then bundled them all together with black electrician's tape and small cable ties at intervals of about one foot. This makes the job so much easier - Trust me.

    To get all this under the driver's carpet is a PITA as the floor is not just carpet in the Aristo - it's moulded and doesn't really want to co-operate. A bit of elbow grease and determination will, however, get you there.


    Hint: Leave yourself with plenty of slack at this end. I didn't, wanting to avoid a bundle of wires, but it was a pain having pulled it all through to the boot and then finding there wasn't much slack when connecting up the AC, the head unit and the motorised screen. It did it but with a bit of cursing for not thinking ahead.

    Here's the bundle. It goes down the right hand side of the centre console, under the carpet in front of the driver's seat, and then along the door edges, to the boot.


    Next instalment ...
    Last edited by infotechplus; 18-02-2008 at 01:44 PM. Reason: Additional Info
    OMG - Winner of the Official "Forum Comment of the Week"!

  5. #5
    Junior Member Automotive Encyclopaedia infotechplus's Avatar
    Join Date
    Apr 2006
    Location
    NSW
    Posts
    816

    Default Re: Aristo JZS147 Stereo Install (Part 2 in a Series)

    I made the RCAs from JAYCAR cable, and gold end terminals. The cable has excellent shielding properties (according to the JAYCAR sales guy) and so far I would have to agree. It is important to keep these wires away from POWER so I ran the power lead down the left side of the car, and the others down the right.

    Here I'm just testing the connections on the new head unit. Note the carpet undeneath as I advised previously.


    More testing with both screen and head unit. I had to do this as the JAYCAR instructions (in typical ENGRISH) were not that clear. You only need to connect a pair of short RCAs to the video out (again made this from JAYCAR cable/gold connectors) to the back of the head unit; sound is via the head unit RCAs even though the motorised screen has sound (for the TV tuner) it's tinny. You want the full power of your amp(s), head unit and car's speaker system when watching DVDs, etc. (when you are stationary )


    To make the job easier, grab one of these special little tools to remove clips. You will need to pop all the clips holding the carpet down along the floor edge to the rear.


    So here's the snakepit of cables and wires that have to go the rear:


    Allow about 6m to comfortably reach the boot.


    Rear door:


    Note the scuff plate has been removed, before popping the carpet.


    Here we are at the boot entry point. I've popped the rear seat (outlined in earlier posts). Just follow the main harness through the opening.


    The boot end


    To be continued ...
    OMG - Winner of the Official "Forum Comment of the Week"!

  6. #6
    NL-34-SH Grease Monkey unleashed__'s Avatar
    Join Date
    May 2007
    Location
    NSW
    Posts
    112

    Default Re: Aristo JZS147 Stereo Install (Part 2 in a Series)(Lots of pix!!)

    good post man!
    hopefully this will be helpful when i'm installing my new head unit..
    might actually call you for some help =p
    can't wait.. picking up the beast tomorrow =p
    opinions are like a** holes.. everyone has one but thinks everybody elses stinks

  7. #7
    Breaker OfThe Unbreakable Backyard Mechanic Herus's Avatar
    Join Date
    Feb 2007
    Location
    SA
    Posts
    310

    Default Re: Aristo JZS147 Stereo Install (Part 2 in a Series)(Lots of pix!!)

    Peter,

    Did you have any issues with that head unit reading a *.avi file name?
    I went into JB here, and trialed a couple of Dvds with divx stuff on them, and they weren't recognised by the machine. Only way I could get the machine to read them was if I renamed them *.divx.

    I would be very interested to know how you went, or if it was a *.divx named file.

    Thanks Mate.

    Andrew
    Member's ride thread!

    Joined Team BHG, 19/7/2008

    Joined Team JZX83, 15/11/08

  8. #8
    Junior Member Automotive Encyclopaedia infotechplus's Avatar
    Join Date
    Apr 2006
    Location
    NSW
    Posts
    816

    Default Re: Aristo JZS147 Stereo Install (Part 2 in a Series)(Lots of pix!!)

    Quote Originally Posted by Herus
    Peter,

    Did you have any issues with that head unit reading a *.avi file name?
    I went into JB here, and trialed a couple of Dvds with divx stuff on them, and they weren't recognised by the machine. Only way I could get the machine to read them was if I renamed them *.divx.

    I would be very interested to know how you went, or if it was a *.divx named file.

    Thanks Mate.

    Andrew
    Andrew,

    the JVC unit reads .avi files no problem, as long as they were XVID/DIVX encoded. The photos show such a file playing (Family Guy). I have mixed movies, TV shows and car videos together, on both CD-R and DVD-R with no problem.

    Cheers,

    Peter
    OMG - Winner of the Official "Forum Comment of the Week"!

  9. #9
    Breaker OfThe Unbreakable Backyard Mechanic Herus's Avatar
    Join Date
    Feb 2007
    Location
    SA
    Posts
    310

    Default Re: Aristo JZS147 Stereo Install (Part 2 in a Series)(Lots of pix!!)

    Well then...

    I was looking at the double din model with the screen already in it...

    Maybe there was some issues with my disks or something....

    Thanks Peter

    Herus
    Member's ride thread!

    Joined Team BHG, 19/7/2008

    Joined Team JZX83, 15/11/08

  10. #10
    ---------HO00NS---------- Chief Engine Builder IN 05 NT's Avatar
    Join Date
    Dec 2005
    Location
    nsw
    Posts
    3,495

    Default Re: Aristo JZS147 Stereo Install (Part 2 in a Series)(Lots of pix!!)

    one bit of advice i can give you,

    if your running an amp/sub in the boot, run the RCA cable down one side of the car and the 8g power supply for the amp down the other side of the car,...if you dont do this, you will get a humm thru the sub, of what ever you run off the amp,

    very annoying!

    looking sweet mate!

  11. #11
    is firing on all eight. Carport Converter AndyTTR's Avatar
    Join Date
    Sep 2005
    Location
    Victoria
    Posts
    1,439

    Default Re: Aristo JZS147 Stereo Install (Part 2 in a Series)(Lots of pix!!)

    Excellent write up. You should post this up on jzs147.com.au if you haven't already.

    Just a question about the head unit, does it display information on the screen in all modes (radio / cd / mp3) or just in the video modes like the Sony units? I was thinking about getting one of these for the Soarer .

    Cheers,
    Andy

  12. #12
    Junior Member Automotive Encyclopaedia infotechplus's Avatar
    Join Date
    Apr 2006
    Location
    NSW
    Posts
    816

    Default Re: Aristo JZS147 Stereo Install (Part 2 in a Series)(Lots of pix!!)

    Quote Originally Posted by IN 05 NT
    one bit of advice i can give you,

    if your running an amp/sub in the boot, run the RCA cable down one side of the car and the 8g power supply for the amp down the other side of the car,...if you dont do this, you will get a humm thru the sub, of what ever you run off the amp,

    very annoying!

    looking sweet mate!
    Yeah, Blake, that's what I did. There is still a very slight hum but only when all volume is zeroed.

    AndyTTR: Head Unit shows MP3 tags, CD Audio tags (if present), and all video files on the screen. No FM data though. In other words when you switch to FM radio the screen goes blue.

    Startup screen


    Reading the inserted disc


    CD Audio inserted. This disc had CD Text written on it


    MP3 disc inserted. Top left shows all the albums on the disc. Bottom left shows current folder. Right side shows all the songs (MP3 tags) in that folder.


    You can skip through the folders/files using the L <-> R, U <-> D master toggle switch on the left.

    Same MP3 disk but you can see that the folder labelled DJ Tiesto has no tag info so it shows "No Name"


    Cheers,

    Peter
    Last edited by infotechplus; 25-02-2008 at 06:55 PM. Reason: Added info
    OMG - Winner of the Official "Forum Comment of the Week"!

  13. #13
    is firing on all eight. Carport Converter AndyTTR's Avatar
    Join Date
    Sep 2005
    Location
    Victoria
    Posts
    1,439

    Default Re: Aristo JZS147 Stereo Install (Part 2 in a Series)(Lots of pix!!)

    Sweet as, thanks for that peter!

  14. #14
    Junior Member Backyard Mechanic Sigmeister's Avatar
    Join Date
    Dec 2005
    Location
    SA
    Posts
    202

    Default Re: Aristo JZS147 Stereo Install (Part 2 in a Series)(Lots of pix!!)

    I have a quick question about the deck if I may.

    I am planning on getting one of these for the GF's car, however she wont have a screen initially. Does it display enough info on the deck to be able so browse MP3's and Movie files??
    Classic JC Quotes
    "A turbo: exhaust gasses go into the turbocharger and spin it, witchcraft happens and you go faster."
    "Usually, a Range Rover would be beaten away from the lights by a diesel powered wheelbarrow. "
    "The Mitsubishi 3000GT is about as sporty as a game of Darts."

  15. #15
    Junior Member Automotive Encyclopaedia infotechplus's Avatar
    Join Date
    Apr 2006
    Location
    NSW
    Posts
    816

    Default Re: Aristo JZS147 Stereo Install (Part 2 in a Series)(Lots of pix!!)

    Quote Originally Posted by Sigmeister
    I have a quick question about the deck if I may.

    I am planning on getting one of these for the GF's car, however she wont have a screen initially. Does it display enough info on the deck to be able so browse MP3's and Movie files??
    It's got everything displayed. In fact, it's the longest scroll I've ever seen on a head unit.
    Shows artist, album, song titles with the press of a button and then it scrolls if it is longer than the display. I was very impressed with that function - much better than my previous JVC MP3 head unit.

    Cheers,

    Peter
    OMG - Winner of the Official "Forum Comment of the Week"!

Similar Threads

  1. AE82, AE92 and AE101 Brake Upgrade Guide
    By The Witzl in forum FAQ
    Replies: 9
    Last Post: 09-05-2020, 08:08 PM
  2. Replies: 19
    Last Post: 14-11-2006, 01:54 PM
  3. GUIDE: GXE-10 IS 200 Stereo and Phone Installation
    By GTtwin in forum Tech and Conversions
    Replies: 1
    Last Post: 04-08-2006, 10:38 AM

Bookmarks

Posting Permissions

  • You may not post new threads
  • You may not post replies
  • You may not post attachments
  • You may not edit your posts
  •