Quaife QSR - Installation & manual steering info:
----------------------------------------------------------------------
AE86 Corolla manual steering rack assembly.
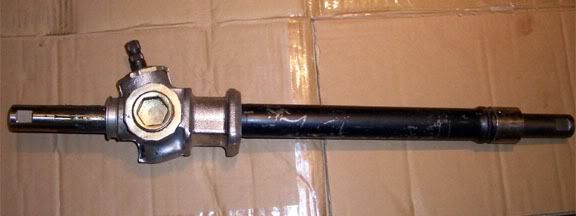
Dissassembling a manual rack.
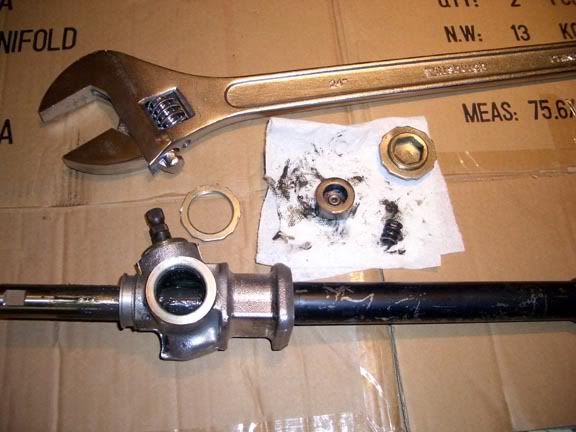
Note: LARGE 24" crescent wrench necessary (lock/retaining nut is 48mm/2" in)
When dissassembling just take it apart and keep everything in order, you don't need to remove the bottom bearing for the pinion gear unless you're replacing it.
Dissassembly:
1. Remove 2 locking nuts (#1 & 2)
2. Remove rack guide cap nut, tension spring, rack guide. (#2)
3. Remove pinion cap nut, pinion gear & top bearing. (#1 & 4)
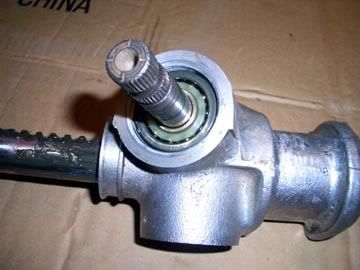
4. Slide rack gear out of housing -
ONLY take it out the drivers side, as pulling it out the passenger will 'score' the pass side end bushing/guide. (#3)
Be sure to clean out as much of the old grease as you can (I used several 3/8" extensions and a couple paper towels to clean out the inside of the rack) Also, make sure the 4 holes just before the end of of the rack housing on the passenger side are clear otherwise you may blow the steering rack boots up or suck them into the gears as it equalizes pressure from one side to the other when moving back and forth.
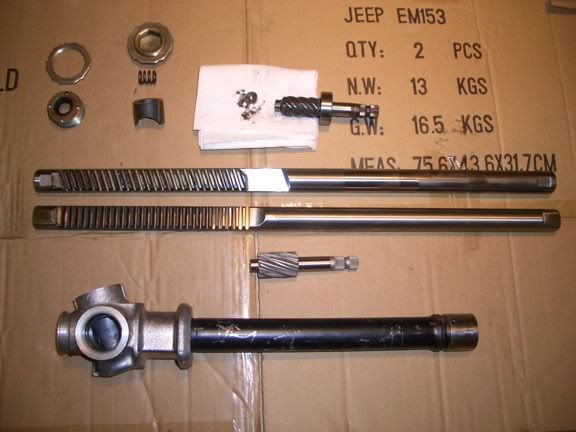
Dissassembled manual rack: top rack & pinion gear set is toyota factory, bottom rack and pinion is a Quaife Quick-Steering Rack gear kit. The one pictured is a modified Quaife QSR kit with 2 extra teeth cut for additional angle with a Battle Version #2 steering angle kit (if needed).
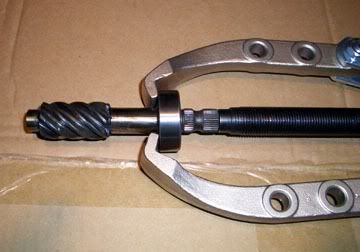
Manual rack pinion bearing removal
Note: installation is flipping gear opposite way to pull bearing down pinion gear shaft.
NOTE: Use molybdenium lithium based grease for reassembly - it came in a black 'peanut' size can from reibes/napa - kragen/shucks/checkers didn't carry it locally.
Apply grease before assembling to:
Rack gear teeth and lightly coat the back side of the gear tooth area.
Pinion bearings & gear (can be packed into pinion gear area, just dont want to fill the whole rack with grease)
Rack guide & spring as rack gear glides along/against it.
Reassembly.
1. Install rack gear, slide in from drivers side.
2. Install Pinion gear, top bearing and cap/tension nut.
When installing spin down pinion nut cap finger tight, then take a small screwdriver and by hand give a small tug to lightly 'snug' down the pinion gear and bearings - no more pressure than that is necessary, or wanted! It is supposed to be set with a inch lb torque wrench for preload but I've found that finger tight with a tiny snug sets it just as well as it was set from the factory (ie: enough to hold steady with no wobble but light enough it spins freely).
3. Install rack guide, spring and cap/tension nut.
I puchased a 3/4" (?) size bolt and 2 nuts from home cheapo that fit into the cap correctly so I could tighten down the cap/tension nut with ease. Snug down by hand & wrench until the rack gear/shaft has no lateral (forward/back & up/down) play, but moves left and right with no catching and/or binding.
4. Install locking nuts.
----------------------------------------------------------------------
For reference:
AE86 Corolla Manual steering intermediate shaft vs p/s intermediate shaft
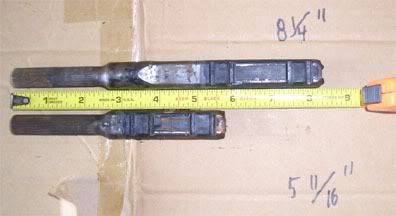
AE86 Corolla Manual rack intermediate steering shaft installed
Note: due to low height of manual rack, the steering shaft was 'pulled' out farther than shown in picture.
If you do not have the manual rack intermediate steering shaft, you can take two p/s column's, cut the end off of one column at about 3.75" (3 3/4)" and weld it to the second for the extended reach.
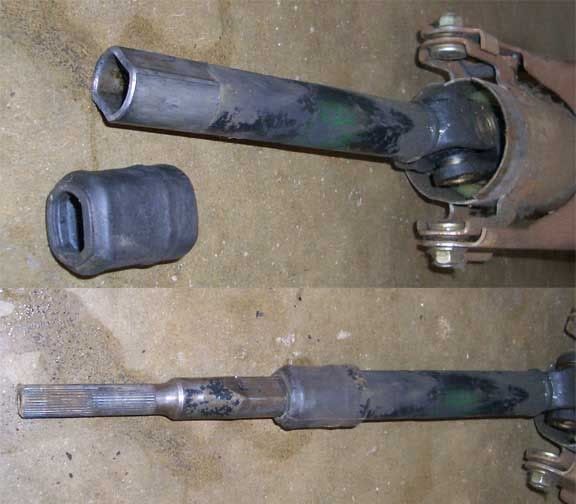
AE86 Corolla Manual vs PS rack pinion shaft size
As can be seen in the picture, the p/s and manual rack pinion shafts are different sizes. Which means you cannot use the u-joint for the p/s on the manual rack or vice versa.
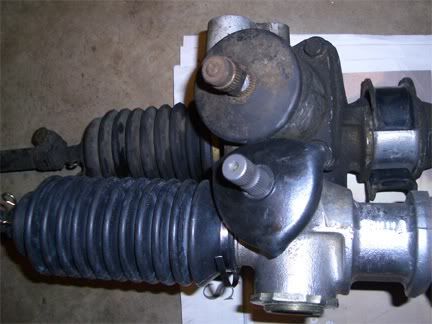
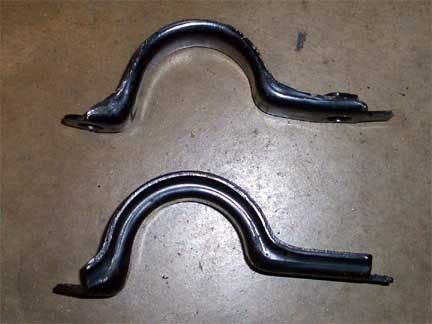
AE86 Corolla Manual (top) vs P/S (bottom) driver side brackets
I decided to go with the P/S bracket (bottom) as it is much stronger.
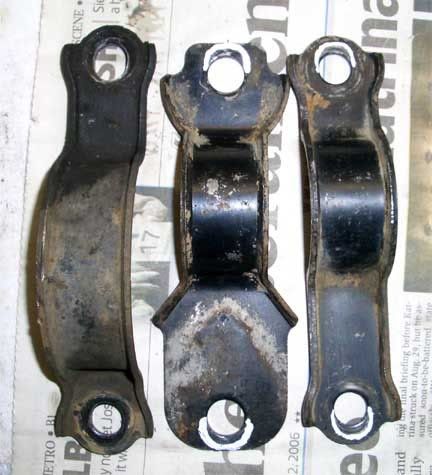
AE86 Corolla Manual Rack (center & right) vs P/S (left) pass side brackets
Note: the markings are around the areas that needed to be ground/widened to fit correctly on my originally P/S equipped vehicle. (may vary from vehicle to vehicle - not sure if it'll be necessary on anyone elses)
----------------------------------------------------------------------


 Reply With Quote
and further investigating


")

Bookmarks