Page 1 of 20 12311 ... LastLast
Results 1 to 15 of 287

Thread: 1GGZE into an RN85 Hilux Dual Cab 2WD [Beware - lots of pix]

  1. #1
    Junior Member Automotive Encyclopaedia infotechplus's Avatar
    Join Date
    Apr 2006
    Location
    NSW
    Posts
    816

    Default 1GGZE into an RN85 Hilux Dual Cab 2WD [Beware - lots of pix]

    As I am almost finished this conversion, and it is the festive season with holidays on the horizon I thought I might start up this thread and document my conversion from the 22R to the 1GGZE engine in my recently-acquired 11/88 RN85 Hilux Dual Cab 2WD.

    A little bit of history first.

    The ute was purchased after several months of looking for a suitable car to use as a tow vehicle for my race car and trailer. I scoured the online sites, Trading Post, etc and looked at literally dozens of utes including Rodeos, Tritons, Couriers and Navaras. I knew I wanted a 'Lux, one that was not too old but cheap enough. I also had in the back of my mind that I wanted to eventually do a conversion to a JDM spec unit.

    I was on my way to answering an ad for a Hilux not too far from my home when I saw another ute with a FOR SALE sign on it out front of a house a couple of blocks from my place. So I stopped, had a look, enquired about the asking price, took it for a drive, and then went off to look at the original ute I was going to also drive.

    When I got home I rang the seller, made an offer, got rejected, and went back to the Trading Post, carsales.com, etc. At this stage I was getting a bit eager as the racing season was about to begin and I had bought a trailer and finished building the racecar, but I had no tow vehicle.

    I rang the seller again that night with a slightly modified offer, and we finally settled on a price halfway between my original ofer and his asking price.

    So now I was the owner of one RN85 Dual Cab Hilux. It had to be a Dual Cab as I had to carry two musician kids (one drummer and one guitarist) and all their gear, as well as all my race gear on race weekends.

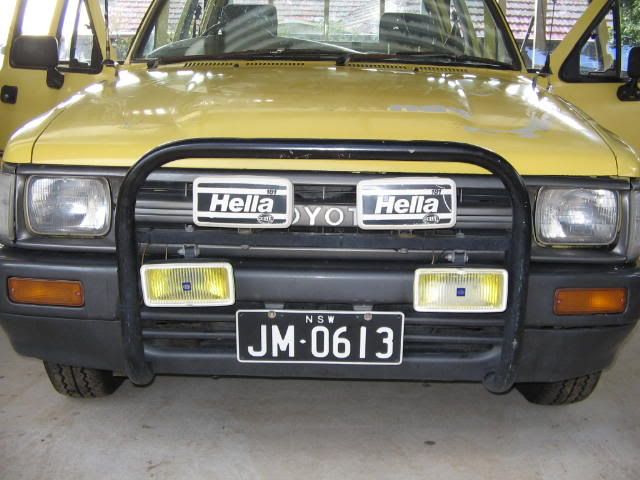
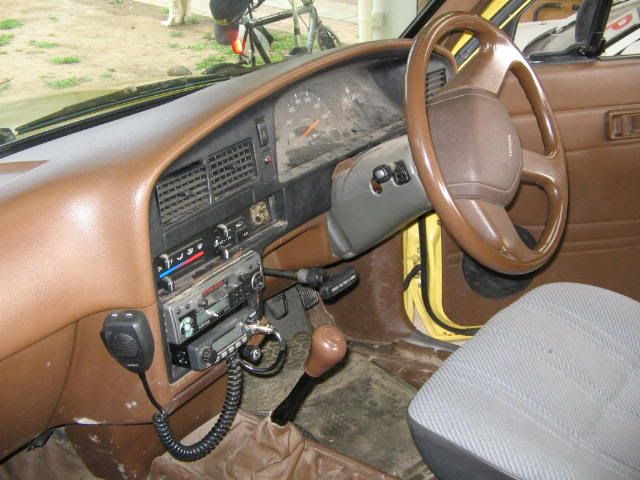
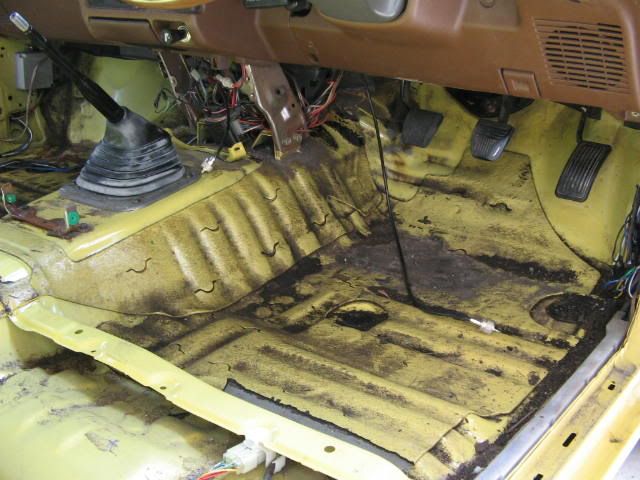
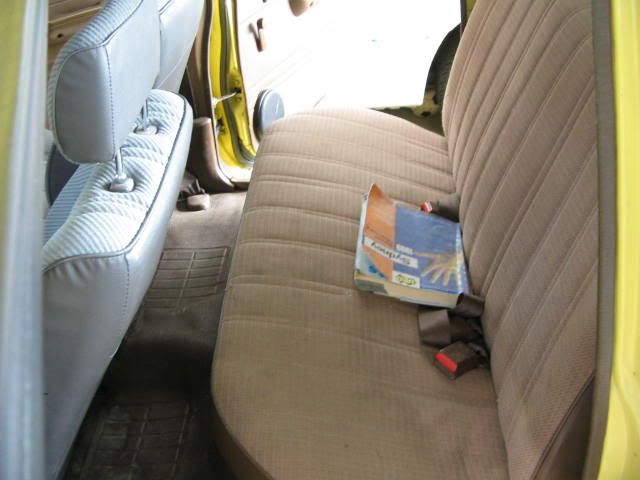
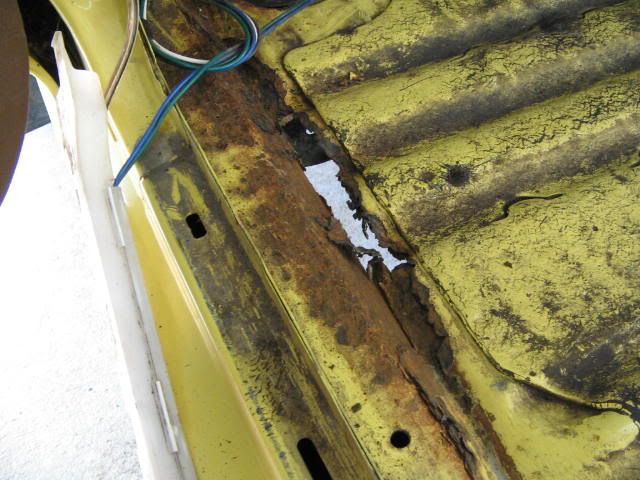
    The RN85 was an ex-hardware store delivery ute. It was mustard yellow, had builder's racks, a CB, a radio, two tired blue cloth bucket seats up front and an even more tired brown bench seat in back, vinyl flooring, and, oh yeah, a gaping hole in the passenger's foot well where rust had done its damage over a long period. The driver's side was not as bad but there was mud an inch thick under the driver's side vinyl.

    The signwriting was removed but it took a couple of layers of paint off as well. The nudge bar was removed along with the Hellas (they are for sale elswehere ) I also changed the plates.


    Interior was brown, brown and brown. It had to go.


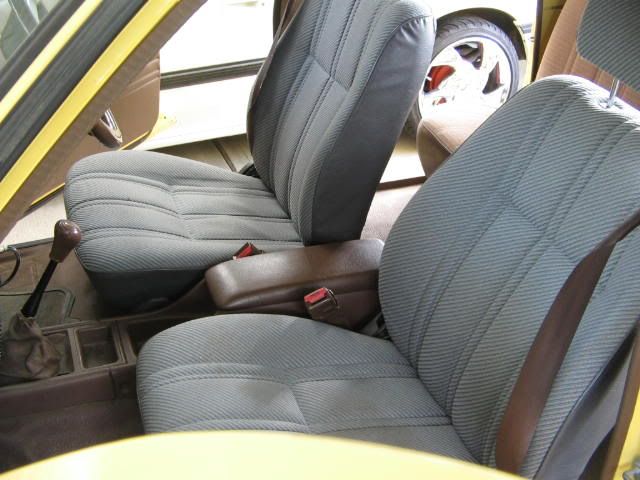
    The front seats were a later addition, and the wrong colour


    The rear bench. No amount of shampoo and gurney could save this seat. It went to the tip,


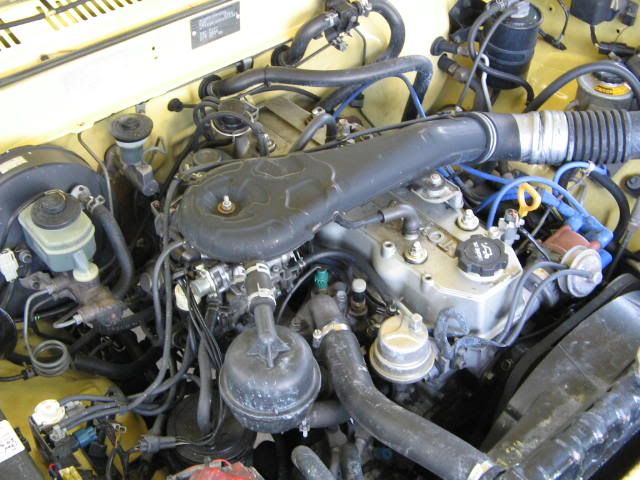
    The engine was strong when I test drove it but this was going to be a challenge to just make habitable. All my previous experience had been with Dattos and Hondas. When I pulled the dash apart I noticed the instrument cluster had been replaced - telltale pink marker pen on the back - the ute already showed almost 300,000 kms and the speedo wasn't working. That's why i pulled it. So I wondered how many kms it had really done in its life?


    It wasn't until I pulled the vinyl up that I thought I had made a mistake. Geez, that rust hole was huge and had weakened the floor.


    So I called a good friend of mine and we set about cleaning up all the rust with a large screwdriver and a bottle of rust converter.

    We welded in a piece of steel, and reinforced the floor with two layers of fibreglass. And I found why the water had come through to the floor. A large grommet in the firewall had not been replaced and water had been leaking through for who knows how long.

    In my next instalment I'll cover the initial cleanup where I purchase the complete interior of a 1996 Hilux SR5 in grey trim that the owner had rolled.

    Peter
    Last edited by infotechplus; 11-11-2007 at 04:45 PM. Reason: Add title and fix spelling

  2. #2
    Junior Member Automotive Encyclopaedia infotechplus's Avatar
    Join Date
    Apr 2006
    Location
    NSW
    Posts
    816

    Default Re: 1GGZE into an RN85 Hilux Dual Cab 2WD [Beware - lots of pix]

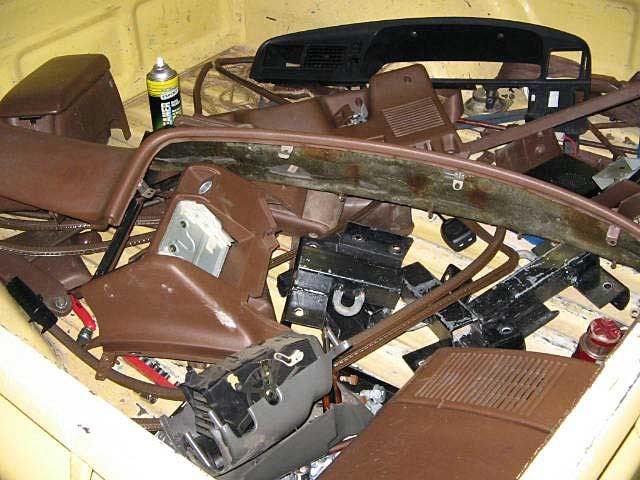
    Not long after I got the ute (the same weekend I think ) I stripped out the interior. I put two seats out of a Honda Civic into the front. Three of the mountings lined up but the fourth (at rear) had to be removed and the old Hilux bracket welded on. All the brown trim pieces were dumped into the back of the ute.


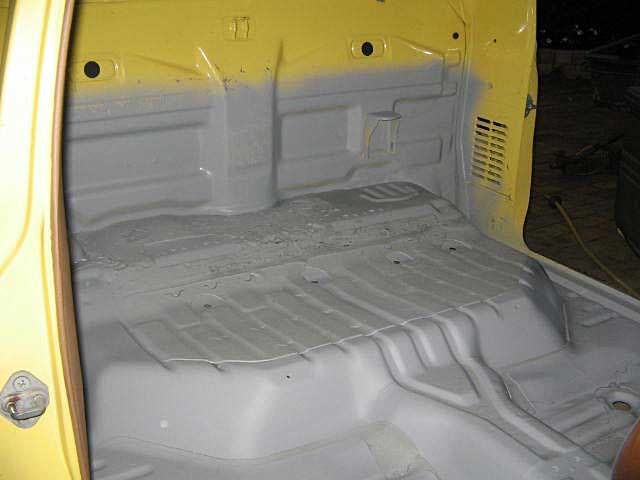
    After cleaning up the floor I undercoated the interior and painted it Harvard Blue Pearl (the same colour as my Civic). I bought a few cans of Septone Vinyl Colour in a dark grey and black, and did the roof linings and the dash pieces, as well as the cluster surround.


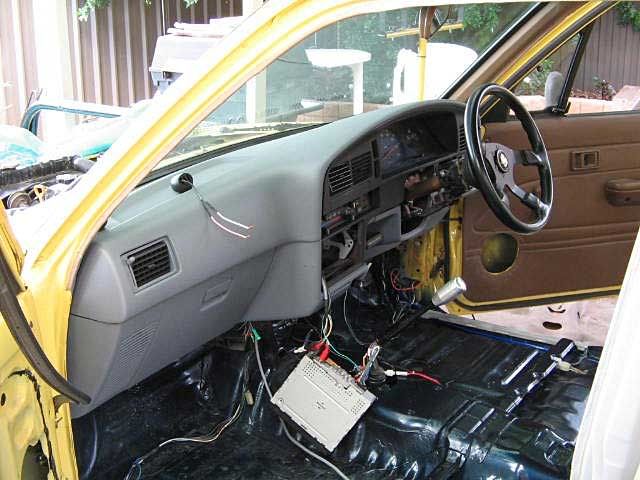
    I went to Bouncer 4WD Spares and Steve who runs the place fixed me up with the complete interior of a crashed SR5. I got everything including a great rear bench (no sag ) door handles, sunvisors, rear view mirror, exterior mirrors, chrome tail latch, digital clock, plastic floor caps, knobs for the air vents and aircon sliders, door trims, winders, seatbelts and fittings, etc. This matched up nicely with the new trim colour.

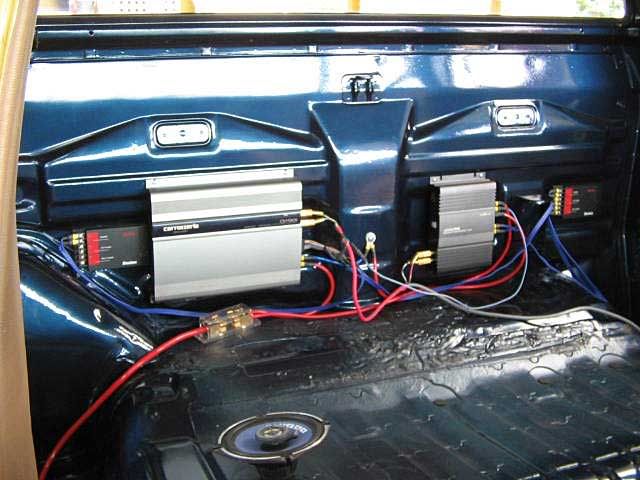
    After the paint dried I installed a stereo system behind the bench seat. This system was made up of mostly secondhand Jap gear courtesy of SSS Automotive. Split front speakers are Boston Acoustic, rear doors have a set of Sony EXPLOD that I had bought some time before, amps are Pioneer Carrozzeria 4 Channel and Alpine 2 Channel. Head unit was also Pioneer controlling a matching 12 stacker also behind the bench.


    I installed all the SR5 trim, seatbelts and door panels. So now the ute was nice and clean, had tunes, and was comfortable.

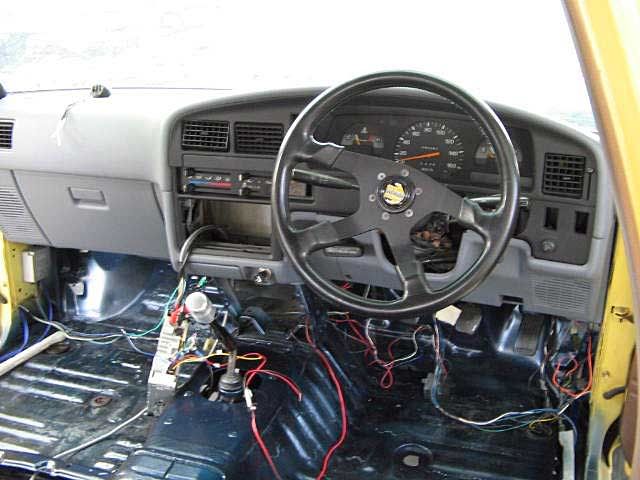
    Also from SSS Automotive I added a Momo steering wheel and RAZO polished gearknob. I tried a polished wood wheel and gearknob but I preferred the matching black in the long run.


    I bought a full carpet kit online from Knox Auto Carpets in South Australia for $140 delivered and installed it over some underlay that I got at Clark Rubber.

    I then sanded back and painted the exterior. I needed a towbar, a heavy duty one, so I bought a secondhand unit from Just Commercials in Fairfield for $100 and fitted an Electronic Brake Controller from Tekonsha for the electric brakes on the trailer.


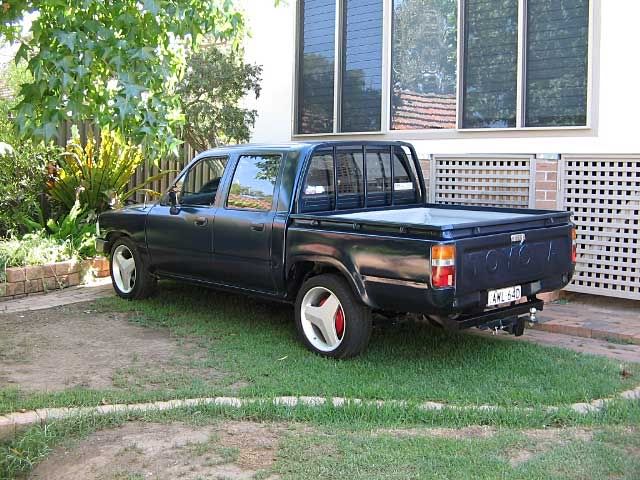
    A set of secondhand Jap wheels in 17 x 7 were sourced again from SSS Automotive. They were a bit old school but I liked them, and they were undamaged. They replaced a brand new set of wheels and tyres that were on the Hilux when I bought it.


    So at this stage the ute was left alone for the full racing season but the engine was consuming copious amounts of fuel making it uneconomical to drive on a daily basis. So I ordered a 1GGZE from SSS Automotive for that legendary low down torque and pulling power.

    Next instalment will look at some other modifications including new sports bucket seats, new wheels, and fitting the IGGZE.

    Costs so far:

    Ute - $2700
    SR5 Interior - $700
    Odds and ends (paint, stereo cabling, etc) - $240
    17" secondhand tyres x 4 (about 70% tread on each, 2 Michelin Sports, 2 Bridgestones 225 x 45 x 17 back, 215 front - $160
    Towbar - $100
    Electric Brake Controller - $165
    Carpet and underlay - $180
    Honda seats - from my Civic (which got the JDM buckets out of the race car)

    Note: Race Car - EG6 imported from Japan as a road car by SSS Automotive

    Cheers,
    Peter
    Last edited by infotechplus; 11-11-2007 at 04:53 PM. Reason: Add photos

  3. #3
    Junior Member Automotive Encyclopaedia infotechplus's Avatar
    Join Date
    Apr 2006
    Location
    NSW
    Posts
    816

    Default Re: 1GGZE into an RN85 Hilux Dual Cab 2WD [Beware - lots of pix]

    Just a brief interlude in the proceedings:

    Here's my EG6 racer sitting at SSS Automotive after being unloaded from the container. (Nov 2005).


    Here's the EG6 on track in March 2006. All work completed by me except the CAMS accredited rollcage by Wildridge Fabrications, Narellan.


    And here's the Hilux, still a work in progress at that stage, with the EG6 loaded onto my trailer. I still hadn't finished the paint and the wheels were unchanged.


    Peter
    Last edited by infotechplus; 20-12-2006 at 06:40 PM.

  4. #4
    Junior Member Domestic Engineer NeoNasty's Avatar
    Join Date
    Nov 2005
    Location
    Vic
    Posts
    640

    Default Re: 1GGZE into an RN85 Hilux Dual Cab 2WD [Beware - lots of pix]

    Sweet.

    Im looking forward to seeing the pics of the engine bay.

    I have an RA60 with a 21R-C Similar engine and I am looking forward to seeing your steering rack etc. If you have any pics Id love to know whether they are the same.
    HZJ75, RS41, JZZ30

  5. #5
    Junior Member Automotive Encyclopaedia infotechplus's Avatar
    Join Date
    Apr 2006
    Location
    NSW
    Posts
    816

    Default Re: 1GGZE into an RN85 Hilux Dual Cab 2WD [Beware - lots of pix]

    Quote Originally Posted by NeoNasty
    I have an RA60 with a 21R-C Similar engine and I am looking forward to seeing your steering rack etc. If you have any pics Id love to know whether they are the same.
    I'll post some pics tonight. Do you mean in relation to the sump modification or the use of the spacer to clear the power steering? Or just the rack itself?

    Peter

  6. #6
    Junior Member Domestic Engineer NeoNasty's Avatar
    Join Date
    Nov 2005
    Location
    Vic
    Posts
    640

    Default Re: 1GGZE into an RN85 Hilux Dual Cab 2WD [Beware - lots of pix]

    More the spacer for the power steering and also the rack itself.

    Cheers
    HZJ75, RS41, JZZ30

  7. #7
    Junior Member Automotive Encyclopaedia infotechplus's Avatar
    Join Date
    Apr 2006
    Location
    NSW
    Posts
    816

    Default Re: 1GGZE into an RN85 Hilux Dual Cab 2WD [Beware - lots of pix]

    Quote Originally Posted by NeoNasty
    More the spacer for the power steering and also the rack itself.

    Cheers
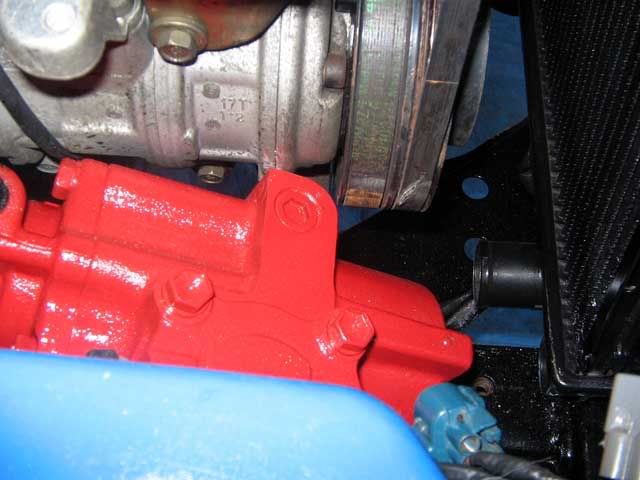
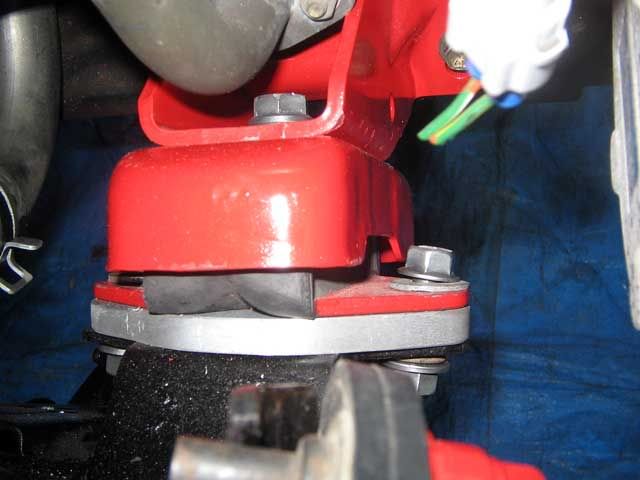
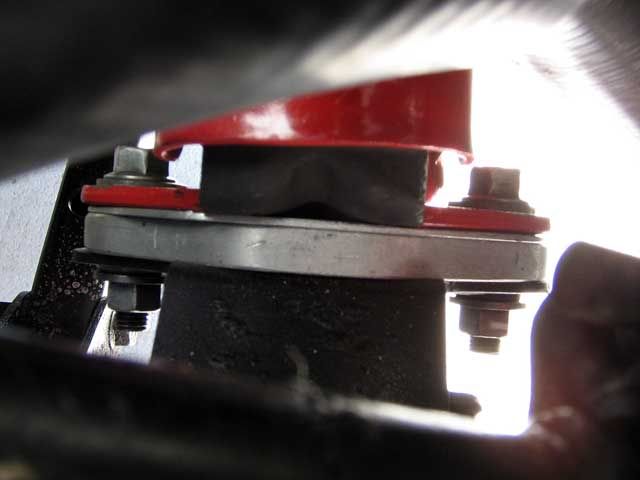
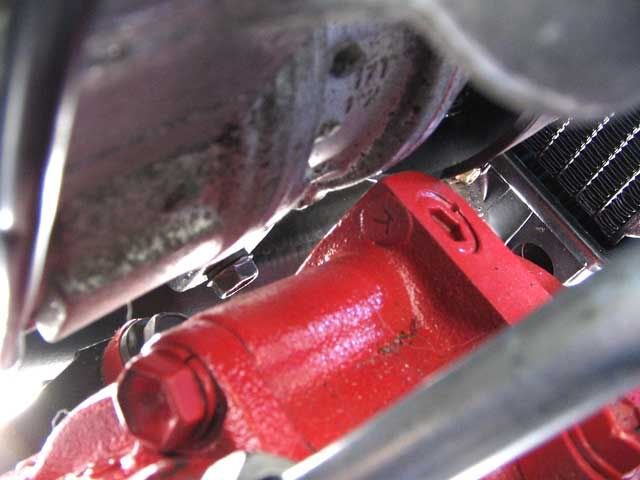
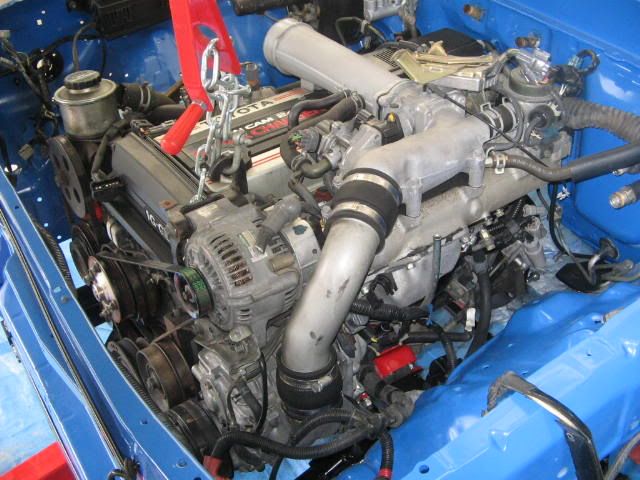
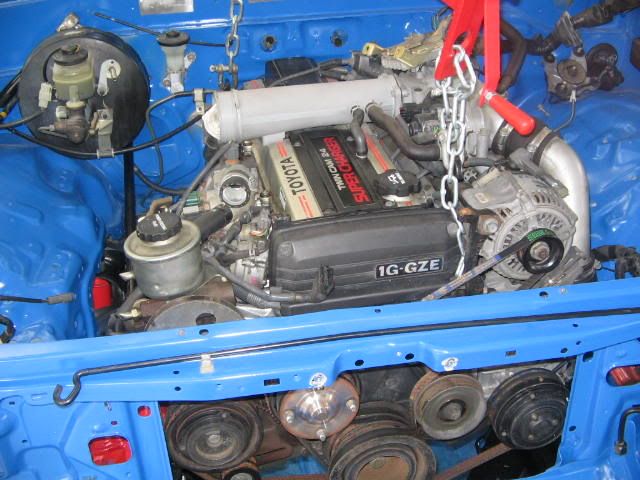
    The problem: The AC unit contacts the power steering unit at the base of the steering column even with the 10mm spacer (on my conversion at least)


    NOTE: Changed the spacer width to 10mm from 20mm. My bad!

    So what I did was a little trial and error. I added a 5mm spacer but it was too much and the 1GGZE would not settle properly on the mounts. So I made a 2mm spacer and that did the job.


    Peter
    Last edited by infotechplus; 11-11-2007 at 05:00 PM. Reason: Changed 20mm to 10mm for the spacer

  8. #8
    Junior Member Automotive Encyclopaedia infotechplus's Avatar
    Join Date
    Apr 2006
    Location
    NSW
    Posts
    816

    Default Re: 1GGZE into an RN85 Hilux Dual Cab 2WD [Beware - lots of pix]
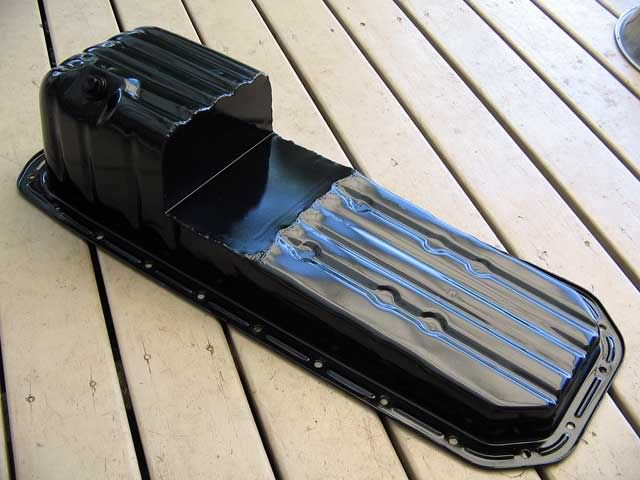
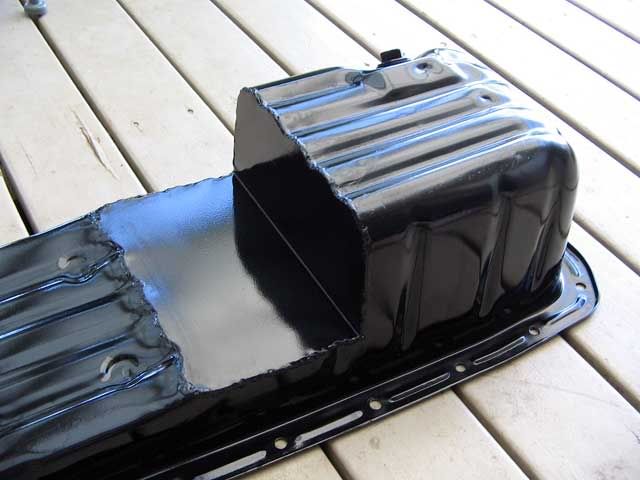
    This is the 1GGZE front sump modified to clear the steering arm crossmember in the Hilux:


    I used a piece of cardboard and traced the outline of the cut sump (combination of hacksaw and angle grinder), then transferred that to a piece of mild steel. This was bent at 90 deg. then cut and trimmed with a file, and then TIG welded into place.

    A lick of gloss black made it all pretty.

    [NOTE: The cut was made to the front of the first indent on the pan side. This was a compromise from going another 1 - 2cm and possibly fouling the oil pickup inside the pan. As it is, on full lock the steering arm just makes contact with the back of the modified pan.]
    Peter
    Last edited by infotechplus; 14-11-2007 at 06:42 AM. Reason: Spelling

  9. #9
    Junior Member Domestic Engineer NeoNasty's Avatar
    Join Date
    Nov 2005
    Location
    Vic
    Posts
    640

    Default Re: 1GGZE into an RN85 Hilux Dual Cab 2WD [Beware - lots of pix]

    Humm, my Celicas steering is different. It has power steering and the box for it isnt at the front of the engine bay like yours, its back a lot more. Hummm I'll have to think about this one.

    Thanks for the pics.
    HZJ75, RS41, JZZ30

  10. #10
    Village Idiot Automotive Encyclopaedia
    Join Date
    Nov 2005
    Location
    Hoppers Crossing
    Posts
    1,130

    Default Re: 1GGZE into an RN85 Hilux Dual Cab 2WD [Beware - lots of pix]

    nice work peter, good work.
    nice color blue too

  11. #11
    Junior Member Automotive Encyclopaedia infotechplus's Avatar
    Join Date
    Apr 2006
    Location
    NSW
    Posts
    816

    Default Re: 1GGZE into an RN85 Hilux Dual Cab 2WD [Beware - lots of pix]

    Thanks Grega,

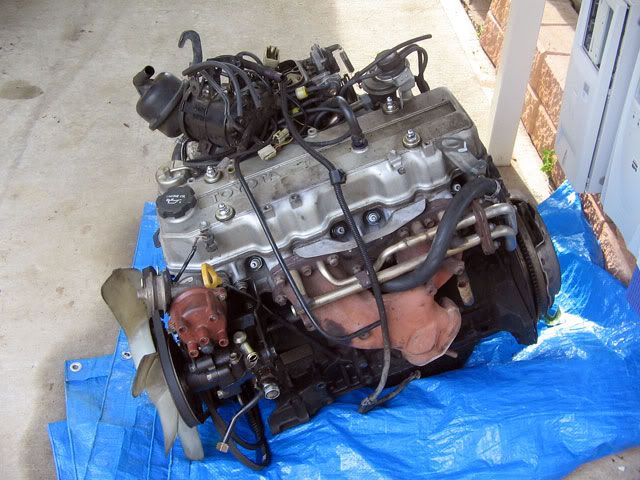
    With the 2006 racing season over I decided to finally do the 1GGZE conversion. I actually ordered and paid for the engine exactly a year ago but was in no position to do anything with it. As it turned out this was a good thing as the 1GGZE I finally picked up was a 3rd Gen, low km unit (70K) with harness and assorted bits. A quick borescope check and compression test revealed a unit in good condition.


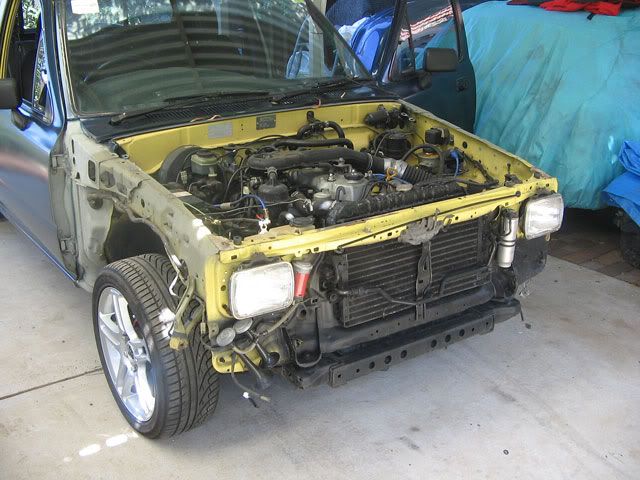
    I started by taking the bonnet, guards, and wheels off the Hilux, and jacking it up to allow me to get underneath it. I always keep the jack under the diff as insurance.

    I removed the 22R in one afternoon and set it aside. I kept everything in case I needed some bits for the 1GGZE.

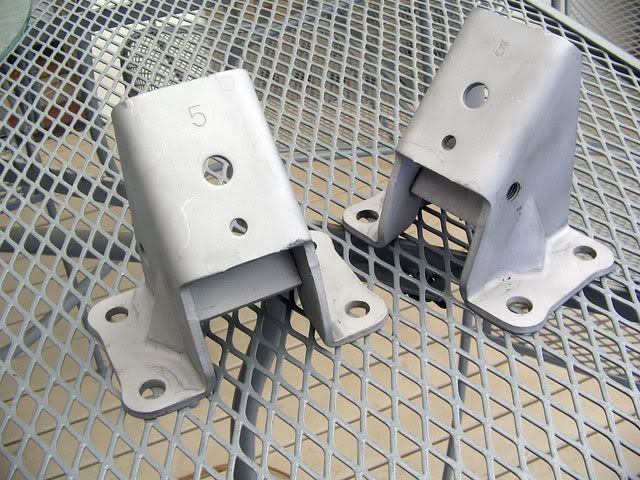
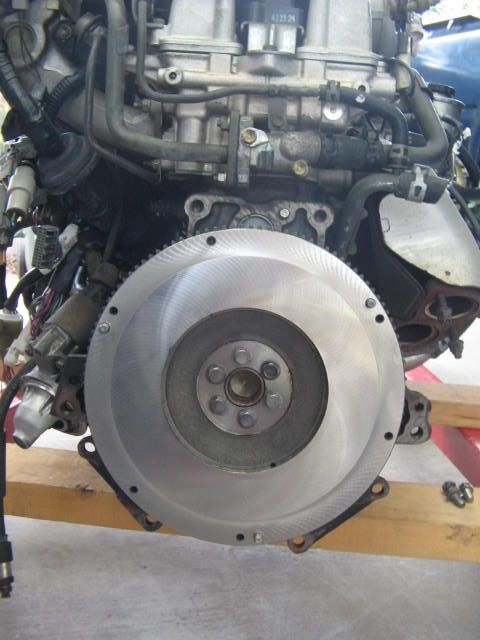
    Various parts I took off the Hilux that I would be reusing I sandblasted. This included the 1G bellhousing, clutch slave cylinder, 3Y engine mounts that i bought and power steering box. I also had the 1G flywheel (thanks again Grega) machined.


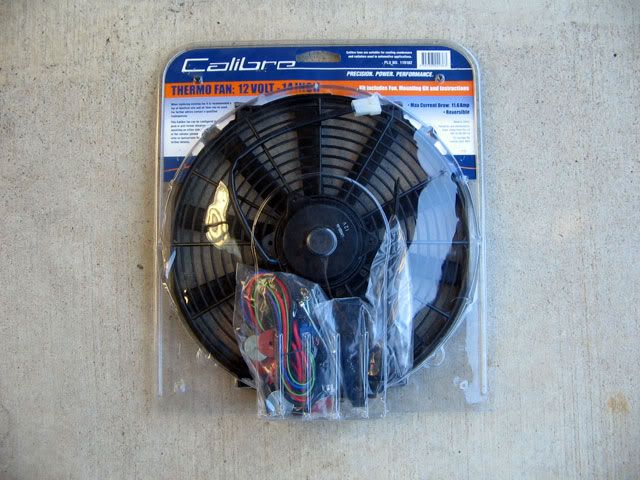
    Given the limited amount of space I removed the engine fan and mounting assembly off the 1GGZE, and purchased a 12" (later swapped for a 10") thermo fan. I removed the original radiator and support surround. In fact I stripped the whole engine bay ready for a cleanup and paint!


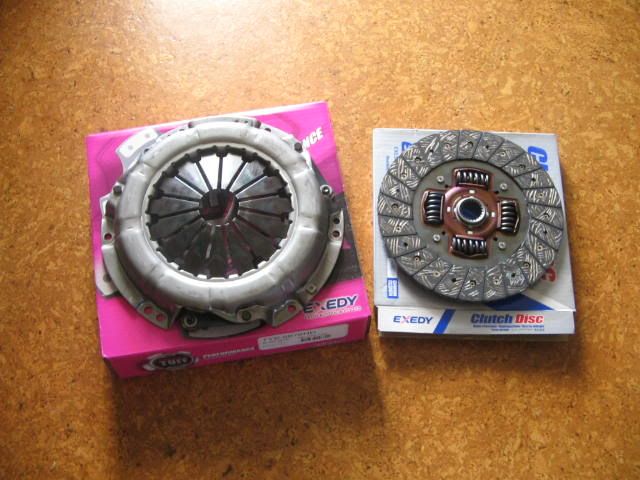
    I also purchased an EXEDY Safari Tuff HD clutch Kit from Western Brake and Steering at Girraween.


    The next step was to clean the engine bay with W&GR and give it a light sand. I was actually suprised at how good it came up. I degreased the original 5 speed and painted the bellhousing before putting them together.


    In the next instalment I'll cover the engine bay paint and begin the install of the 1GGZE.

    If you can't wait for the next instalment, there are some photos of the 1G in the Hilux at this thread:

    http://www.toymods.net/forums/showthread.php?t=15962

    Peter
    Last edited by infotechplus; 14-11-2007 at 06:56 AM.

  12. #12
    Junior Member Automotive Encyclopaedia infotechplus's Avatar
    Join Date
    Apr 2006
    Location
    NSW
    Posts
    816

    Default Re: 1GGZE into an RN85 Hilux Dual Cab 2WD [Beware - lots of pix]

    OK. We're getting there ... slowly.

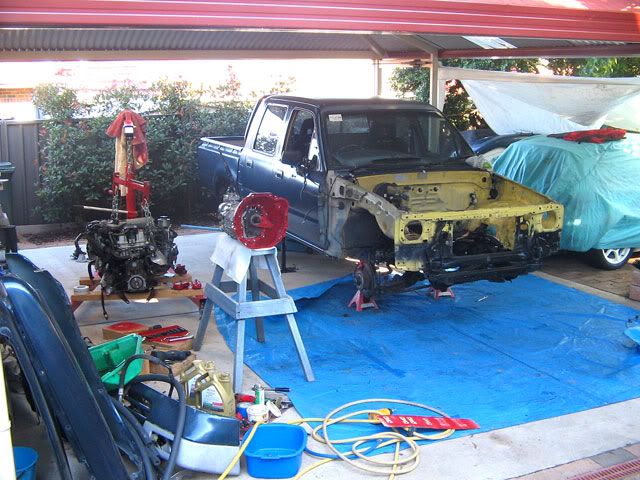
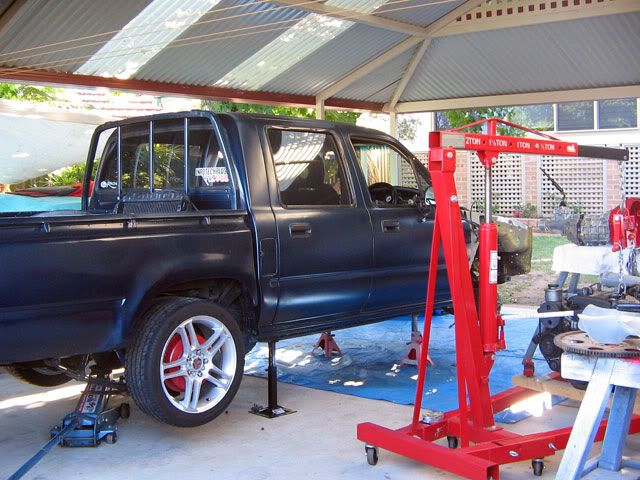
    There's nothing beats a good work area when doing a conversion (or any car work for that matter). My garage is currently full of engine bits and the like, so I am using the double carport we put in a couple of years ago. This is ideal since it has a level floor, excellent night lighting and good visibility during the day. It allows me to put the car up and still have plenty of space around it.


    Everything ready to go now.


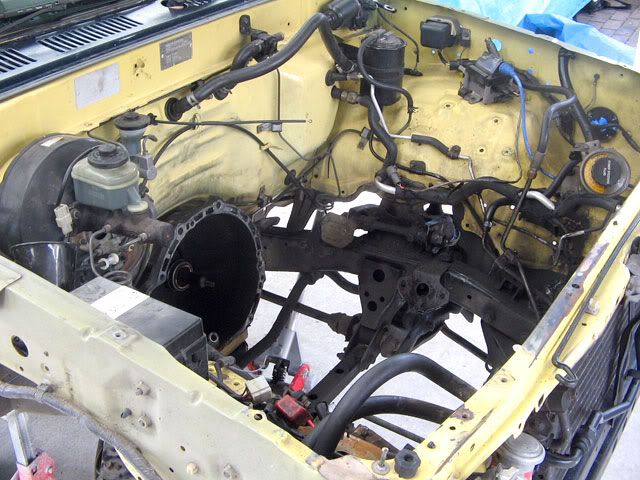
    So here's the 22R out of the Hilux, just set aside.


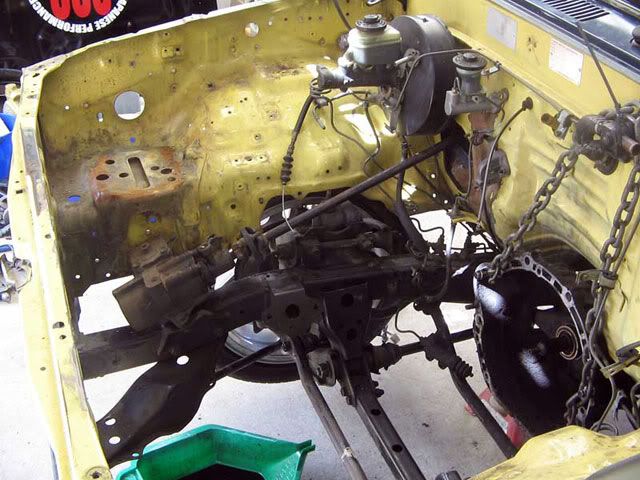
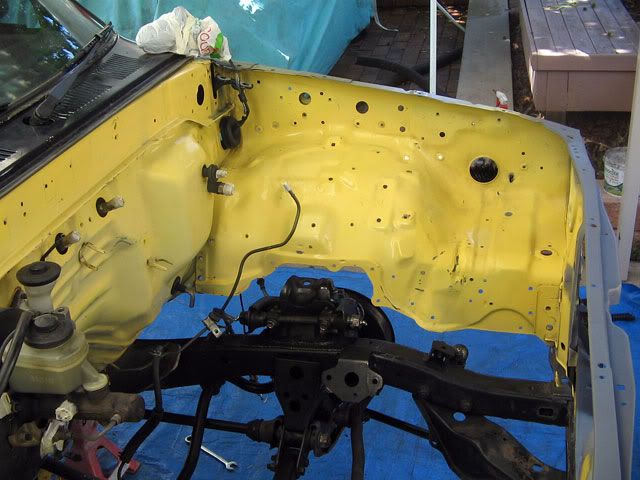
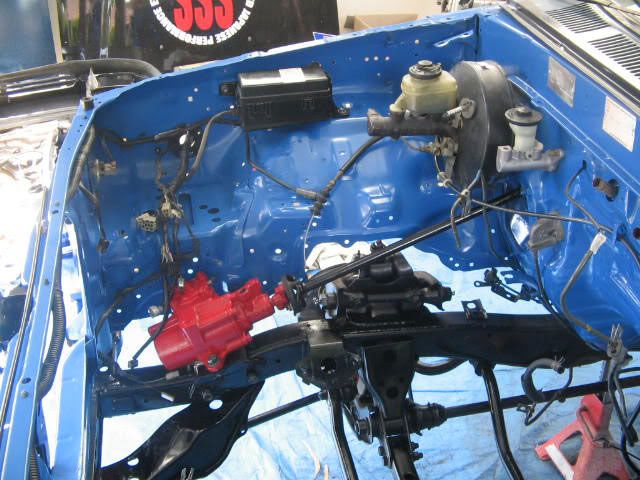
    So this is all that's left after the intial pull. I decided to remove everything else (except for the brake booster) to make it easier for painting.


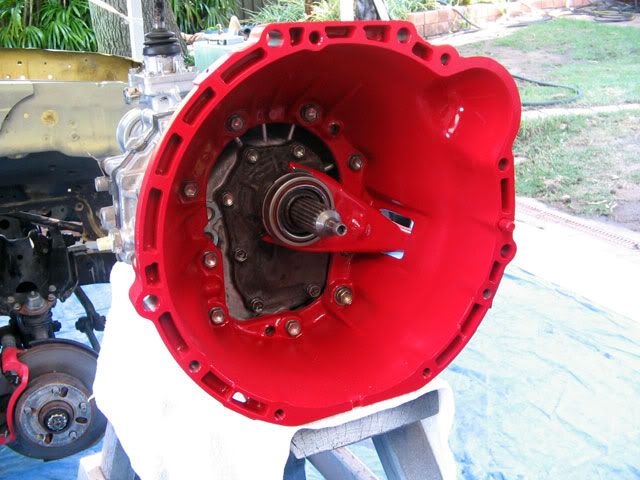
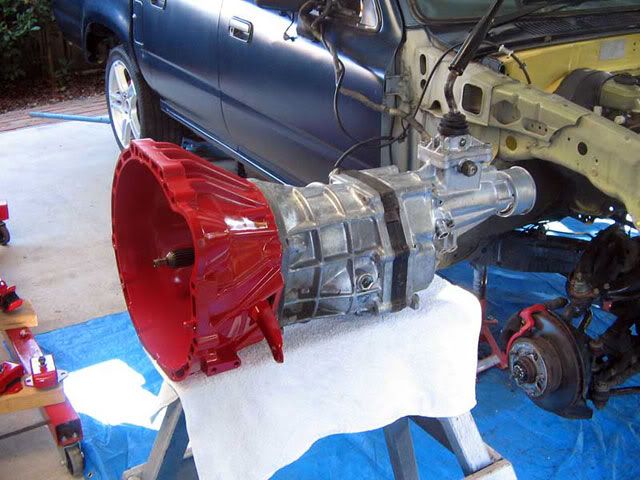
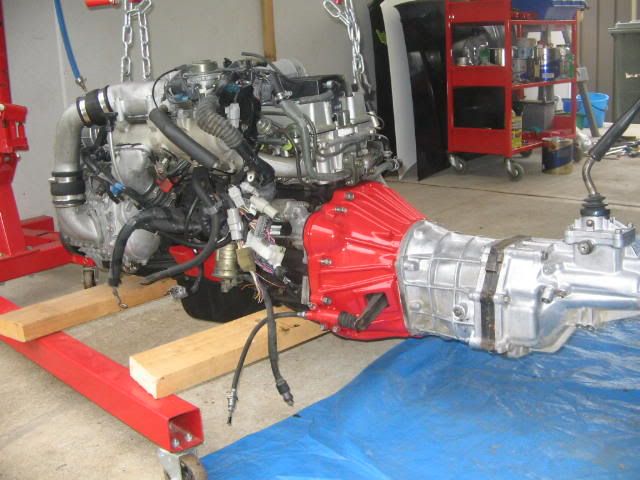
    Here's the gearbox and bellhousing all bolted up, ready to install.


    Copious amounts of W&GR were used after two sessions with HD degreaser and a gurney. The old bellhousing was so heavily caked with grime you could not see the bolts that held it to the gearbox.


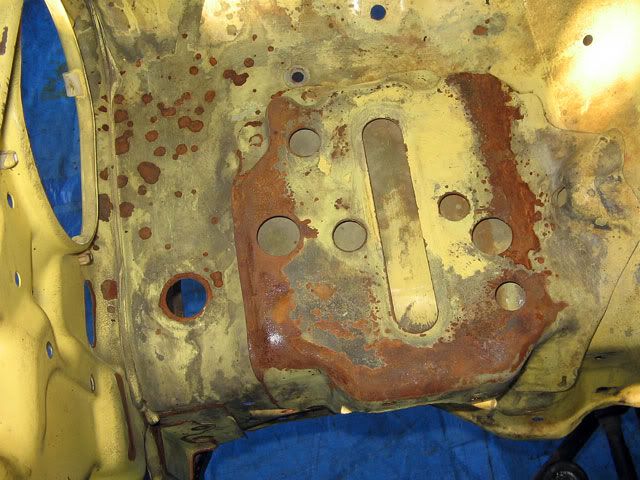
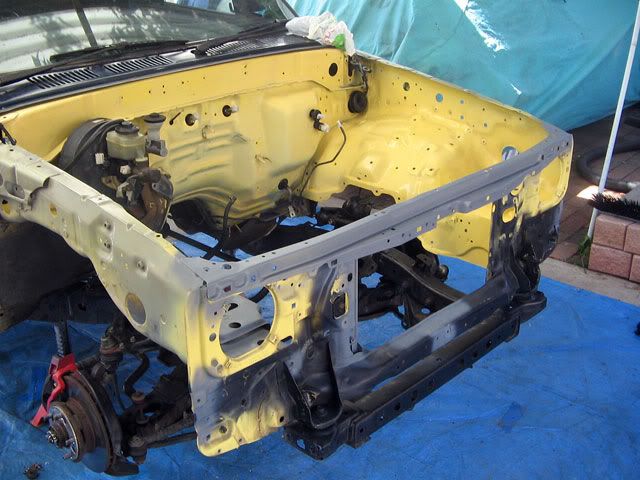
    As I said earlier I was quite suprised at how the paintwork came up in the engine bay after the clean. But that wasn't going to deter me from getting rid of the original yellow!

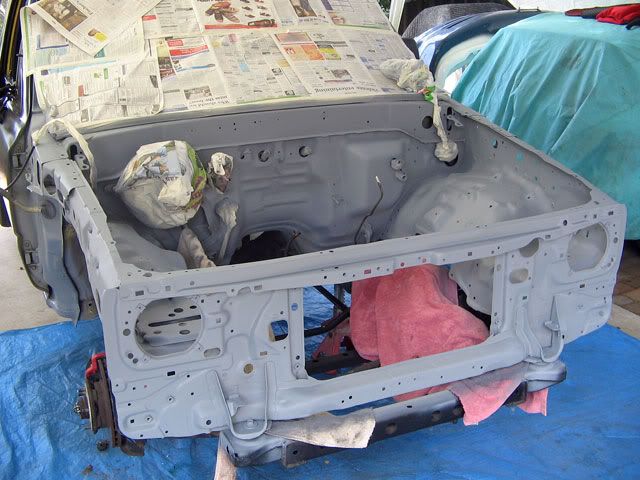
    The first job was to clean up the battery area which had rusted due to corrosion from the past batteries. Then I sanded the front frame back to bare metal (the top bit anyway) and gave it a coat of etch primer. This area is highly visible and it pays to have a clean, smooth surface to paint.


    So now I was ready to paint. At this stage I should say I have read a few threads where guys have asked about painting a car. My advice is to seek out your local TAFE College as they may offer assistance in this area.

    Earlier in the year I did a 12 week course at St. George TAFE. Cost was $300 but considering that I had full use of a workshop (along with about 4-5 other guys) one night a week for 3 hours, two spray booths and baking ovens, plus use of the paint (basic colours, undercoats, primers, and sanding tools), as well as a teacher to guide me I think that is great value. Consider hiring a spray booth only and the hourly rate can be well over a $100. Ring your local TAFE and enquire - you never know.

    And a course like this will make you appreciate how nice it is to use a very high quality (read: professional) spray gun as they have at TAFE. Gravity fed, HVLP (High Volume Low Pressure) Devilbiss units.

    Peter
    Last edited by infotechplus; 14-11-2007 at 07:05 AM. Reason: Report all photos from Photobucket

  13. #13
    Junior Member Automotive Encyclopaedia infotechplus's Avatar
    Join Date
    Apr 2006
    Location
    NSW
    Posts
    816

    Default Re: 1GGZE into an RN85 Hilux Dual Cab 2WD [Beware - lots of pix]

    The colour I chose was called Toyota Blue. It's a colour from the 80's Toyota catalog - TOY882 is the paint code. I thought it was more in keeping with the "vintage" of the RN85, it has a nice presence without being too "look-at-me", and it was less than $100 for 4 Litres

    The top photo is a better representation of the colour as it was taken with a flash setting on the DC.

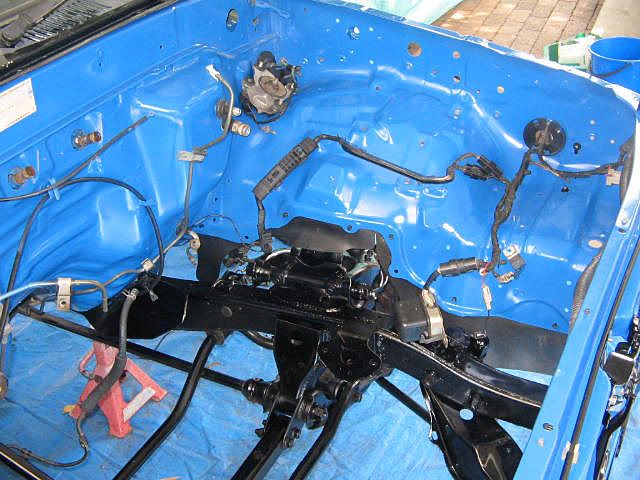
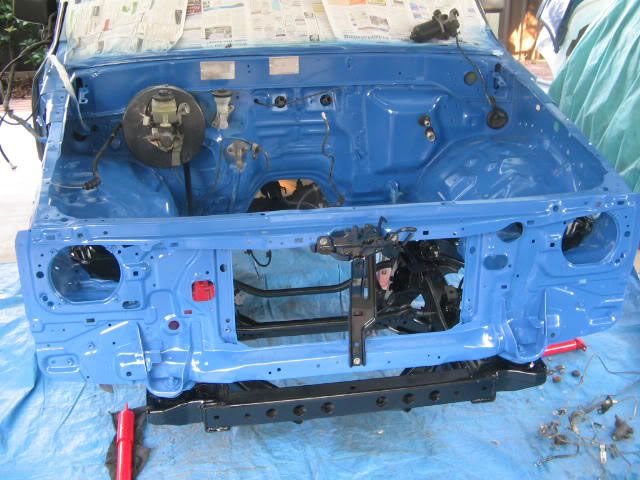
    Here's the engine bay after two coats of colour and three of Acrylic Clear. I only used Premium Thinners on colour and clear coats. Save the GP Thinners for undercoating only.


    I also gave the frame (rails,suspension, sway bar) two coats of Chassis Black which should protect it for years to come and provides a nice gloss finish. Again, this was after a lot of elbow work with degreaser and W&GR.

    If anyone wants more detail I have a lot more photos. Any questions as well, I'm happy to assist.

    Peter
    Last edited by infotechplus; 14-11-2007 at 07:10 AM. Reason: Photobucket update

  14. #14
    Junior Member Automotive Encyclopaedia infotechplus's Avatar
    Join Date
    Apr 2006
    Location
    NSW
    Posts
    816

    Default Re: 1GGZE into an RN85 Hilux Dual Cab 2WD [Beware - lots of pix]

    Here's an assortment of photos with some other details:

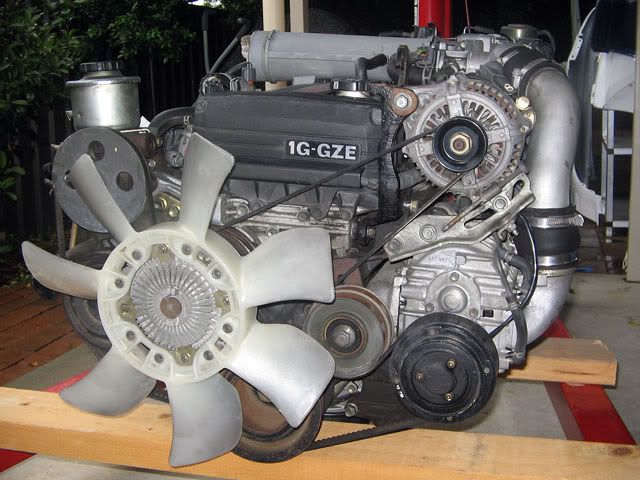
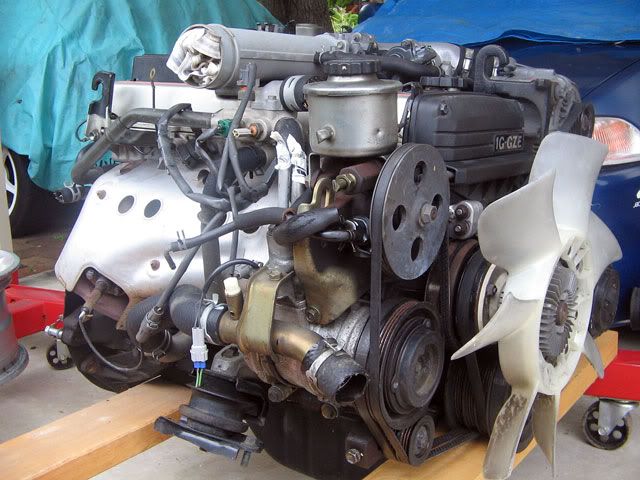
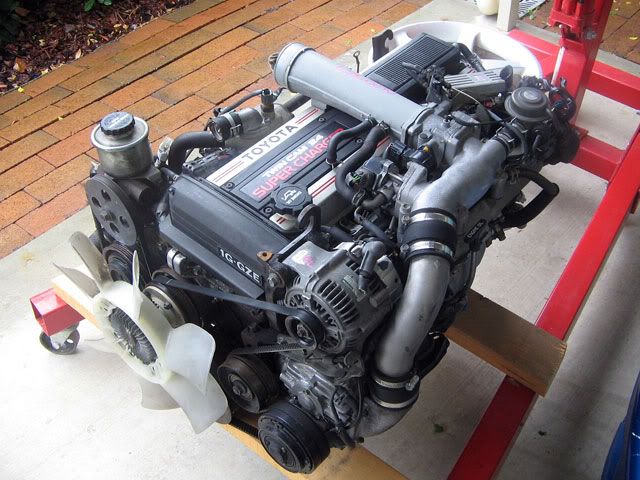
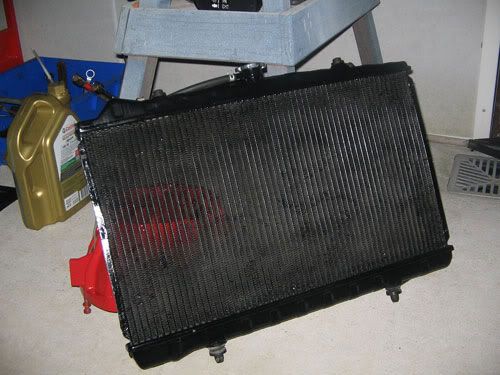
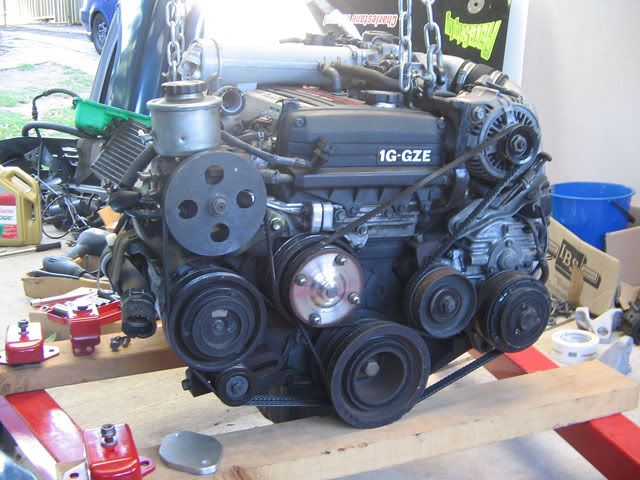
    This is the 1GGZE with the fan and clutch removed. There is not enough room in the RN85 engine bay to accommodate the original fan so you need to remove it, and fit a thermo to your radiator, which in my case, was a Nissan CA18. The clearance is just about one finger wide using a 10" unit mounted directly in the centre, near the top of the radiator.


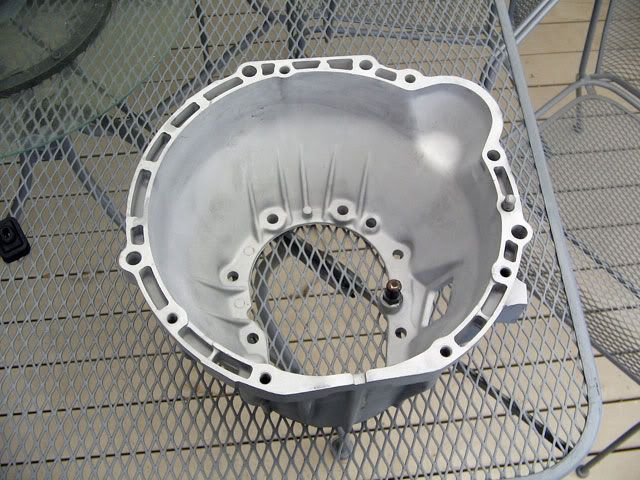
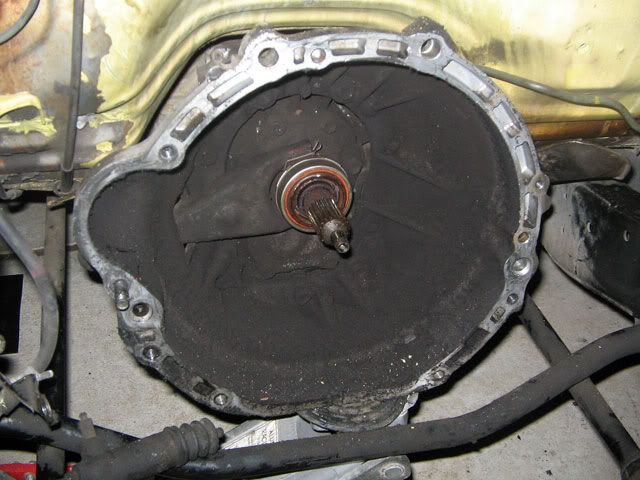
    This is the old bellhousing. As I said earlier it was heavily caked with grime. You can also see to the left where a leak from the clutch reservoir has stripped the firewall of paint.


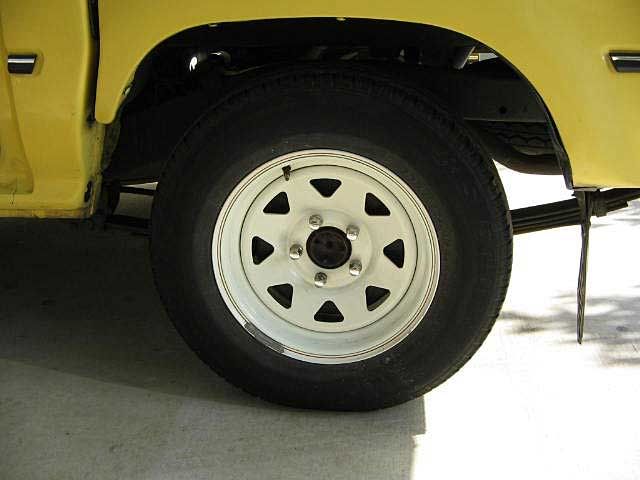
    As much as I liked the previous three spoke wheels - they were Enkei Selbach Tri Spokes, I swapped them for this set of 17 x 7s Hokuto wheels, which I cleaned up, sanded, and sprayed with 2Pac wheel silver and then clearcoated. This was good as I could then transfer the tyres I had bought for the Crimson wheels on the new ones.


    This is the other side of the engine bay with some electrical items reinstalled. The power steering unit was sandblasted before being painted.


    Peter
    Last edited by infotechplus; 14-11-2007 at 07:26 AM. Reason: Added some detail

  15. #15
    Junior Member Automotive Encyclopaedia infotechplus's Avatar
    Join Date
    Apr 2006
    Location
    NSW
    Posts
    816

    Default Re: 1GGZE into an RN85 Hilux Dual Cab 2WD [Beware - lots of pix]

    I decided to test fit the 1GGZE bellhousing and gearbox on the engine, and to make sure I had everything bolted up correctly. As well I could measure the overall length and decide if it was possible to install everything in one go. Alas, this was not the case so I had to install the engine, and then bolt up the bellhousing and gearbox from underneath.

    The gearbox mounting point - there's a plate on the crossmember - needs to have its holes elongated about 15mm. I removed the plate and made the modification. It also meant having to remove the intermediate tailshaft. [Make sure you mark the orientation of the bolts so that you bolt everything up in the same position.]


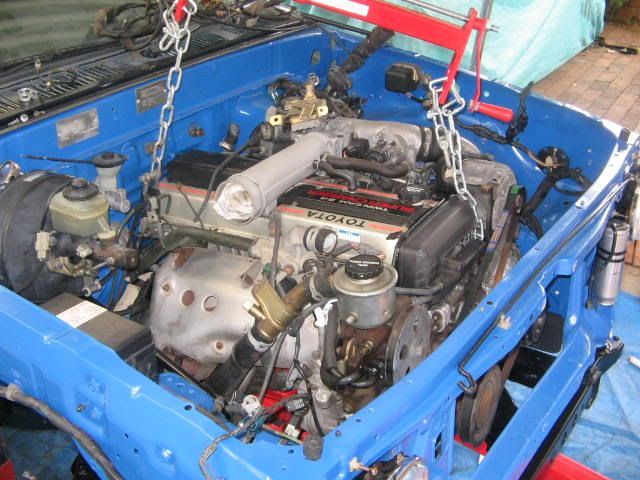
    Engine Trial Fit

    Trial fitting the engine, and checking the function of the 10mm spacer, was next on the agenda. This was because the heater outlet at the back of the 1GGZE needs to be modified slightly to clear the firewall of the RN85. As it turned out I didn't bend it far enough forward so it lodged itself against the firewall. Later, when everything was fitted up and the engine mounts were tight, I removed the cut off water hose, and bent the pipe further forward courtesy of a 3/8 inch stubby extension bar. Then I could fit the new heater hose.


    Removing everything from the firewall also helped with the fitting, especially the heater control unit.

    Peter
    Last edited by infotechplus; 14-11-2007 at 07:30 AM. Reason: Photobucket Update

Similar Threads

  1. Rn110 hilux 1GGZE conversion
    By Bullfrog in forum Engine & Driveline Conversions
    Replies: 28
    Last Post: 15-02-2009, 08:17 PM
  2. Will RN85 grille fit on my 86 hilux ?
    By quicknissan in forum Tech and Conversions
    Replies: 1
    Last Post: 19-10-2006, 07:08 AM

Bookmarks

Posting Permissions

  • You may not post new threads
  • You may not post replies
  • You may not post attachments
  • You may not edit your posts
  •