
 Reply With Quote
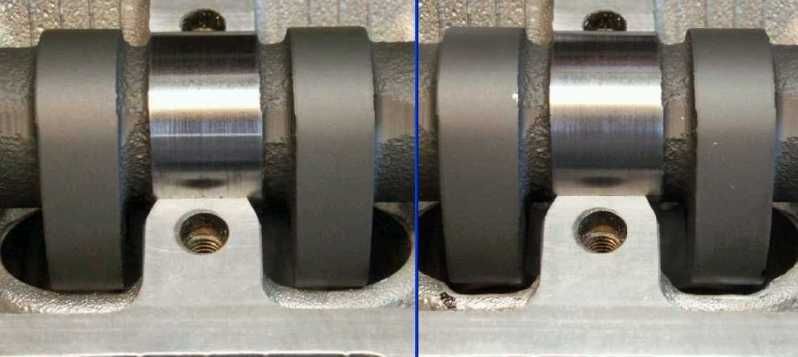
Some VERY big cams..... stock on right
They needed a bit of help... the bucket cradles get "massaged" for clearance


Been a while...
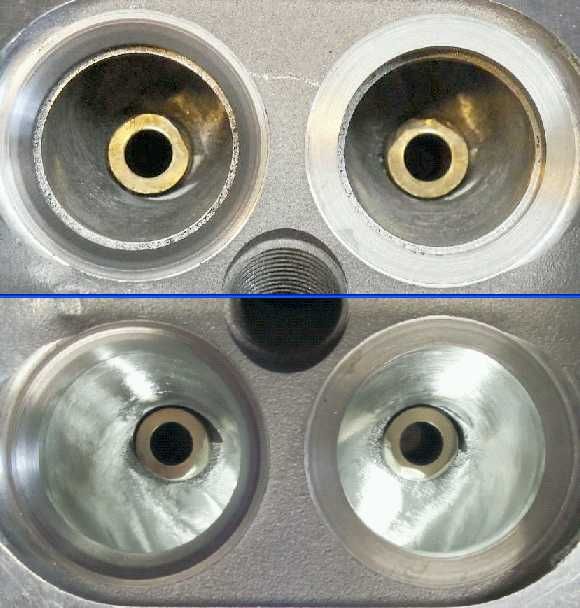
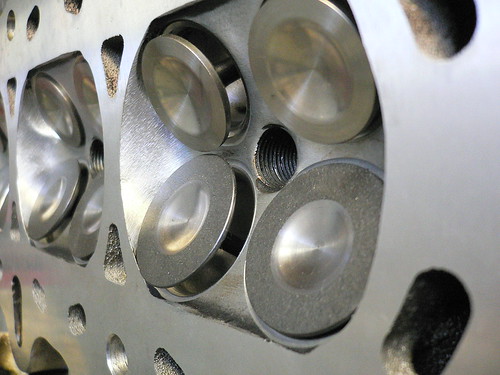
this is my first O/S valve head, and since I was using a cutting bit inside the bowls for the first time, I've been focusing on getting it right.....
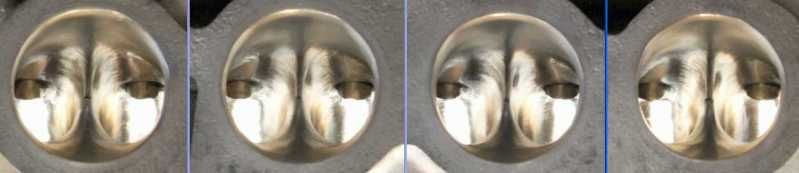
So, here are the four O/S exhaust ports... in order(#1 on left, 4 on right)
The obvious signs this is an O/S valve head... the thinned splitter, and the ample volume to flow past the guide, what you can't see from this perspective is the ample room on the other side of the guide as well.
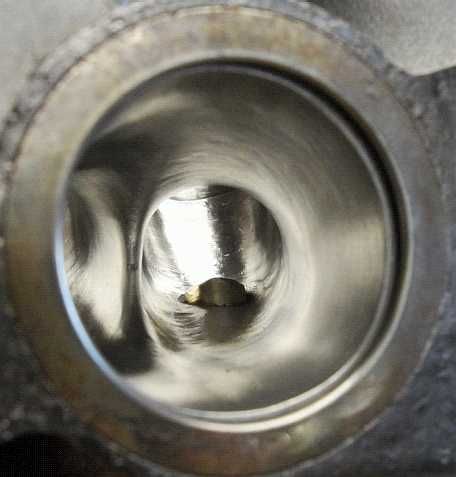
So, since those don't show it all, here is a view @ a single bowl...
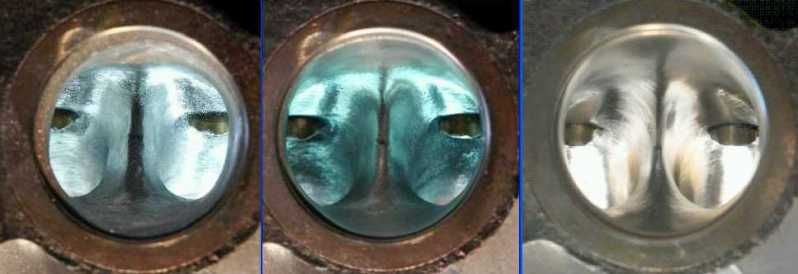
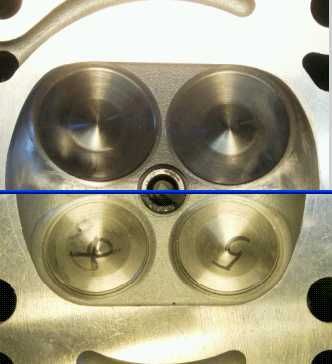
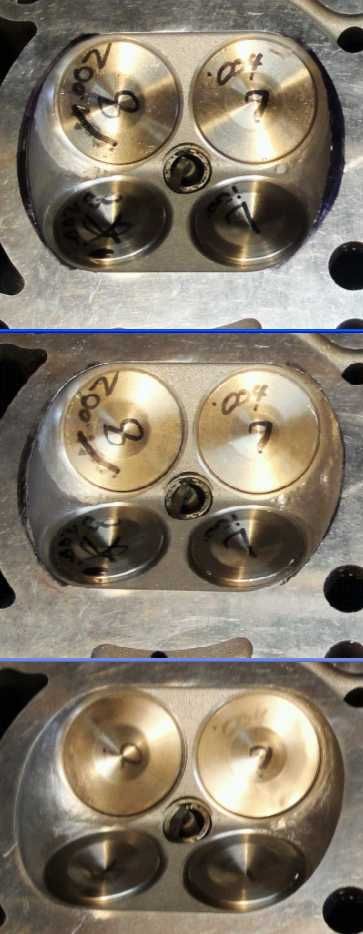
Another view... this time a 3 panel of the progression of exhaust port #3
focus on the splitter and watch as it changes based on need
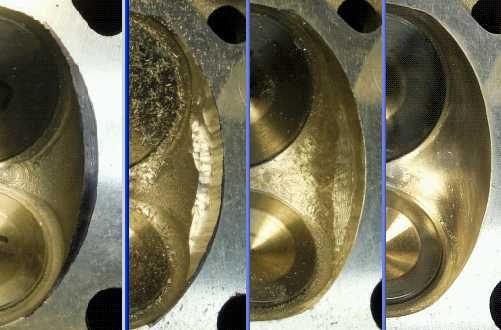
Now for a unique 2 panel... the top half of the photo below is above... the bottom half is the updated photo showing the bowl work complete. The lower view was mirror imaged to show port to port comparison
Information is POWER... learn the facts!!
Some VERY big cams..... stock on right
They needed a bit of help... the bucket cradles get "massaged" for clearance
Information is POWER... learn the facts!!
What size cams OST?
Intake: Valve lift .410 (10.410 mm), Duration Adv 297°, Duration @.040 (1 mm) 259°Originally Posted by knightrous

Exhaust:Valve lift .400 (10.160 mm), Duration Adv 300°, Duration @.040 (1 mm) 250°
Information is POWER... learn the facts!!
What tool do you use for cutting the valve seat angles? Something like a neway hand tool or a machine?
Did you enlarge the couterbores for the new seats?
Nice work!
The seats are machine cut. The seats were installed, (and are being cut) by Loynings. We are using one piece 1SZ buckets (16 - the thickest) and Loynings will machine the valve seats
The plan is the valve + the bucket + cam clearence. Calculate that and machine the seats so the valve clearances are set. The advantage to doing the seat depth this way... it allows for an additional rebuild, or 2 without changing any parts. When the seats get re-cut(@ a future rebuild), either the valve tip, or the shim itself gets machined a similar amount and valve clearance remains.
Information is POWER... learn the facts!!
OST - good information as always --- Thanks for sharing and including such a host of quality shots.. I wouldn't be suprised if you ended up working at Loynings one day before he gets too old or eve part time if they were occasionally short staffed.. You've obviously spent a bit of money and time with them, learned a lot.. and looks like they appreciate your enthusiasm..
Off-topic.. thinking of your 4afze build, interested in doing something similar with some left over bits n pieces. Have you ever tried to fit 7afe cams in an early 4afe head?
4AFE/gearbox issues, 4AGT/ZE replacement changes to fully blown 7AGTE project...
https://www.facebook.com/gerard.mang...1485304&type=3
The Corolla 4WD fan club: https://www.facebook.com/Corolla.Ae95.4wd?ref=hl
PM sent...
great thread so far keep it coming
I've not tried to fit the later cams into the earlier head.... mostly because I don't have a later set of cams to try....
I'm not sure about working for them.... I'm ornery and cantankerous...(major league A.D.D.) with that said, on my lottery list... is buying Loynings... that... and importing my AE71 to the Nordschleife for a weekend of lapping

Information is POWER... learn the facts!!
OH... MY LORD..............
The parts delay, and machine work for this head culminated back in mid September, that was just before/as I began a different build. I chose not to run both threads @ the same time... AND I used that different build to re-familiarize myself with removing material from the chamber...
mind you nothing other then doing it gets you comfortable with removing MASS QUANTITIES of ALUMINUM from the combustion chambers of a $2500 head........ and hoping you don't fudge it up
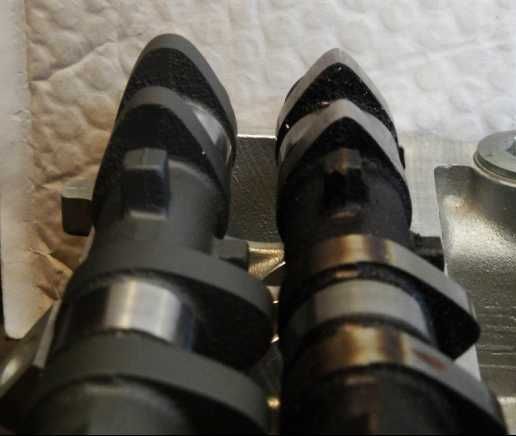
But I move a bit too quickly over the machining details... so let me catch up. There is much required to do and check when preparing an O/S valve head that runs 300 duration 10+mm lift cams. Many here have checked valve to piston clearance when building their engines.... but how many of you had to check for valve to valve clearance??? Some of you know what I'm referring too, but the rest???
Valve to valve clearance is something that must be done on 40+ degree valve angle heads(Toyota 4 valve "G" heads) when using LONG duration high lift cams in conjunction with O/S valves. The camshafts are installed, and "timed" to each other. The camshafts are rotated slowly to make sure the intake valves don't hit the exhaust valves... and visa versa.
not the head I'm working on, but it shows potential for valve to valve contact
Once this is verified, final depths are determined by measuring the 1SZ buckets (the thickest set) and then calculating the depth to the camshafts base circle for that particular lobe. Times 16... then doing the math and "mixing" buckets and valves till all you have are a valve tip or 2 that gets "tipped". Now all the buckets, valves, and cams are set
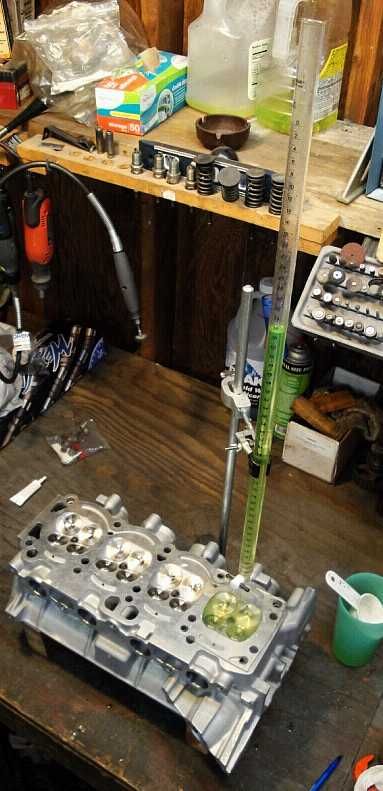
So... with all the machining(over 12 hours @ Loynings) now finished... I get out the burette.........
and measure the chambers.... #1 - 36.6, #2 - 36.5, #3 - 36.3, #4 - 36.6 if you remember a few chambers had seen some tool work by the previous porter, as well as a little bit from me... that explains the .3cc difference between the larger ones, and the smaller one
Once measured..... cutting begins... I begin on #4 chamber. I need to increase the chambers volume by 2.9cc or a little over 8%....
The top view is the chamber prior to resizing... you can see the Sharpie outline of the head gasket.....
another 3 panel
the middle panel shows the right hand side of the chamber roughed out, and in the bottom view, the chamber has been opened up 39.3cc, the last 2/10 of a cc I'll get while hand shaping, and polishing.
Information is POWER... learn the facts!!
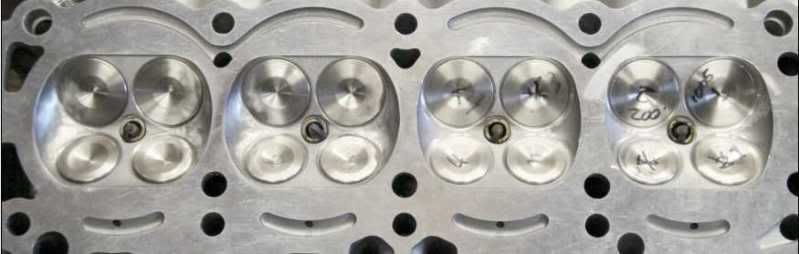
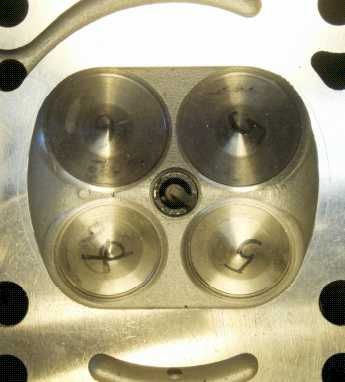
2 chambers(left 2) @39+cc, and 2 chambers (right 2) @ 36+cc
Notice the gap between cylinders. Compare the gap between the 2 cylinders on the right, now compare that to the gap between the 2 cylinders on the left. The spacing had been 11.4mm, now the gap is 6.1mm....... That means I removed over 5mm of material from the chamber walls... oh... the clients gasket has roughly 4.5mm between chambers
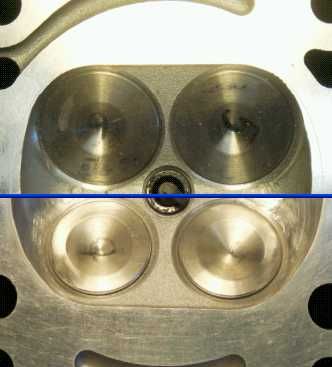
5mm is quite a bit.... Here is chamber 3....
before....
after....
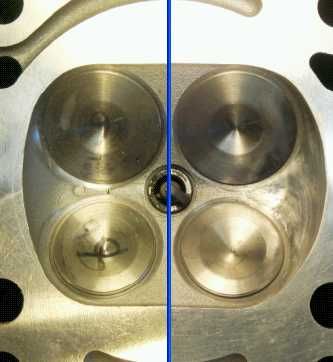
Hmmmm.... here are a few split frame photos. I used the spark plug for positioning/referencing
this one shows how much material and the depth from the perspective of the intake
similar view but this time the exhaust shows the chamber expansion and depth
This last one has a different split
So with 2 chambers mostly to size, I'll start working the other 2 next.
Information is POWER... learn the facts!!
Information is POWER... learn the facts!!
I don't understand why you destroyed the chambers?
And how you explain the distance difference between chambers;are the bores too at different spacing?
(hey,I port heads for living..)
Hmmm, I don't believe I've destroyed the chambers, the call on this head was a chamber volume of 39.5cc. Stock chambers are only 36cc........ how else do I enlarge the chambers if I don't remove chamber material? Also, the O/S valve need more room around them (to fully utilize their added size
The bores spacing has remained as it is, the chamber material I've removed is why the gap between chambers has changed.
I do have a few things I use... but making a chamber 39.5cc with O/S valves is not easy, and right now "we" are in a tempory hold pattern. Each of the chambers are getting pushed out to 39cc (+ or -) and I'm waiting for the client to send me one of his pistons.......
An Atlantic pistons has a dome peak of about 7mm, and the width of that peak is about 68mm long centered in the piston. my client told me his dome peak is close to 10mm and 74mm long.....
That is HUGE.... I did some sample measurements and the peak of the chamber measures out to a little over 15mm total depth...... the spark plug sits about 7.4mm tall........ "Houston, we have a problem"
I've asked the client to send me one of his pistons so I can see how his pistons fit my chamber work..
If the pistons interfere.... I'll be bringing it all to my buddies (Loynings) to get their take.... and try to figure out an effective solution if one is needed
Information is POWER... learn the facts!!
 Posting Permissions


Bookmarks