Page 2 of 3 FirstFirst 123 LastLast
Results 16 to 30 of 45

Thread: Is200 + ls3 +t56 = is620

  1. #16
    Forum Member 1st year Apprentice
    Join Date
    Jan 2007
    Location
    Queensland
    Posts
    48

    Default Re: Is200 + ls3 +t56 = is620

    Tailshaft adapter. Think I will sandwich this between the gearbox and the tailshaft way up in the transmission tunnel where no one can see it.


  2. #17
    Forum Member 1st year Apprentice
    Join Date
    Jan 2007
    Location
    Queensland
    Posts
    48

    Default Re: Is200 + ls3 +t56 = is620

    Update time.

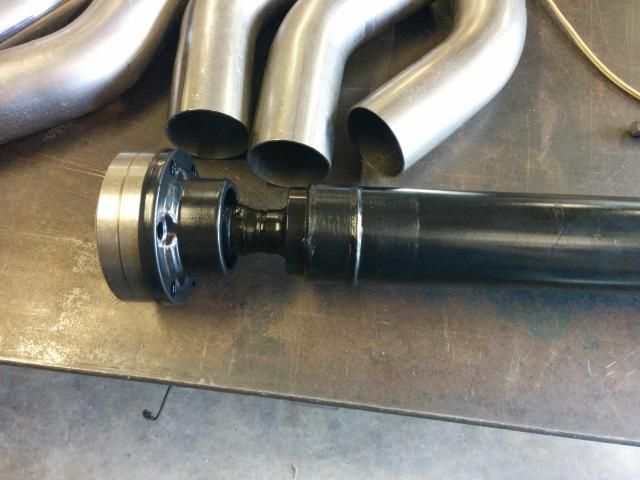
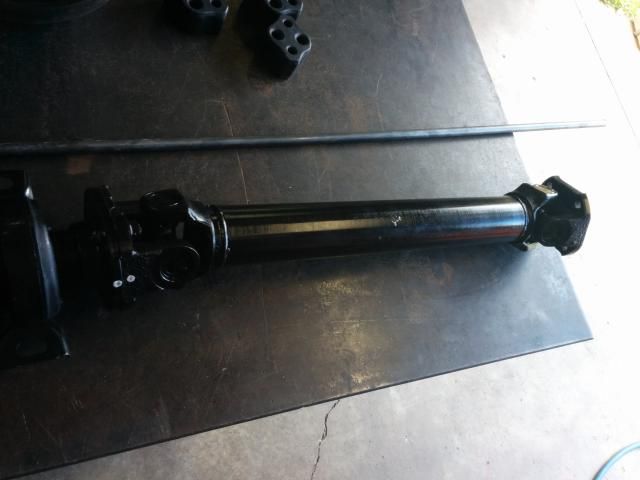
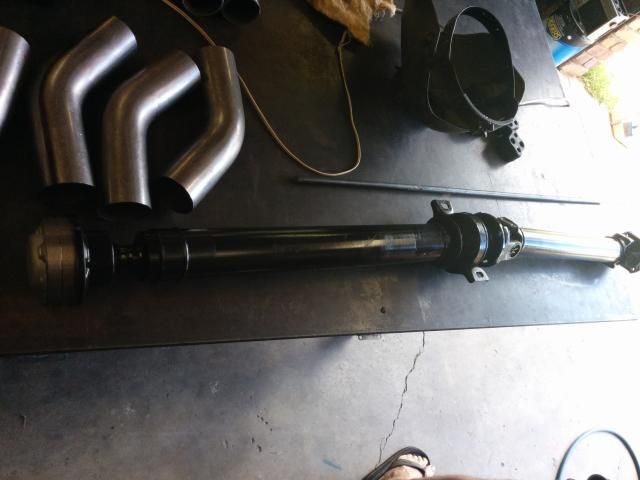
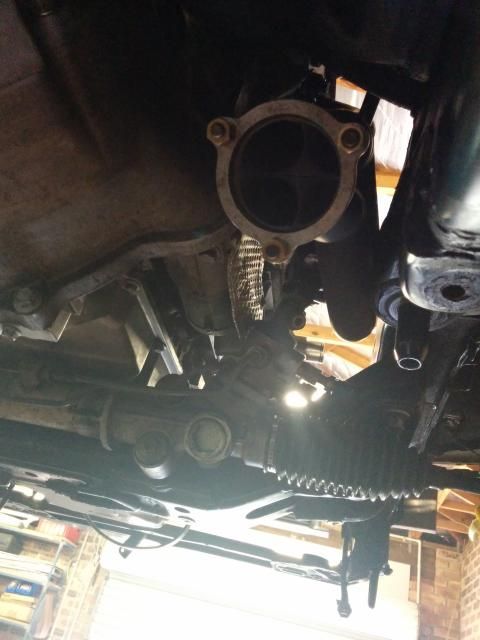
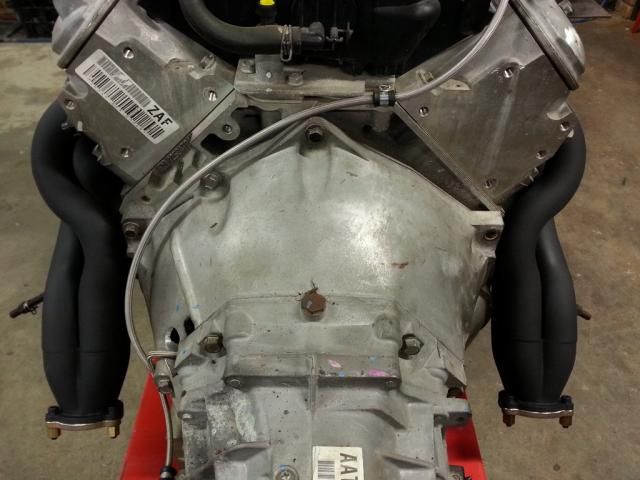
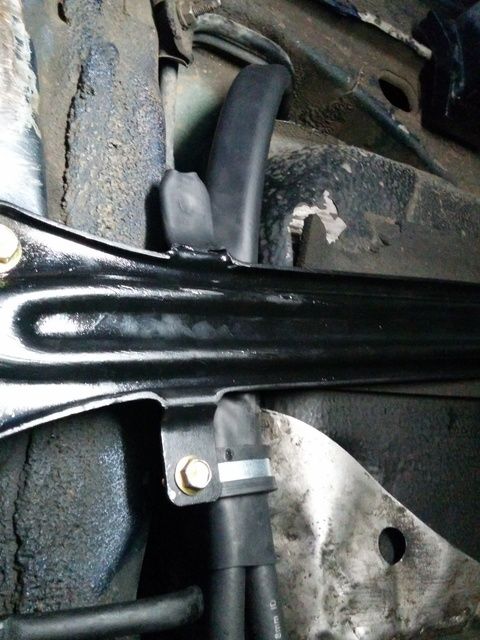
    Firstly, there was a small fuck up with the tailshaft. I thought only the front section was going to require modification to suit the gearbox. I'd been operating under the assumption that the IS200 and IS300 diffs were the same length. Unfortunately, this was not the case. The IS300 diff was about 15mm longer. So rather than working any further on it, Pete dropped the whole lot at the local driveshaft shop and had the rear section remade with new Hilux uni joints and got them to weld the CV stub into the front shaft and then balance the whole lot. I picked it up this morning.


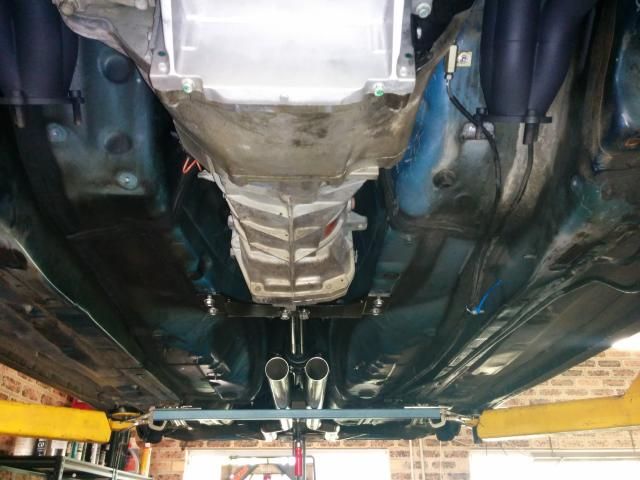
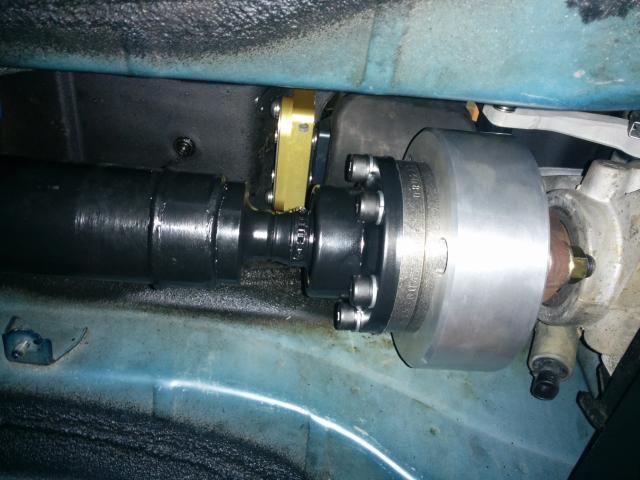
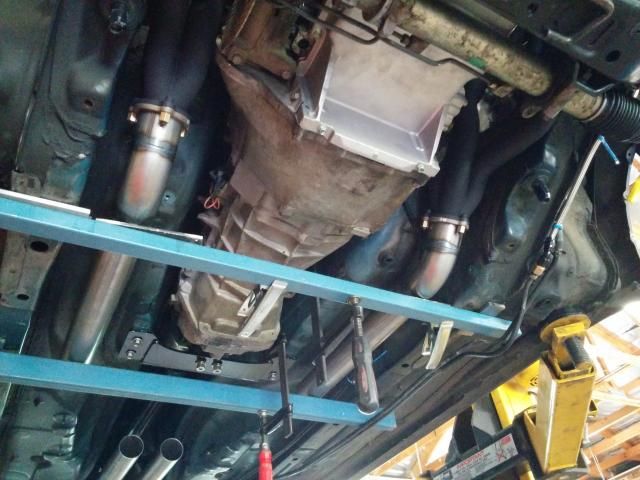
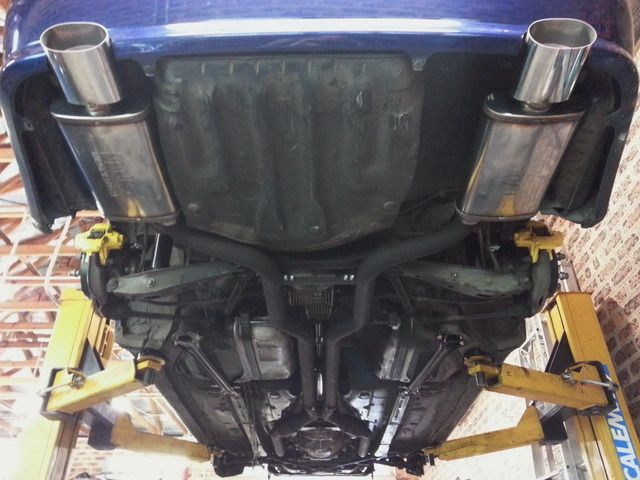
    Then we installed it.


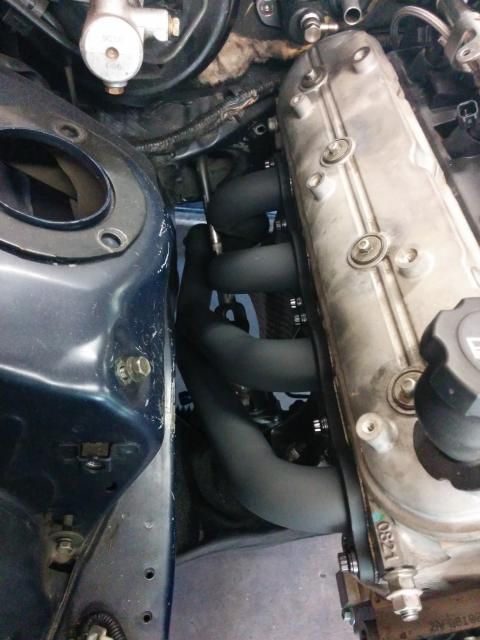
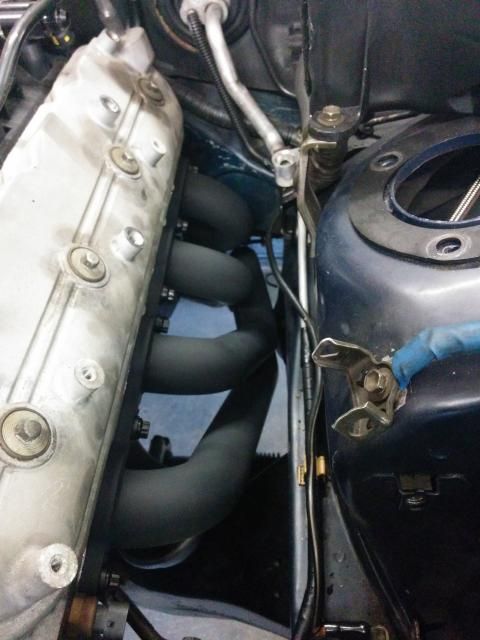
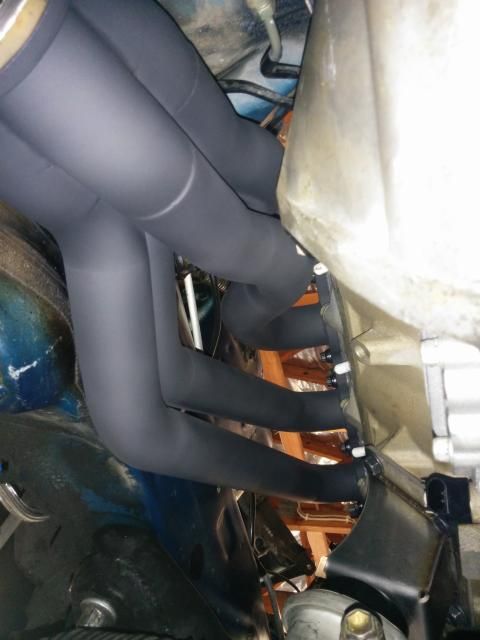
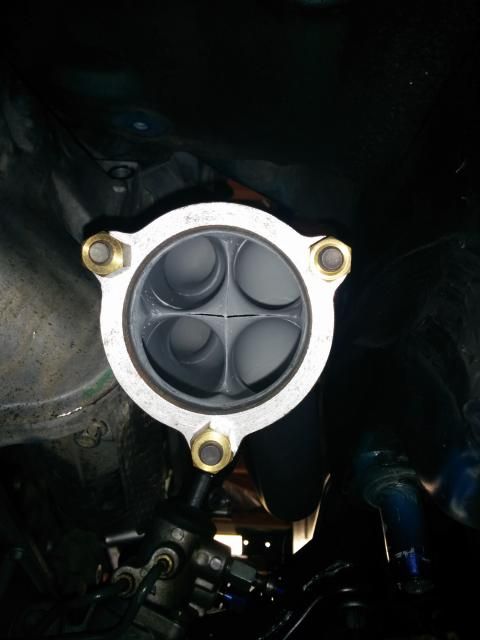
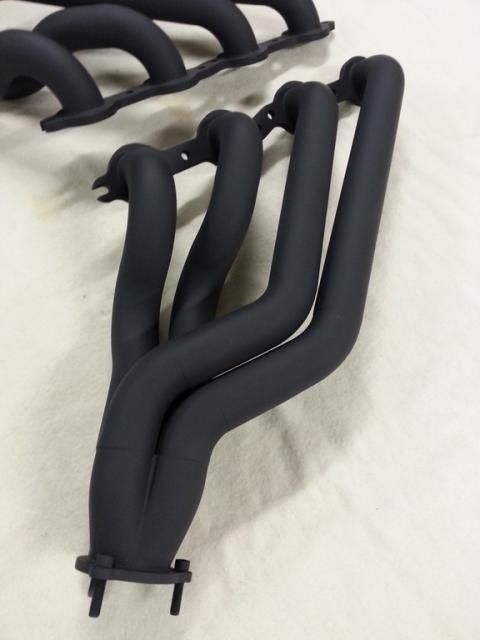
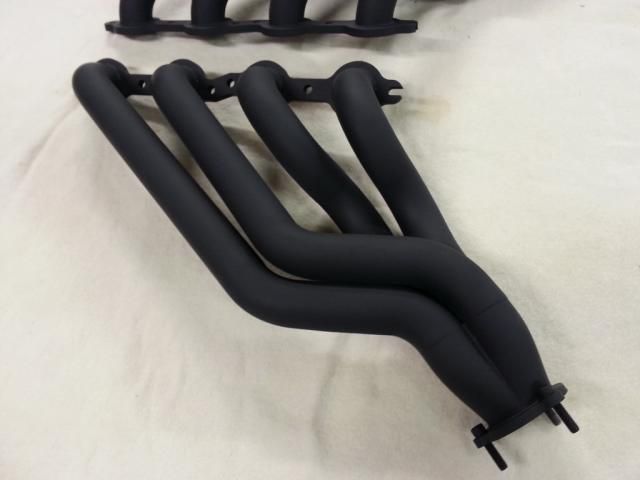
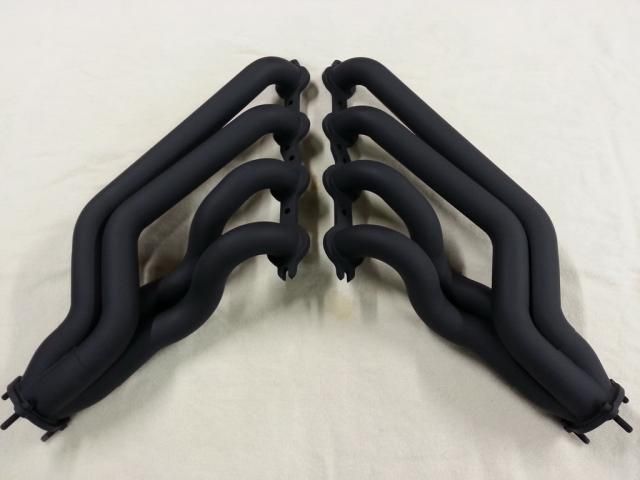
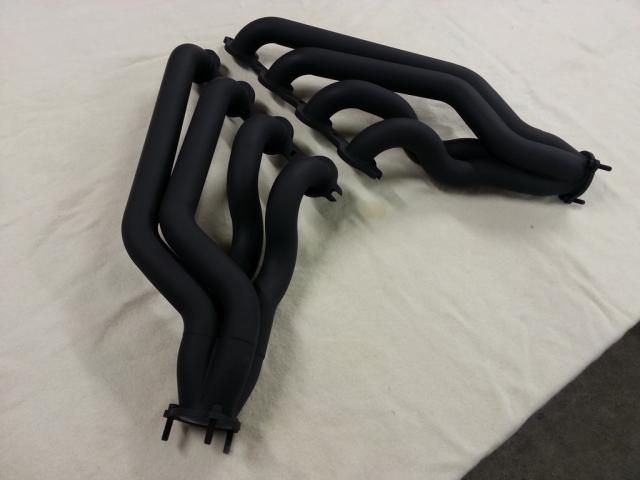
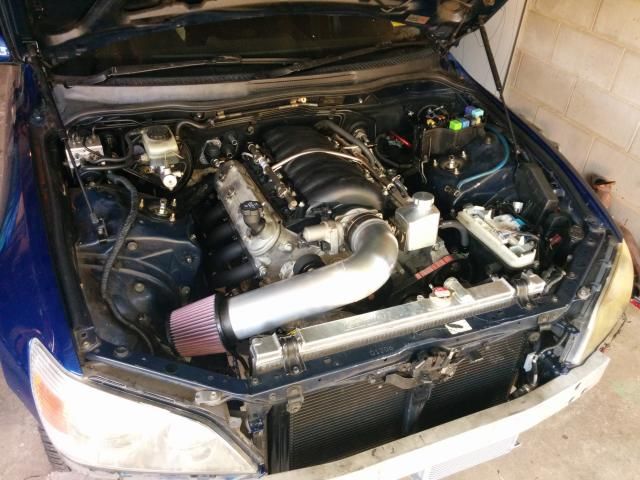
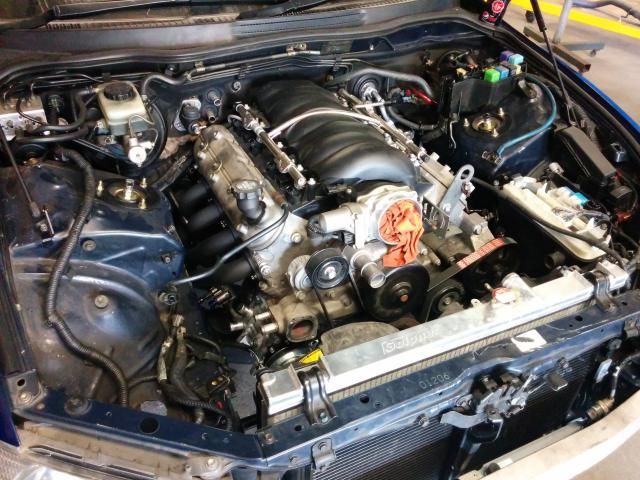
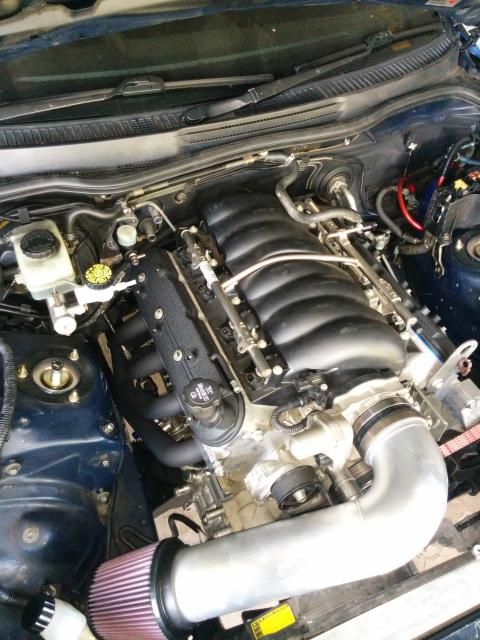
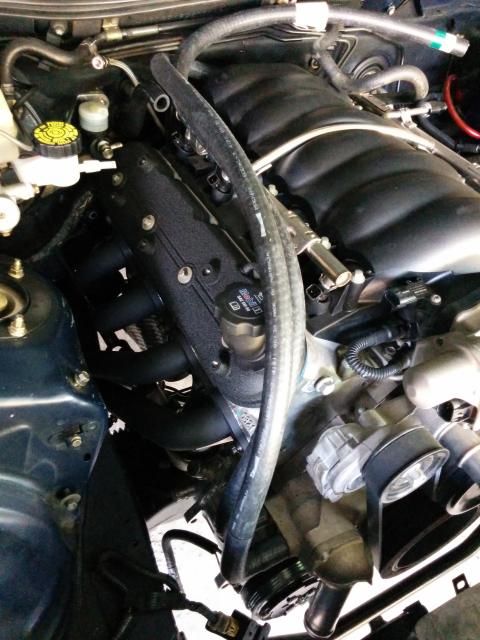
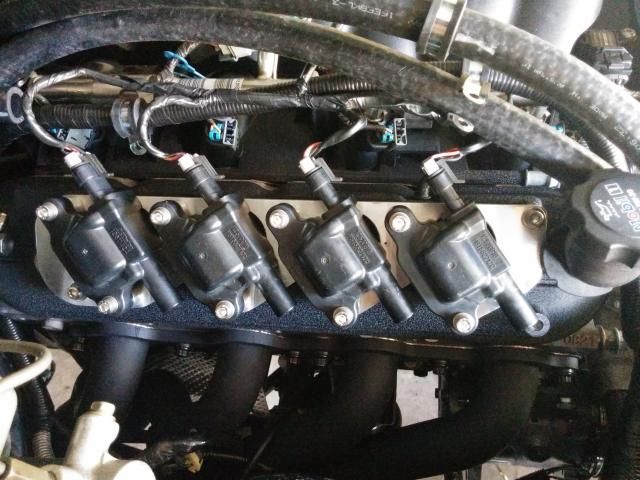
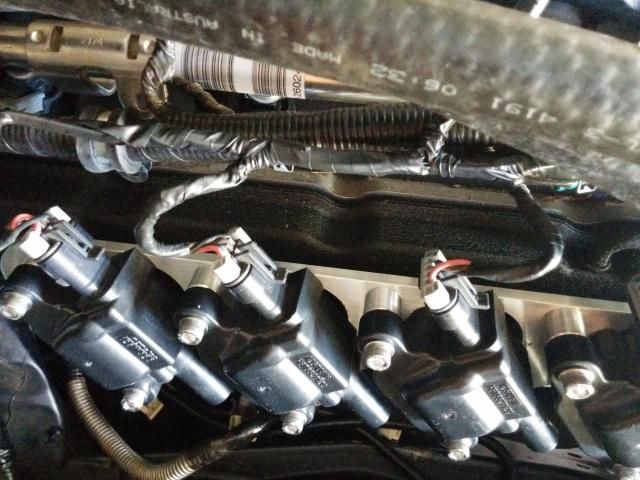
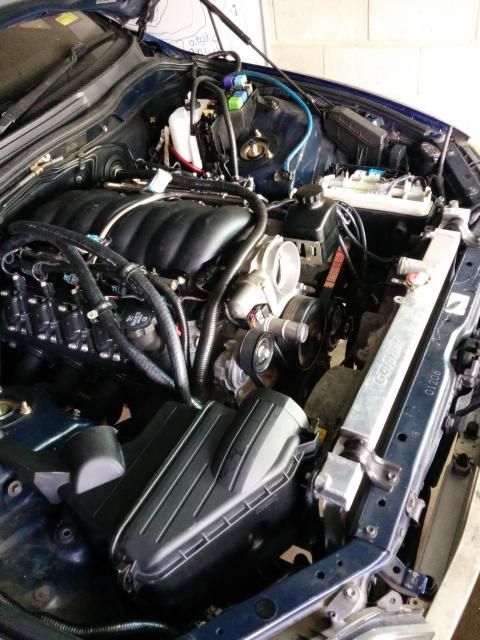
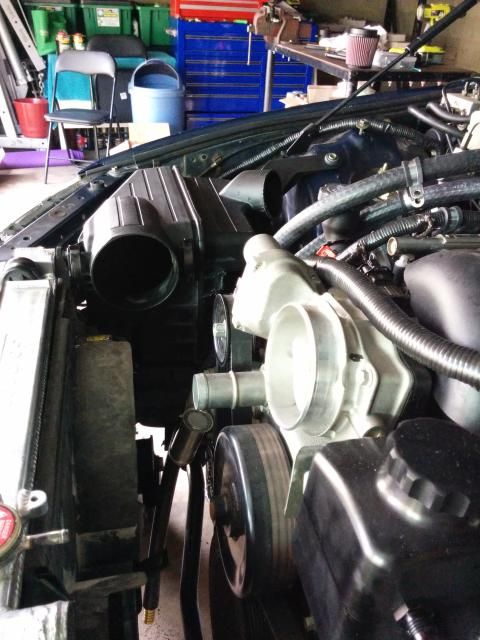
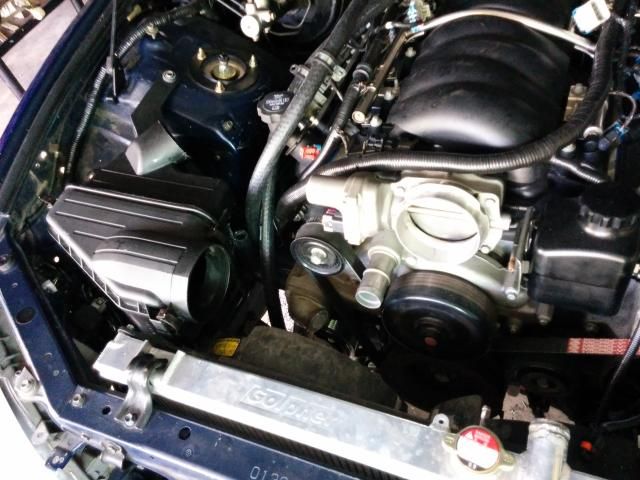
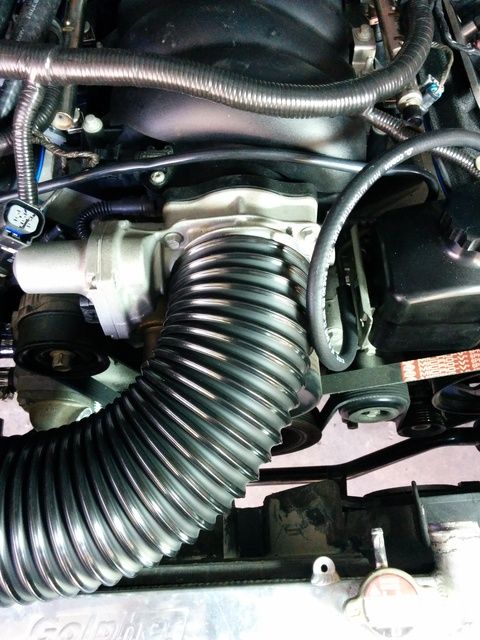
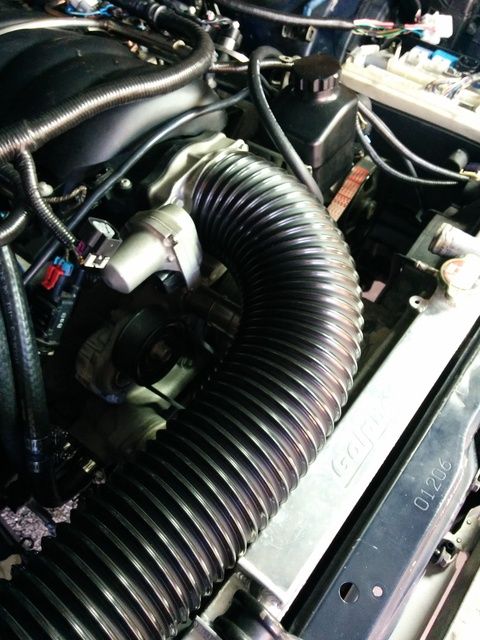
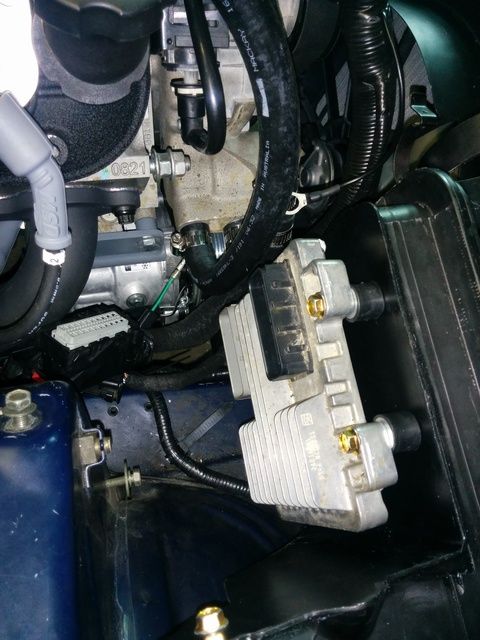
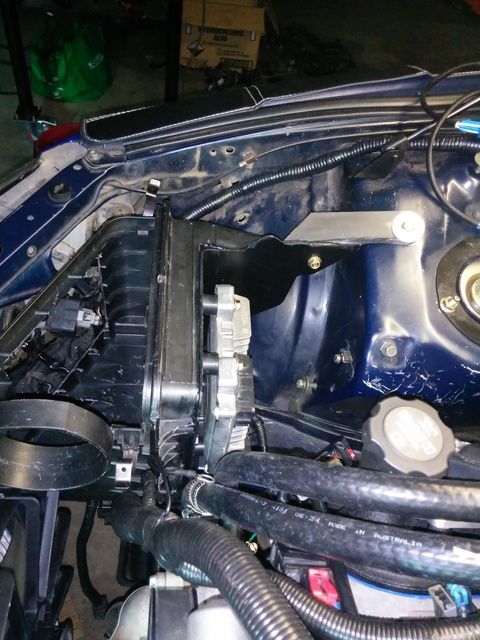
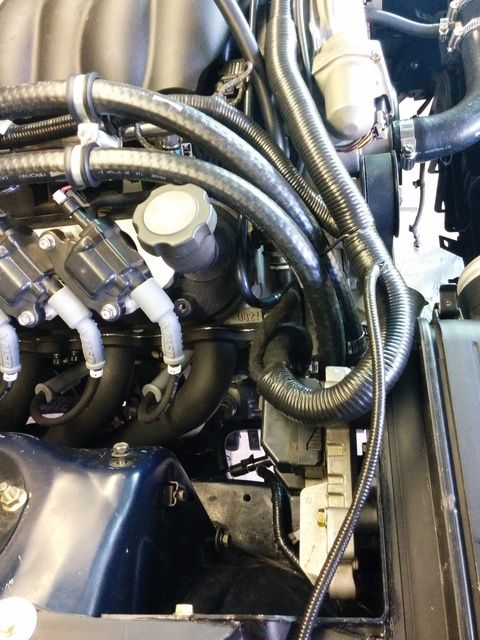
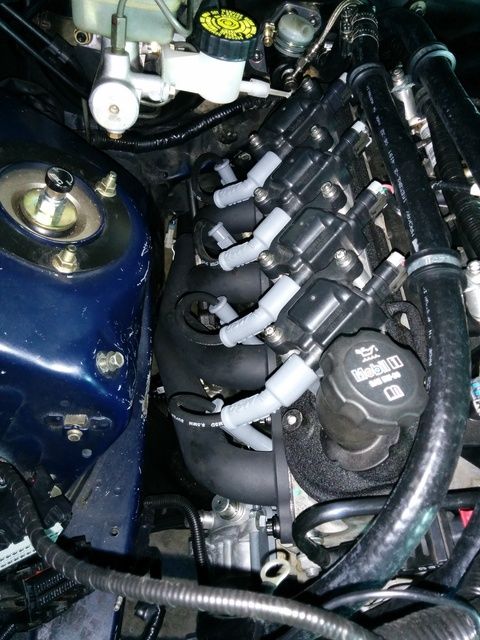
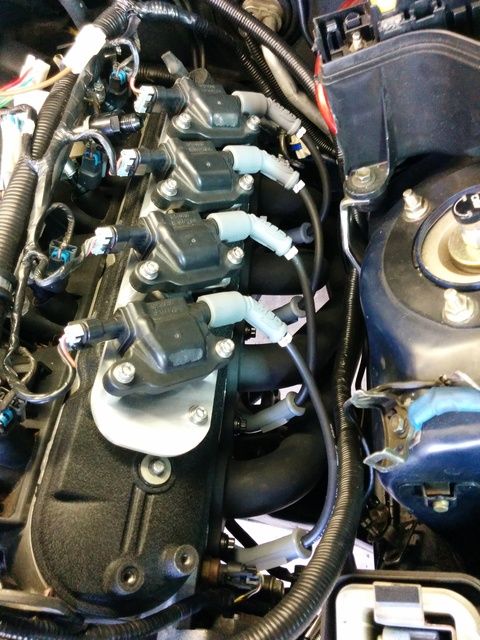
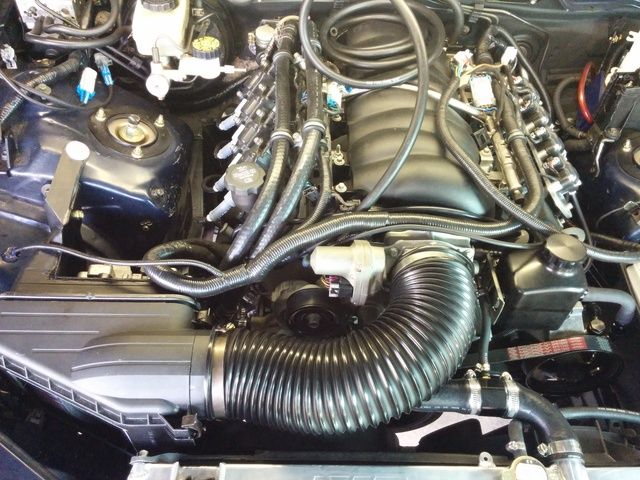
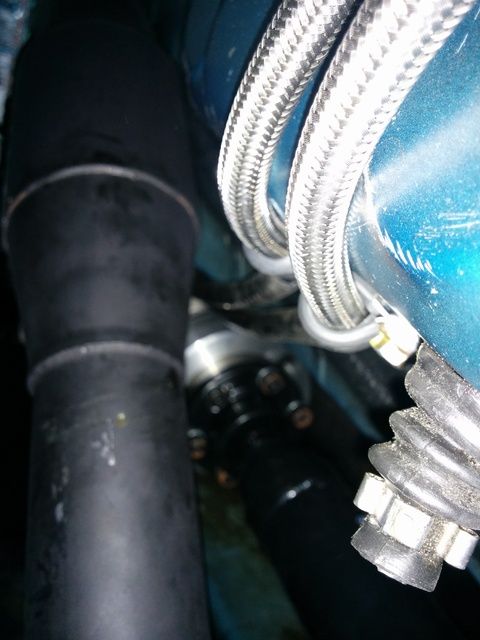
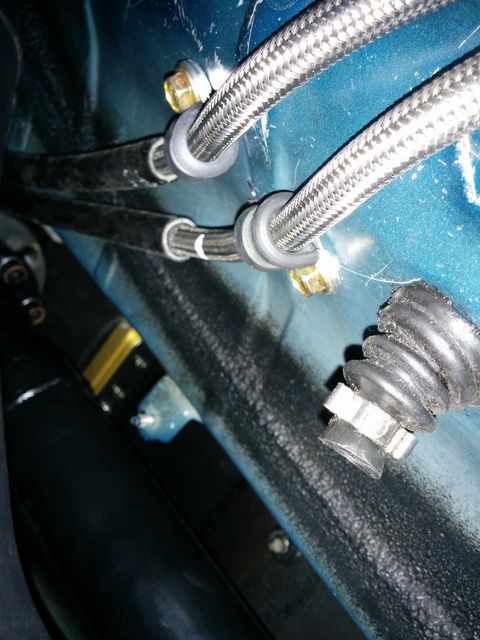
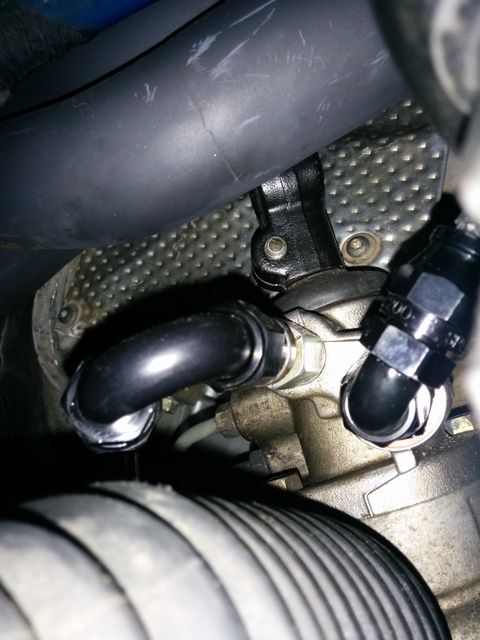
    We were able to install it because I had picked up the headers from ceramic coating on Tuesday morning and dropped them down to Pete and he had installed them on the engine and bolted the engine into the car for (hopefully) the final time. I haven't got any pics of the coated headers out of the car yet as it was a drop and run. But Pete took some so I'll post them up soon. Here's how they look in the car.


  3. #18
    Forum Member 1st year Apprentice
    Join Date
    Jan 2007
    Location
    Queensland
    Posts
    48

    Default Re: Is200 + ls3 +t56 = is620

    And a couple of pics of how the rest of the exhaust is progressing now that the headers are back.


    I spent a bit of time this afternoon cutting the header tank section from the moulded plastic that also houses the factory thermos. Going to give this a go for the time being instead of buying new fans and having to make a shroud to suit. I didn't get a finished photo, but here is a progress photo.


    If it provides enough clearance, I'll do some more cleaning up on it to make it look good.

    And finally, a quick shot of the dipstick tube to a/c compressor clearance issue to be resolved.


    - - - Updated - - -

    Coated headers:


  4. #19
    Forum Member 1st year Apprentice
    Join Date
    Jan 2007
    Location
    Queensland
    Posts
    48

    Default Re: Is200 + ls3 +t56 = is620

    Ok, so I picked this up yesterday. The final job for Pete (for now) was to whip up an intake pipe. This'll do to get it running and I might revisit it down the track. Fucking 4" pipe takes up a lot of space.........


    A quick pic enroute. Thank goodness the rain held off. All of the windows are down in the car. Power windows. And no power.


    And finally back at home. This day was not without its stress. In fact here was plenty of it.


    Big thanks to Pete for all the amazing work. Bill for letting the car take up his hoist for the last couple of months while Pete worked his magic. Leigh and Nick for coming down the coast with me a number of times and helping me work on bits while Pete was doing his thing. Sam (Guido) for the loan of the trailer to bring it home. Dad (macktheknife) for the use of his car to be the tow slut and Jon (psi999) for coming over to help unload the car and push it up the driveway.

    Now the ball is firmly back in my court to finish it.

    Here are a few more pics of the exhaust


    .


  5. #20
    Forum Member 1st year Apprentice
    Join Date
    Jan 2007
    Location
    Queensland
    Posts
    48

    Default Re: Is200 + ls3 +t56 = is620

    I've been thinking about the intake for this. In a Commodore, the radiator and condenser are set back behind the radiator support panel (and hence the bonnet catch mechanism).


    In my car, the radiator is set back, but the condenser is under the panel.


    I thought I could maybe lay the radiator back a bit, but then the air is not flowing straight through it, and I'd still be sucking air through the intake from behind the condensor.

    One idea could be to chop out the centre section of the rad support panel removing the bonnet catch mechanism and then maybe tie it back together with some strap or rod and then run a Commodore type OTR over the top and out the front and use some lockable catches


    Or work with what I've got, maybe a bigger filter, and just box off that corner of the engine bay. I'm also looking around for potential OEM airboxes that could work.

    This is an IS300 air box. Could be an option to reverse the flow of that box. Would need to work out where to take the fresh air from though.


    - - - Updated - - -

    Been chipping away at some little jobs. Having water running across the floor of the garage the last few days has been something of a hindrance.

    The power steering reservoir I bought was just held in place by sliding into a bracket and sitting on a little platform. But it could still flop around a bit. The little platform it sat on had a hole in it so I decided to pull the reservoir apart and drill and tap a hole to thread a bolt through from the inside, poke through the platform hole and be secured by a nut from the bottom. The bolt will be sealed by a copper washer and be loctited in.


    The reservoir pieces are now off being anodised black for a more OEM type OCD Racing look.

    The engine has a little 1/4" steam port coming out of the top for bleeding air out of the cooling system. This needed to be connected back in and most conversions just put it back into a radiator hose. Enter a radiator hose adapter. Which was handy because I also needed a place to put a Toyota water temp sensor to go to the Lexus temp gauge in the dash. An extra hole and some more tapping gives this:


    That'll obviously go in the top radiator hose. Speaking of radiator hoses, I've been scouring the shelves at Supercheap to come up with some suitable bends to cut up for my application. I pretty much just need 3 90degree bends in 35mm diameter. Turns out a couple of early V6 commo top hoses are the perfect diameter and give me the right bends I need once chopped up. I also have an array of different hoses to work out some good heater hoses connections. Will post pics once done.

    I needed to find a place to mount the remote reservoir for the clutch master. There's really fuck all places for it where it can be a bit higher than the master itself. Here seemed about the best and kind of OEM'ish place I could find.


    Finally, before I started running the wiring and working on coil pack mounting, I decided to give the rocker covers some wrinkle love. They'll get a new set of seals and gaskets as well.


    I also had to give my front calipers another paint touch up. While carting them around in the back of the car one day, they kind of rolled around and got all chipped up. FFS. So a bit of sanding and more paint. They don't look quite as good now up close, but I can't be fucked with them anymore. I'll get them on the car ASAP to minimise any further risk of damage!!!

  6. #21
    Forum Member 1st year Apprentice
    Join Date
    Jan 2007
    Location
    Queensland
    Posts
    48

    Default Re: Is200 + ls3 +t56 = is620

    Rocker covers refitted. Makes a noticeable difference.


    I wasn't happy with the Tilton remote fluid reservoir for the clutch that came with the master cylinder kit and I'd used the smaller of the two options! It was bulky and the barb was on the bottom. There was nowhere I could mount it that was high enough to not have a dip in the hose that ran to the master. So I picked up a GM item today which is a lot more compact and has the barb off the side. This places it above the barb on the master and I can still mount it in the same place.


    - - - Updated - - -

    Had a little bit of time to do some spending this afternoon. So I got some aluminium to make a pedal mount.

    Picture these bits assembled somehow.


    And it gets mounted on the lower two holes in this picture.


    Struggling to picture it still? This is my vision for it.


    The stand offs will be shorter and I'll mill out the centre material in the plate a bit. Over engineered for throttle mashing enthusiasm.

    - - - Updated - - -

    So many competing space issues in this engine bay. Plan was to build on the existing intake and box the filter into that corner. Seems simple and logical.

    Except the ECU needs to live in that corner as well due to the loom configuration.

    And since I had to cut the overflow tank section of the thermo fan housing, I need to find somewhere to put a tank. And right now, it wants to try and live in the same corner. It could possibly live in the back passenger corner where the battery was but that has been earmarked as possible location of the coil packs. Of course, I could use the new brackets I bought and mount them back on the rocker covers in a more compact way, which would kind of be OEMish but I didn't want to do that.

    Something is gonna have to give and it'll probably be the coil packs........that probably saves me having to buy some loom extensions and finding ways to run 4 long leads neatly across the back of the engine bay and along to the plugs.

    Put overflow tank in back corner. Make a box over the air filter and mount the ECU to the top of the box.

    /thinking out loud

    - - - Updated - - -

    Today I spent much of the day putting wheels on something that desperately needed them in my kind of limited garage space.


    And then I jacked up and removed the wheels from something that doesn't need them just yet.


    Needed to do this so I could wind the coilovers up a bit (especially the rears!) and swap the front brakes over to the Supra units. While I am underneath, I can look at what I'm going to do with fuel lines and respray the bit of that amazing exhaust that I scraped to shit getting it off the trailer...........

  7. #22
    Forum Member 1st year Apprentice
    Join Date
    Jan 2007
    Location
    Queensland
    Posts
    48

    Default Re: Is200 + ls3 +t56 = is620

    Another full day in the garage, but feel like I got fuck all done. Too much shit floating around so I had more of a clean up to throw some stuff out and tidy some stuff up. A lot of the shit that is floating around has to eventually find its way into the car............

    So, on to the car itself. I wanted to get the front brakes done today. I had a couple of split dust seals, so had ordered a new it from Elmhurst Toyota in the US. Such a fast turnaround and great pricing even with the current exchange rate. Would highly recommend. Doing the seals wasn't a lot of fun. Quite fiddly and time consuming. One trick Nick told me about was to make sure the pistons were pushed a fair way back in to make get the seals on easier. Of course, while squeezing one of the pistons back in I marked the paint quite badly on one of the calipers. Grrrr. Push on.

    To mount the bigger Supra calipers and rotors means cutting the Lexus dust shield back a bit. I did all that and gave them a squirt of paint. No pics. Got them all mounted up eventually with new HEL braided hoses.


    The caliper that was marked was on the passenger side. Once it was mounted, I gave it a hit with the flapper disc in the angle grinder, a quick hit with some 600 grit to feather the edges then masked everything up and gave it a few more squirts of paint. Came up fine.

    Braided hoses installed in the rear as well.

    With garage time running out for the day, I started having a muck around with the heater hoses.


    Looks like the combination of hoses and bends I have bought will work out quite nicely once cut to length. There's a couple of mounting holes on the fuel rail so I'll use a couple of P-Clips to support the hoses along there.

    - - - Updated - - -

    Only a small update. Got the power steering reservoir back from the anodiser. Much more subtle now.


    - - - Updated - - -

    Had a phone interview today which seemed to go pretty well, so I rewarded myself with a bit more garage time.

    Since the loom and coil packs and heater hoses all want to occupy similar space on the drivers side, I thought it best to drape the GM loom over and start plugging stuff in. Then I started working on the drivers side coil pack mounting. Shit is starting to get crowded and messy. Here's a couple of pics:


    While I was down at Nick's earlier this week, I was eyeballing his IS300 factory airbox. Looks like this:


    Turns out the diameter of the little pipe that connects to the fresh air intake is 4" same as my intake pipe. So I snagged one off eBay and it is currently enroute. I'm going to have a look at options for using it perhaps in reverse flow with some ducting off the back of it to fresh air.


  8. #23
    Forum Member 1st year Apprentice
    Join Date
    Jan 2007
    Location
    Queensland
    Posts
    48

    Default Re: Is200 + ls3 +t56 = is620

    Quote Originally Posted by bahaimus

    Not happy with this coil arrangement. I couldn't sleep last night knowing this was my solution. Needs revision.

    I literally did wake up in the middle of the night last night and was unable to go back to sleep thinking about an alternative. So after taking the kids to their swimming lesson this morning, I checked that the aluminium shop was open (it was!) came home took a few measurements while doing some more imagineering and then headed off again. $12.98 for today's materials!

    The coils are 90mm at their widest point. So I could go 100mm flat bar or 80mm. I opted for 2 350mm lengths of 80x6 flat bar. This meant the coils needed to be angled.


    Artistic

    I did some marking and drilled the holes for mounting to the rocker covers and then bolted both pieces together so I could make both brackets at the same time. They are not a mirror image installation though due to the mounting nubs on the rocker covers. So I actually end up with the coils angled towards the front on the drivers side and towards the rear on the passenger side.


    Then I did some more marking, some more drilling, a bit of hole sawing and then some jig sawing.


    Then some tapping.


    Then a bunch of linishing and a small amount of trial fitting.


    Then a final bit of trial fitting.


    The job remaining is to give the surfaces of the brackets a good sand and then cut some spacers on a lathe to address this issue below. I bought some 16mm rod today as well.


    So tell me that wasn't worth the five hours effort so far?

  9. #24
    Forum Member 1st year Apprentice
    Join Date
    Jan 2007
    Location
    Queensland
    Posts
    48

    Default Re: Is200 + ls3 +t56 = is620

    I didn't really get any progress pics, but this took fucking ages. Way longer than I thought it would.


    I also gave the plates a touch up on a scotch brite wheel. Looks much nicer. But photos of that tomorrow.

    While I was getting my sexy on on the lathe, I also made a start on some things for the pedal mount.

    This was the first time I'd actually used a metal lathe to make something, even if it was just spacers.

  10. #25
    Forum Member 1st year Apprentice
    Join Date
    Jan 2007
    Location
    Queensland
    Posts
    48

    Default Re: Is200 + ls3 +t56 = is620

    Here's how the plates finished up.


    And here are the coils mounted. Passenger side facing the rear:


    Drivers side facing the front:


    Spacers spacing:


    I fucked around with the pedal mount some more.

    At the moment I just have the plate sitting on top of the pieces of round bar and two 80mm long M6 counter sunk hi tensile bolts holding it all together. Some shit photos:


    The positioning is perfect. But it is quite wobbly. I'm going to cut a bit of plate to put on the floor under the rod. And drill a couple more holes and put some nutserts in so I can have more bolts holding it. And finally, see if I can get it all tacked together with a tig to try and keep it all from flexing. There is flex in the assembly, but also in the sheetmetal. Unfortunately, I can't access the back of it with out some cutting of the bodywork so will have to see how the above works out.

  11. #26
    Forum Member 1st year Apprentice
    Join Date
    Jan 2007
    Location
    Queensland
    Posts
    48

    Default Re: Is200 + ls3 +t56 = is620

    Lastly, my IS300 airbox arrived today. It fits in the corner nicely and shouldn't be too hard to get it to line up with a bend off the throttle body.


    I don't think it will work the way I had envisioned it. But the good news is that my pod actually fits inside it!


    So with a bit of careful positioning and a bit of flexible ducting inside the box, I might be able to run with it. I'll cut the front face out of the box behind the headlight for the source of cooler air and maybe some from the bottom as well.

    - - - Updated - - -

    So in amongst a bunch of jobs done this week, I took a look at this airbox setup. Did some cutting and trimming and have arrived at something that looks like this:


    And with the lid on:


    Just needs a bit of flexible hose to connect the two bits of pipe together.

    Local hose supplier had some of this stuff which I will use for the rest of the intake for now as well as inside the airbox.


    Just not quite an OEM enough looking solution. But will do to get it on the road now.

    Other jobs done include:
    - power steering pressure hose out of 200 series speedflow.
    - couple more spacer machined for mounting loom and heater hoses in p clips
    - heater hoses cut to length and joined
    - vacuum line from engine to brake booster
    - assorted nuts, bolts, washers and paints purchased
    - started cleaning up the fan shroud some more and will give it a lick of plastic paint
    - tried to finalise mounting of clutch master but fucked up when cutting the pushrod to length. Totally forgot about the thickness of the spacer I had to make and cut it too short. Of course the Tilton distributor in Aud doesn't bring in the pushrods separately, even though Tilton in the US sell them that way. So I ended up ordering a cheap universal eBay master cylinder to pilfer the pushrod from. Fuxking Americans and there imperial thread bullshit. This 5/16 UNF threaded pushrod is a prick
    - looked at options to stabilise throttle pedal mount. Not as easy as thought. I remounted it anyway and it will do for now. While I can flex it with my hand, pushing on the pedal with normal throttle pressure shows it to be reasonably stable of until I can address it further.

    And that's it for now.

  12. #27
    Forum Member 1st year Apprentice
    Join Date
    Jan 2007
    Location
    Queensland
    Posts
    48

    Default Re: Is200 + ls3 +t56 = is620

    Alright, been doing some stuff here.

    I needed somewhere to mount the ECU on a flat surface. I decided to chop the back of the airbox out and put a piece of aluminium in there to mount the ECU on.

    Test fit looks ok.


    Painted the aluminium and then sealed it up with some Sikaflex.


    A few rubber cotton reel type mounts:


    I need to do something with the routing of the loom I think.


    Then I made my plugs leads using the MSD universal kit that I got. Feeding the lead through the LS3 coil boots was a right **** of a job.


  13. #28
    Forum Member 1st year Apprentice
    Join Date
    Jan 2007
    Location
    Queensland
    Posts
    48

    Default Re: Is200 + ls3 +t56 = is620

    Got some adhesive backed EPDM foam strips to seal the gap between the fan shroud and the radiator. Want to make sure the rad is operating as effectively as possible.


    Cut the factory rubber shift boots down to try and get the best seal I could around the new shifter.


    Cut down some V6 Commodore radiator hoses to fit my application.


    Final mounting of the airbox and connecting the through tube to the pod filter inside it.


    Then connected it all up with a temp length of the hose you all love so much.


    Have pulled the fuel pump hanger out of the tank and looking at upgrading the fuel pump to the Walbro 255 and looking at how I'll run the return system etc.

    That's where it stands.

    Looks like I am leaving the wiring till last. *sigh*

  14. #29
    Forum Member 1st year Apprentice
    Join Date
    Jan 2007
    Location
    Queensland
    Posts
    48

    Default Re: Is200 + ls3 +t56 = is620

    Where was I up to?

    I worked on this last weekend but didn't really achieve much. Spent quite a bit of time trying to muck around with the fuel pump hanger since my fancy billet one has still not arrived. The factory thing is a finicky plastic assembly and I needed to upgrade the fuel pump to a Walbro 255 and also add the facility to have a an external return line coming back to it whilst maintaining the internal siphoning function to draw fuel from one side of the saddle tank to the pickup side.

    Needed to crack on with work so Dad came down to stay for the weekend and help out.

    So I went and purchased a few fittings and some hose.


    Included in that pile of stuff is some 4x glue lined double layer heatshrink. I used that on all of those hose where it had to pass close to something that I didn't want to have abrasion issues with. I also used it to hold the rubber fuel lines from the fuel pump hanger down underneath the car together and give them a little extra protection as well. It was good shit.

    No in depth pics, but this was the result for the fuel hanger after I had to redo the return loop because the first one hit the bottom of the tank too much.


    Special thanks to Nick for having his nerd travel kit handy and soldering the new connections for the fuel pump for me.

    With that completed, we got on to working on running the fuel lines. Working from scratch to run the supply and return lines. Sorry, pics don't really convey the routing. But I had to snake these lines up over the top of the exhaust on the passenger side to the Corvette filter/regulator which is mounted near the gearbox.


    Now I just need to run the hose from the filter up to the fuel rail. But I need another fitting.

  15. #30
    Forum Member 1st year Apprentice
    Join Date
    Jan 2007
    Location
    Queensland
    Posts
    48

    Default Re: Is200 + ls3 +t56 = is620

    I also finished running the hoses for the power steering cooler.


    Dad worked on fitting the adapter on the sump for the engine oil cooler and mounted the thermostat. I probably don't actually need an oil cooler, but I decided to run one to add a bit off oil capacity back in to the system since I had to cut a chunk out of the sump and just to add a bit of head room to the cooling capacity until I can ascertain of the current radiator and fans are up to the job.


    Not much to finish, but now I need to buy a couple of 120deg -8 200 series fittings. Ouch.

    Revisitng Nick and his wiring prowess, he swung in to action to give me a hand with the Lexus loom side of things. During the week and donned his nerd hat and came up with a pretty comprehensive pinout diagram for the Lexus ECU and while he was there on Saturday, started unwrapping and stripping the loom of all of the excess wiring. He even took the loom home with him at the end of the day to keep working on it. I really hate wiring with a passion and that job was like a noose around my neck. Here's to you Nick!


    Many thanks to Nick and my old boy for all the help this weekend. Edging ever closer.

Similar Threads

  1. 1UZ-FE TT in my IS200
    By IS200-V8 in forum Engine & Driveline Conversions
    Replies: 23
    Last Post: 09-01-2013, 12:47 AM
  2. 1JZ-GTE in to an IS200
    By ellz in forum Engine & Driveline Conversions
    Replies: 38
    Last Post: 16-02-2009, 10:17 AM

Bookmarks

Posting Permissions

  • You may not post new threads
  • You may not post replies
  • You may not post attachments
  • You may not edit your posts
  •